Manage Integrations
Overview
Integrations in the Accounting Data as a Service™ Dashboard allow your application to connect with various external services to access and manage production data securely. These integrations can include accounting, banking, commerce platforms, and other financial services, each with specific requirements and capabilities.

Integration Information
Before you can access production data, some integrations require registration and configuration of integration keys. Below is a table detailing the requirements and additional information for each service:
| Service Name | API Keys | Environment | Additional Information |
|---|---|---|---|
| Bring Your Own Data (BYOD) | Not required through Accounting Data as a Service™ | Production | |
| Freshbooks | Require Integration Keys | Production | |
| Microsoft Dynamics 365 Business Central | Require Integration Keys | Production | Must register with a Microsoft Azure account. |
| Microsoft Dynamics 365 Finance | Require Integration Keys | Production | Must register with a Microsoft Azure account. |
| MYOB | Require Integration Keys | Production | |
| Oracle Netsuite | Not required through Accounting Data as a Service™` | Production | |
| Quickbooks Online | Require Integration Keys | Production, Sandbox | Must complete a security assessment questionnaire for production keys. |
| Quickbooks Desktop | Not required through Accounting Data as a Service™ | Production | |
| Accounting Data as a Service™ Sandbox | Not required through Accounting Data as a Service™ | Sandbox | |
| Sage Business Cloud | Require Integration Keys | Production | |
| Sage Intacct | Not required through Accounting Data as a Service™ | Production | |
| Wave | Require Integration Keys | Production | |
| Xero | Require Integration Keys | Production | Must certify your application with Xero. |
| Zoho Books | Require Integration Keys | Production | |
| Plaid | Require Integration Keys | Production, Sandbox, Development | |
| Shopify | Require Integration Keys | Production, Sandbox | |
| Square | Require Integration Keys | Production, Sandbox |
Setting Up Integrations
To enable and set up integrations, follow these steps:
-
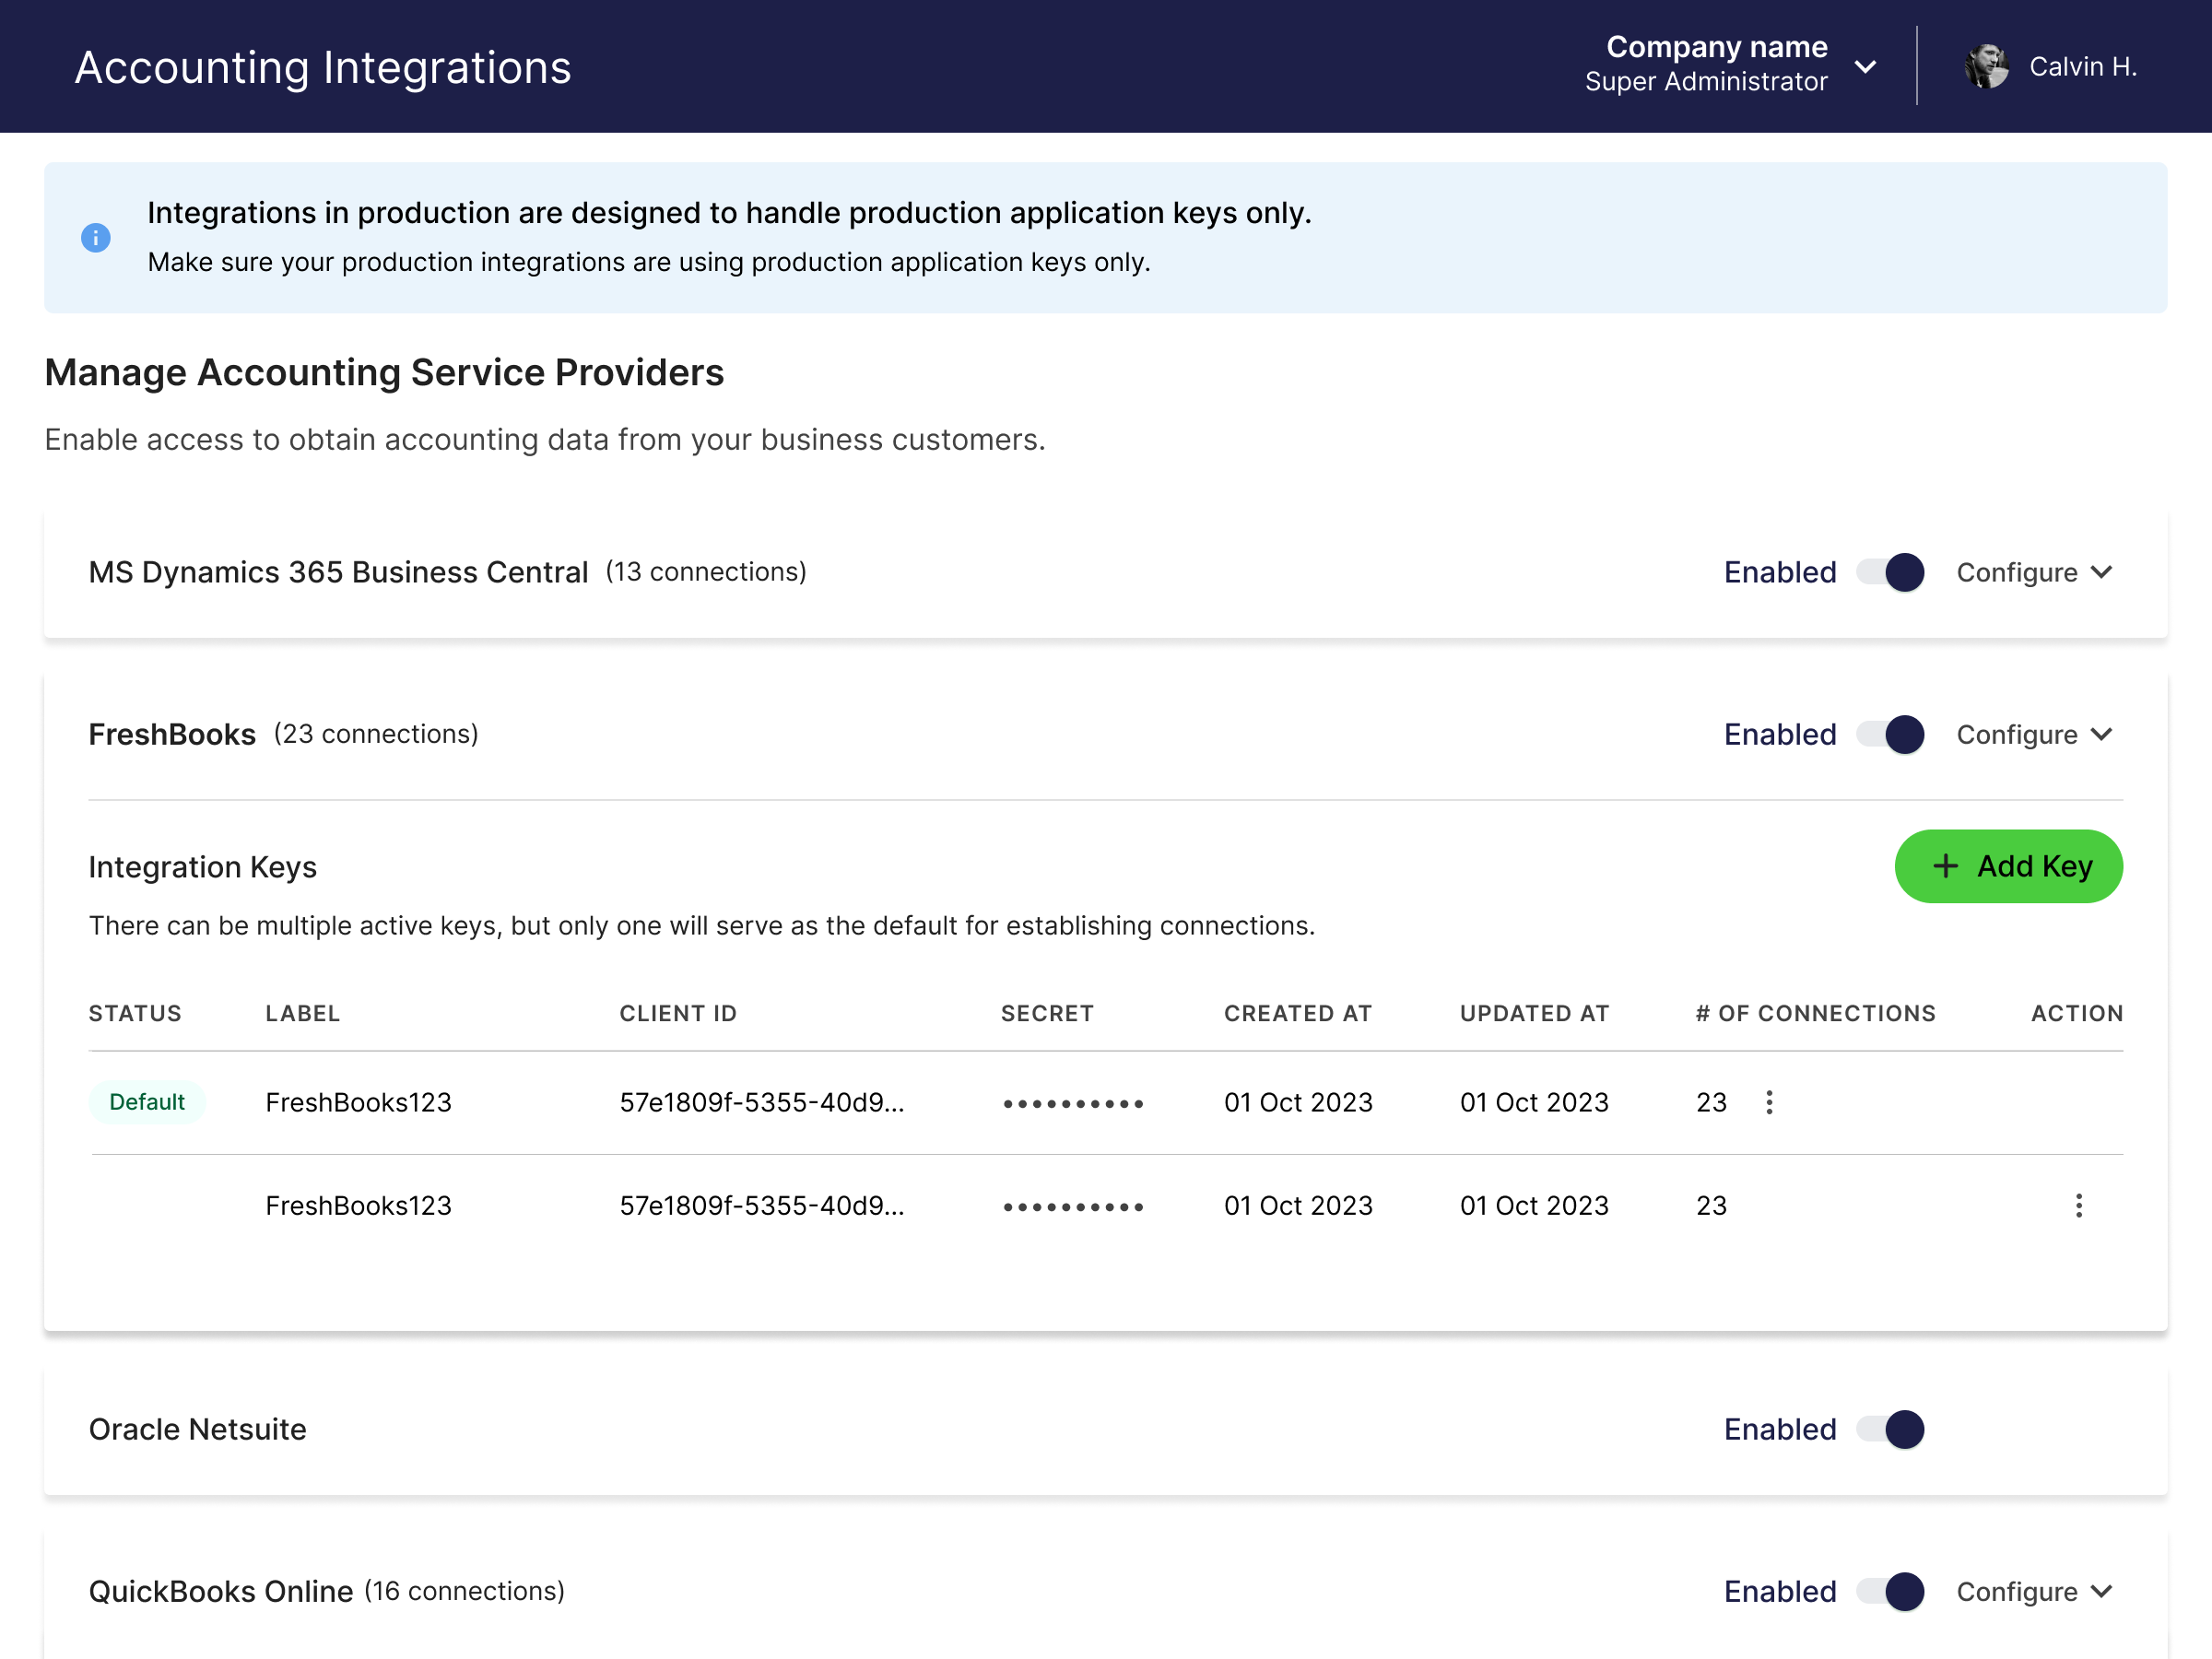
Navigate to Integrations: Go to the Dashboard and select the Integrations menu on the left sidebar menu. Choose from Accounting, Banking, and Commerce services in the dropdown.
-
Enable Integrations Without Keys: For services like Quickbooks Desktop, Oracle Netsuite, and Sage Intacct, Sandbox, simply enable them by toggling the switch on.
-
Add Integration Keys: For other services, expand the service tile, click on "Add Key". Input necessary details such as client ID, secret, and any specific permissions or scope required by the provider.
-
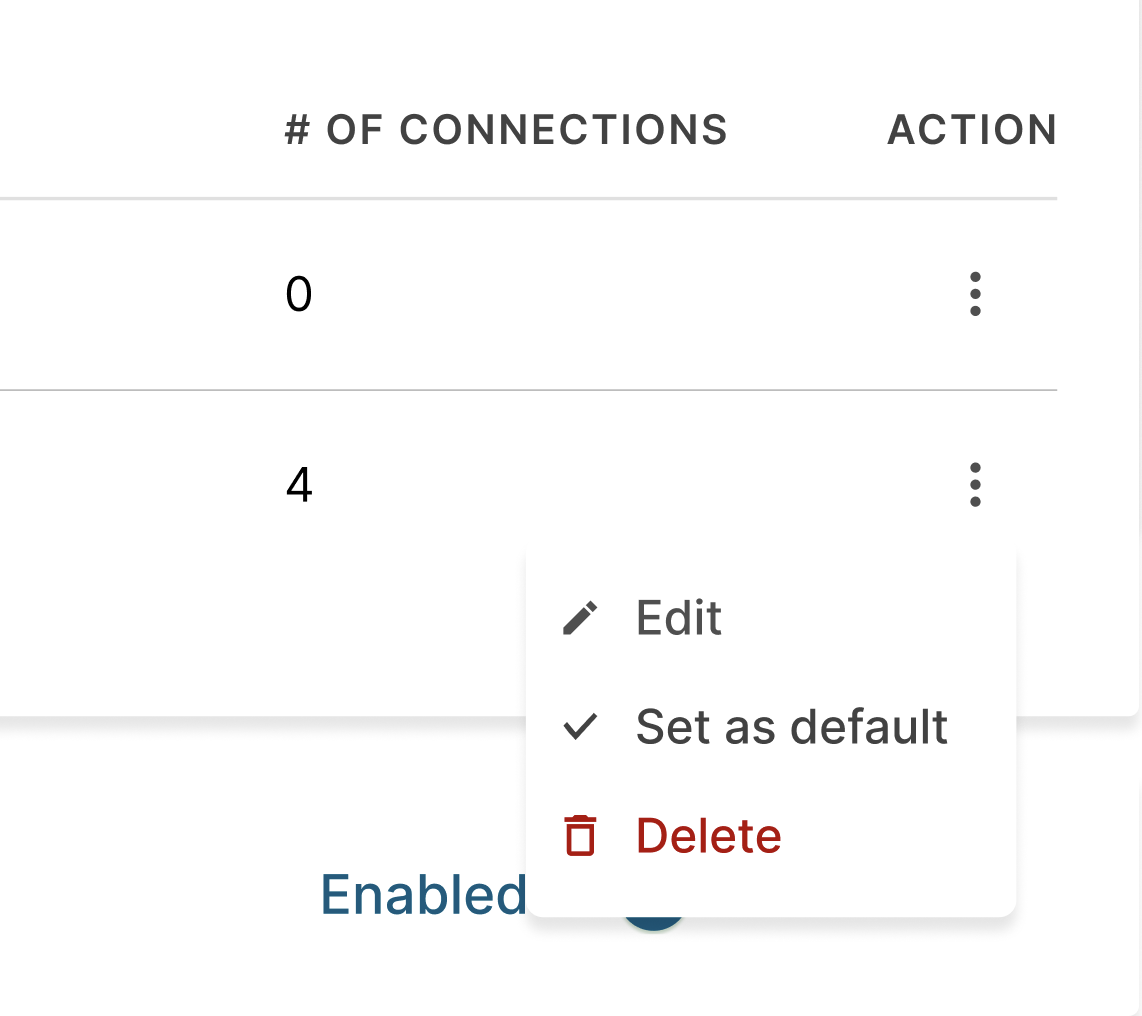
Manage Integration Keys: After adding, you will see a list of integration keys for each service provider. The list includes status, label, client ID (shown), client secret (hidden), create and update date, and number of connections. Actions such as editing, setting as default, or deleting a key are available via the action menu.

Key Management
-
Limit: Up to 3 API keys can be added per integration.
-
Default Key: You can set a default key which will be used for new business connections. Changing the default does not affect existing connections.
-
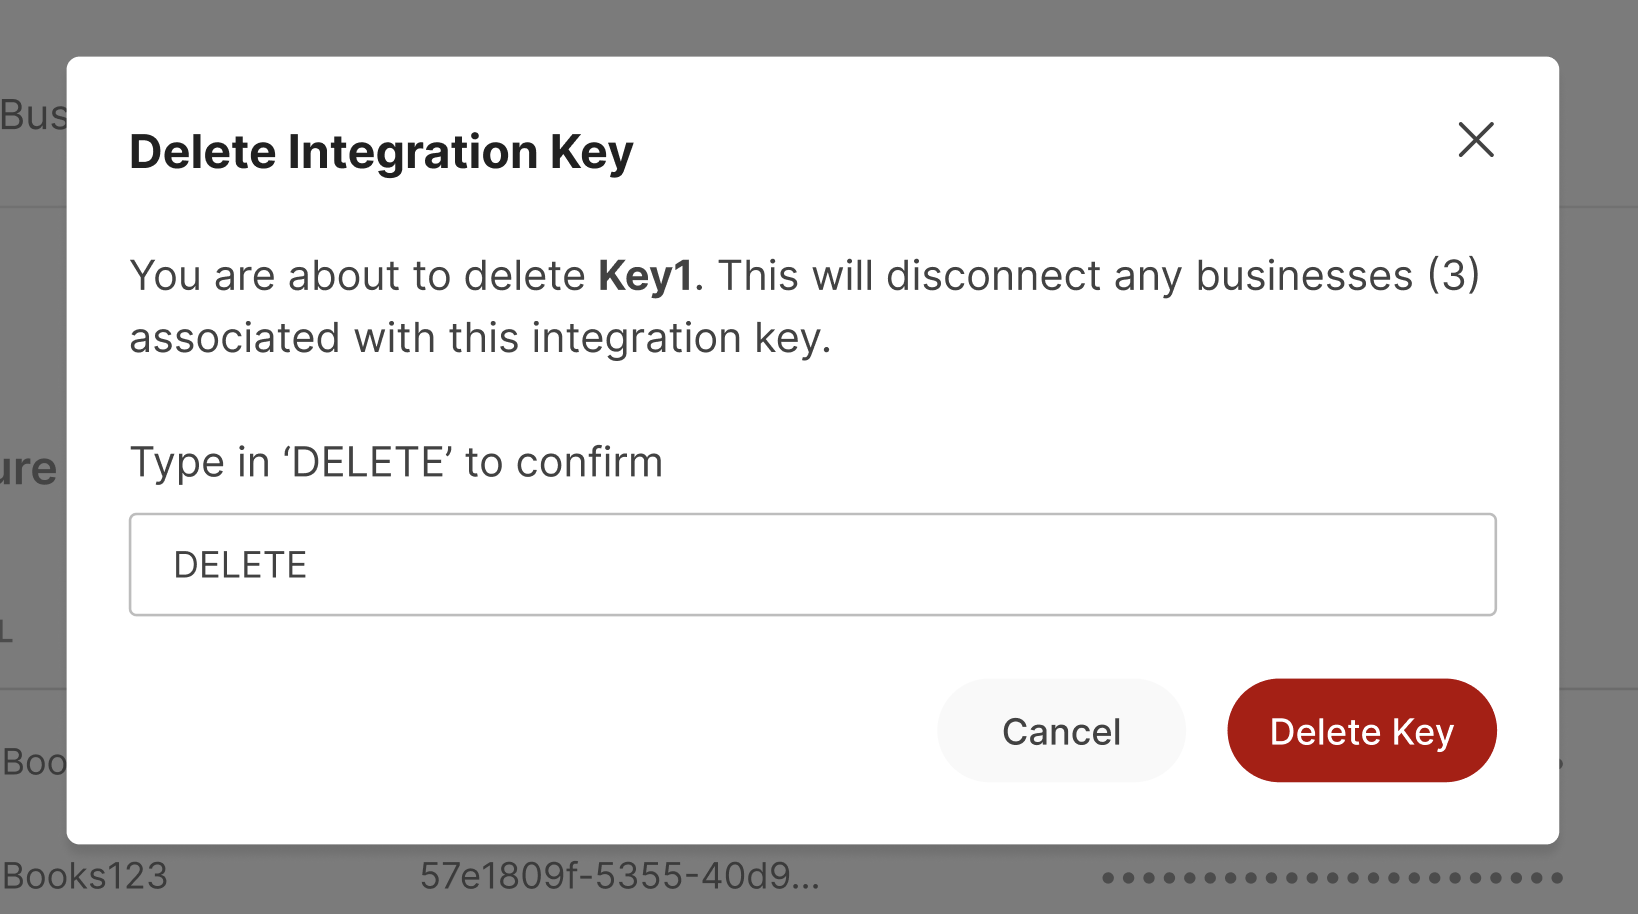
Editing or Deleting Keys: Editing or deleting an API key will disconnect all business connections associated with that key.

-
Changing Scopes: Modifying the scopes of the keys will affect new connections but will not disconnect existing ones.
Caution
- Deleting an API key is irreversible and will permanently disconnect any data retrieval using that key.
- Ensure all changes to integration settings are necessary and checked for accuracy to avoid disrupting connected services.
For more information on specific integrations and their setup, please refer to the respective service guides.
Updated 5 months ago