Setup QuickBooks Online
Before you can access data from users using QuickBooks Online for their accounting, you need to set up a QuickBooks Online integration in the Dashboard. You'll need to:
- Register a new application on Intuit's developer portal.
- Enter details about your app and complete the app assessment questionnaire.
- Intuit reviews your questionnaire to ensure your app meets their platform requirements. If your app is approved, you can access your keys to enable your integration.
- Add your secure keys to Accounting Data as a Service™.
Register your Application
- Visit Intuit Developer Portal and sign in or create an account.
- When you're logged in, in the top navigation select My Apps.
- Click + Create an app.
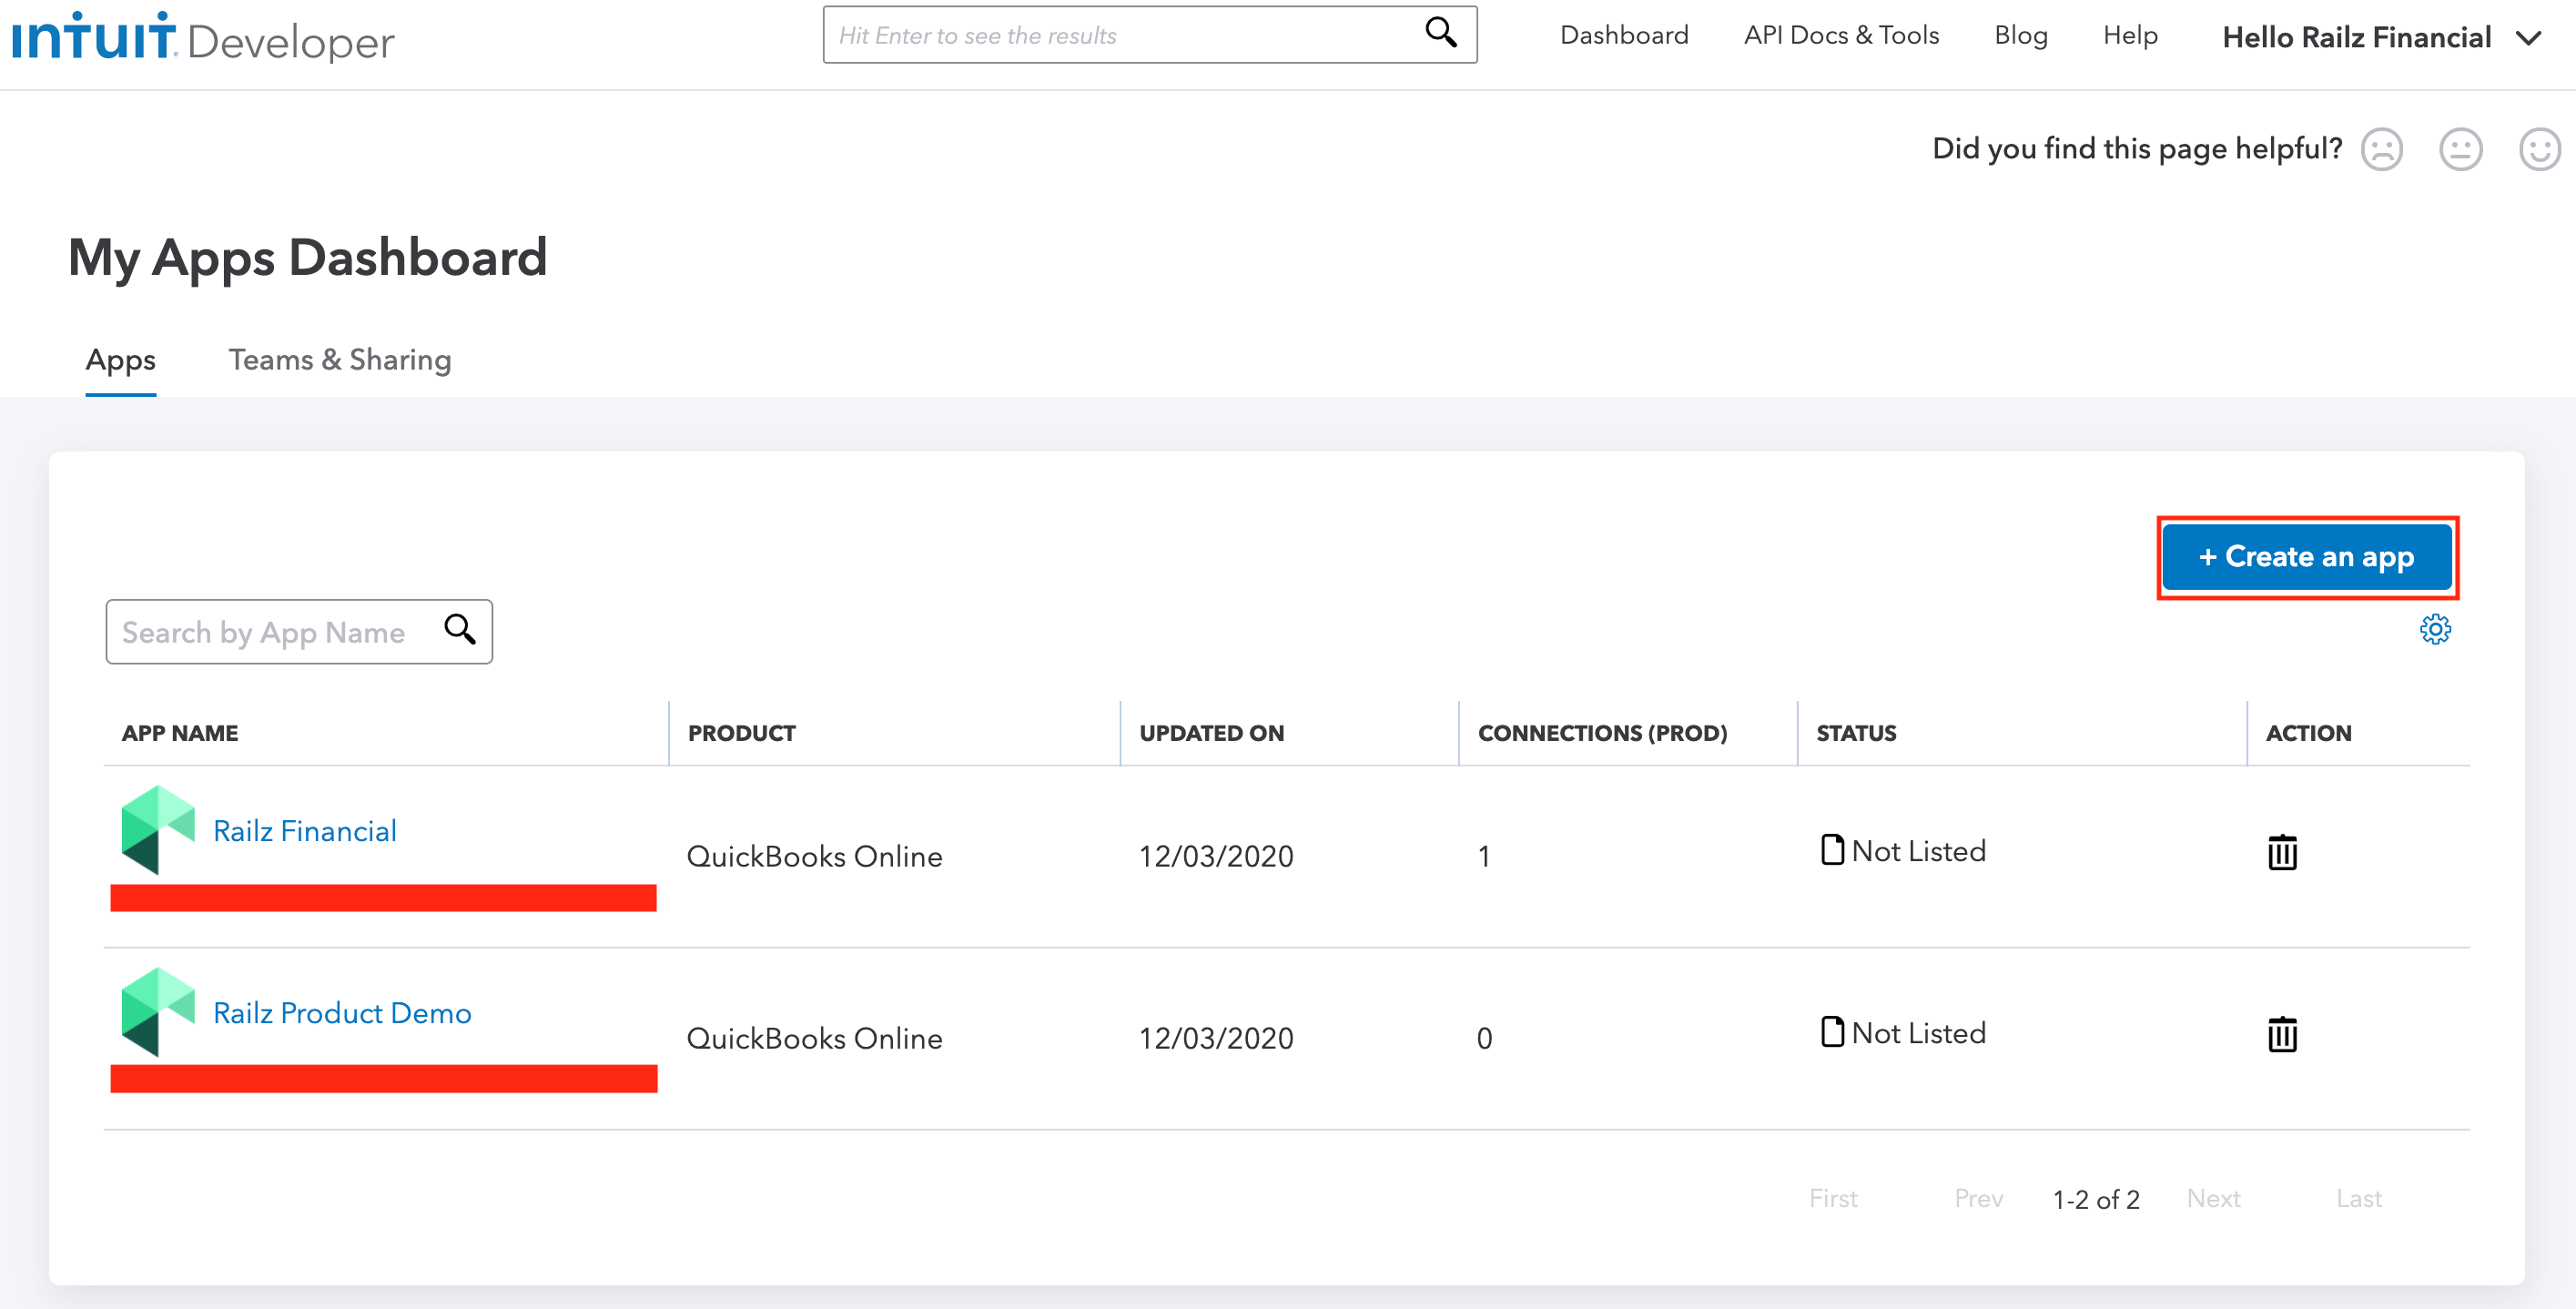
QuickBooks Online Apps Dashboard. Click to Expand.
- Enter your app name
- Under Select a scope, select based on the below.
- Select com.intuit.quickbooks.accounting
- Select com.intuit.quickbooks.payment ( US only ) if you need datatypes like bank accounts, vendor bank accounts, customer bank accounts. Any integration using this will only work for US business connections.
- Click on Create App
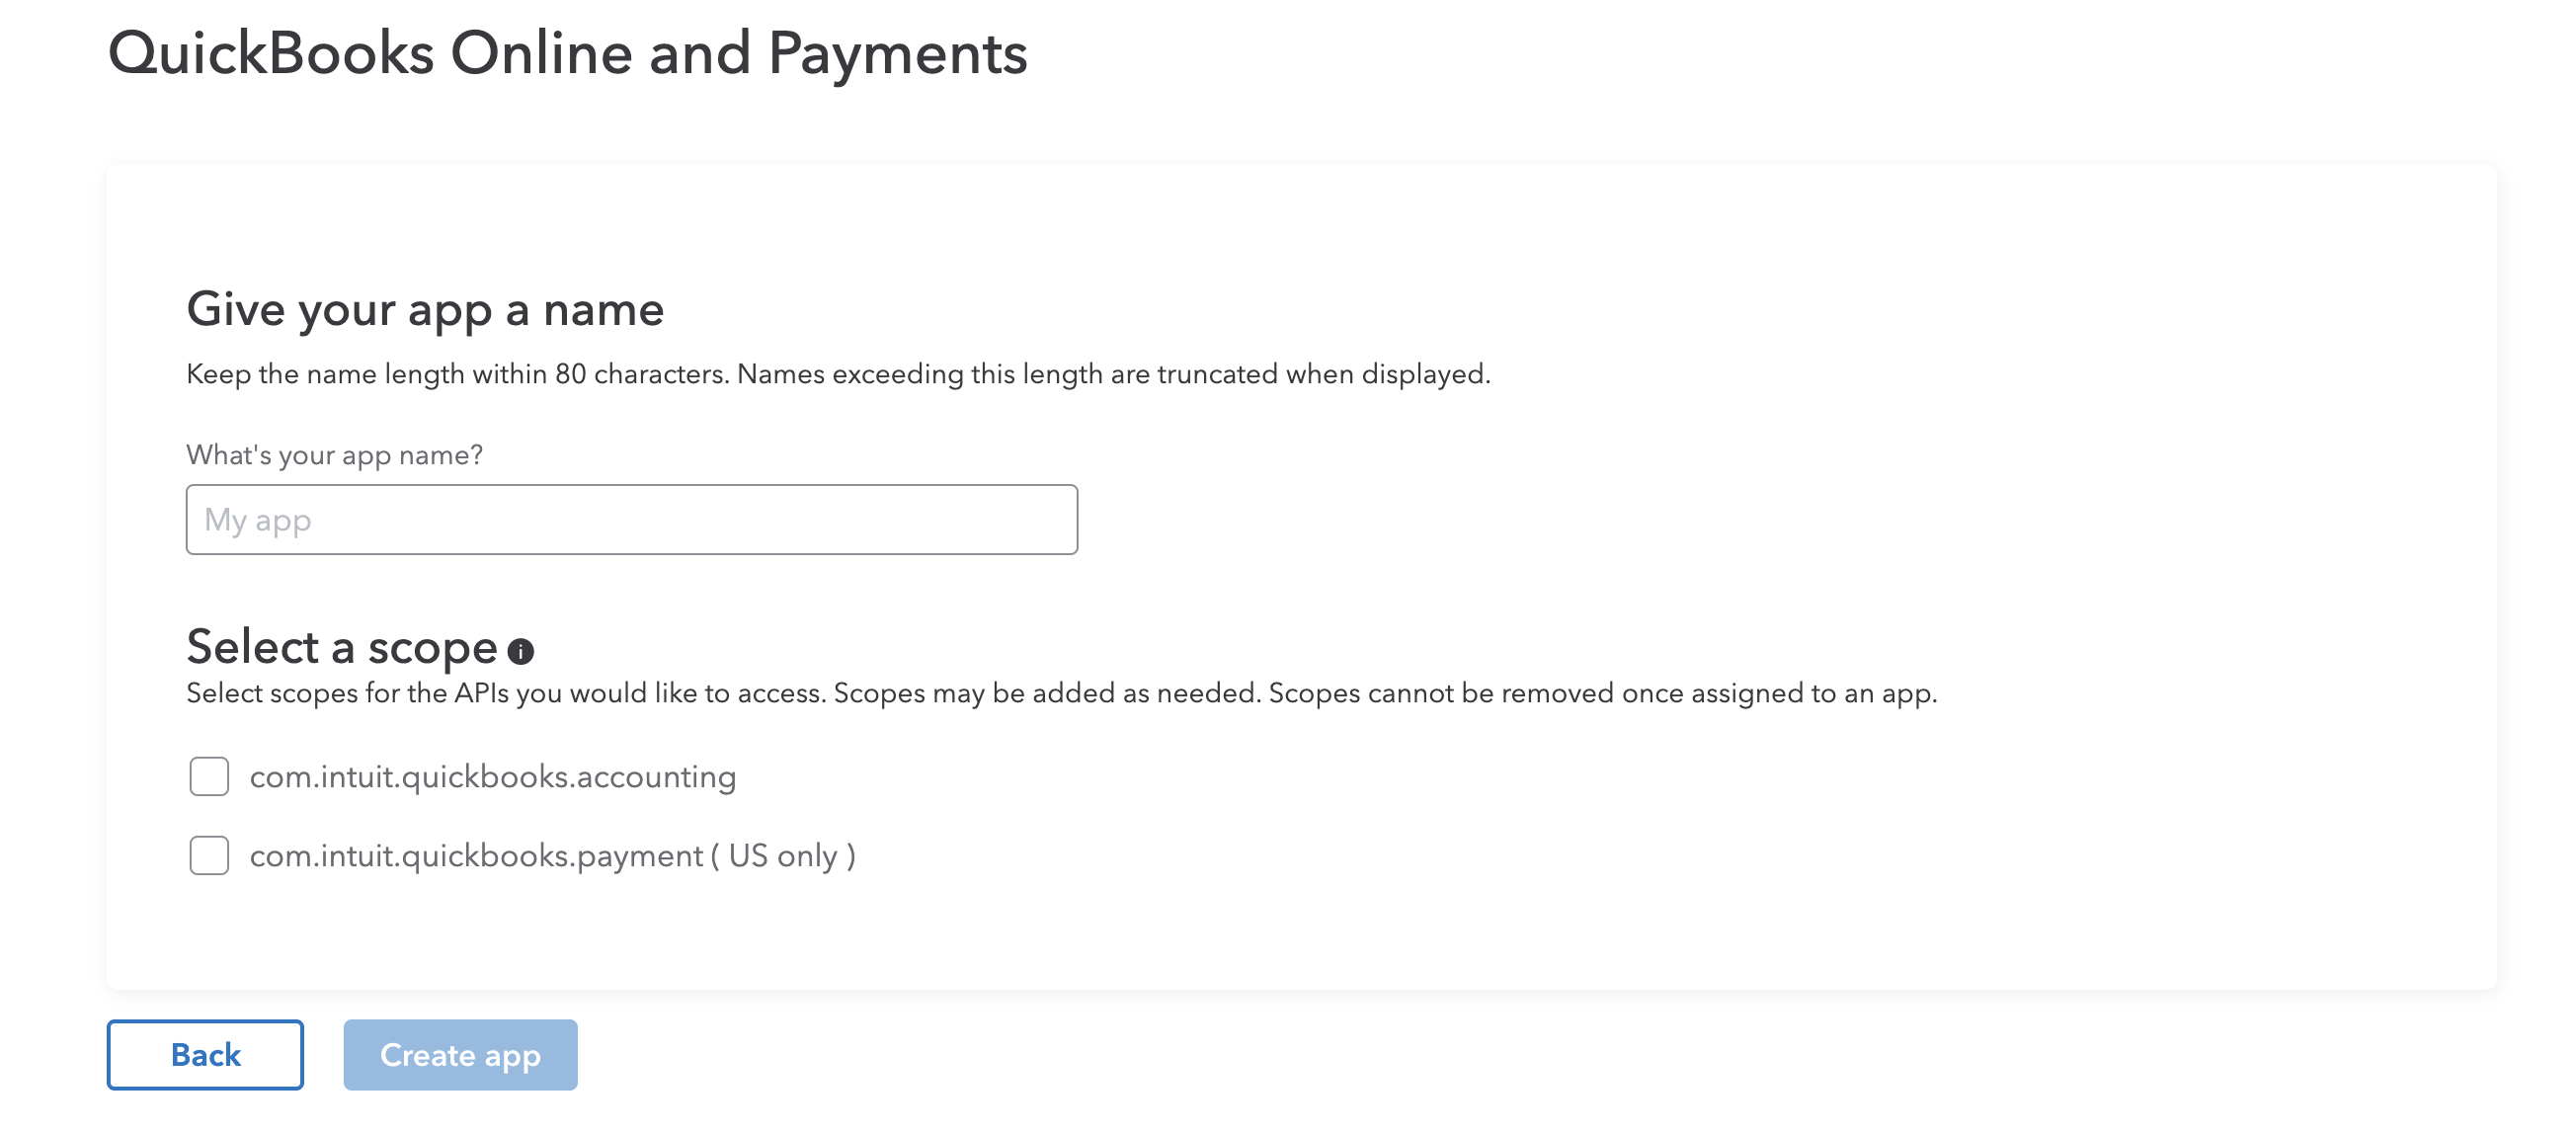
Create a QuickBooks Online App page. Click to Expand.
App Development & Production Keys are not Interchangeable
Development keys do not work with live QuickBooks Online accounts and vice versa, Production keys will not work in the Sandbox environment.
- To obtain the Production keys, go to the Production Menu > Keys & OAuth sub-menu and complete the requested details described in the Add details about your app checklist.
- Complete the app assessment questionnaire as described below.
- When you've completed the requirements, the Keys & OAuth page for production is displayed. Copy your Client ID and Secret. You'll need these for a later stage in this process.
- To obtain the Development/Sandbox keys, go to the Development Menu > Keys & OAuth sub-menu.
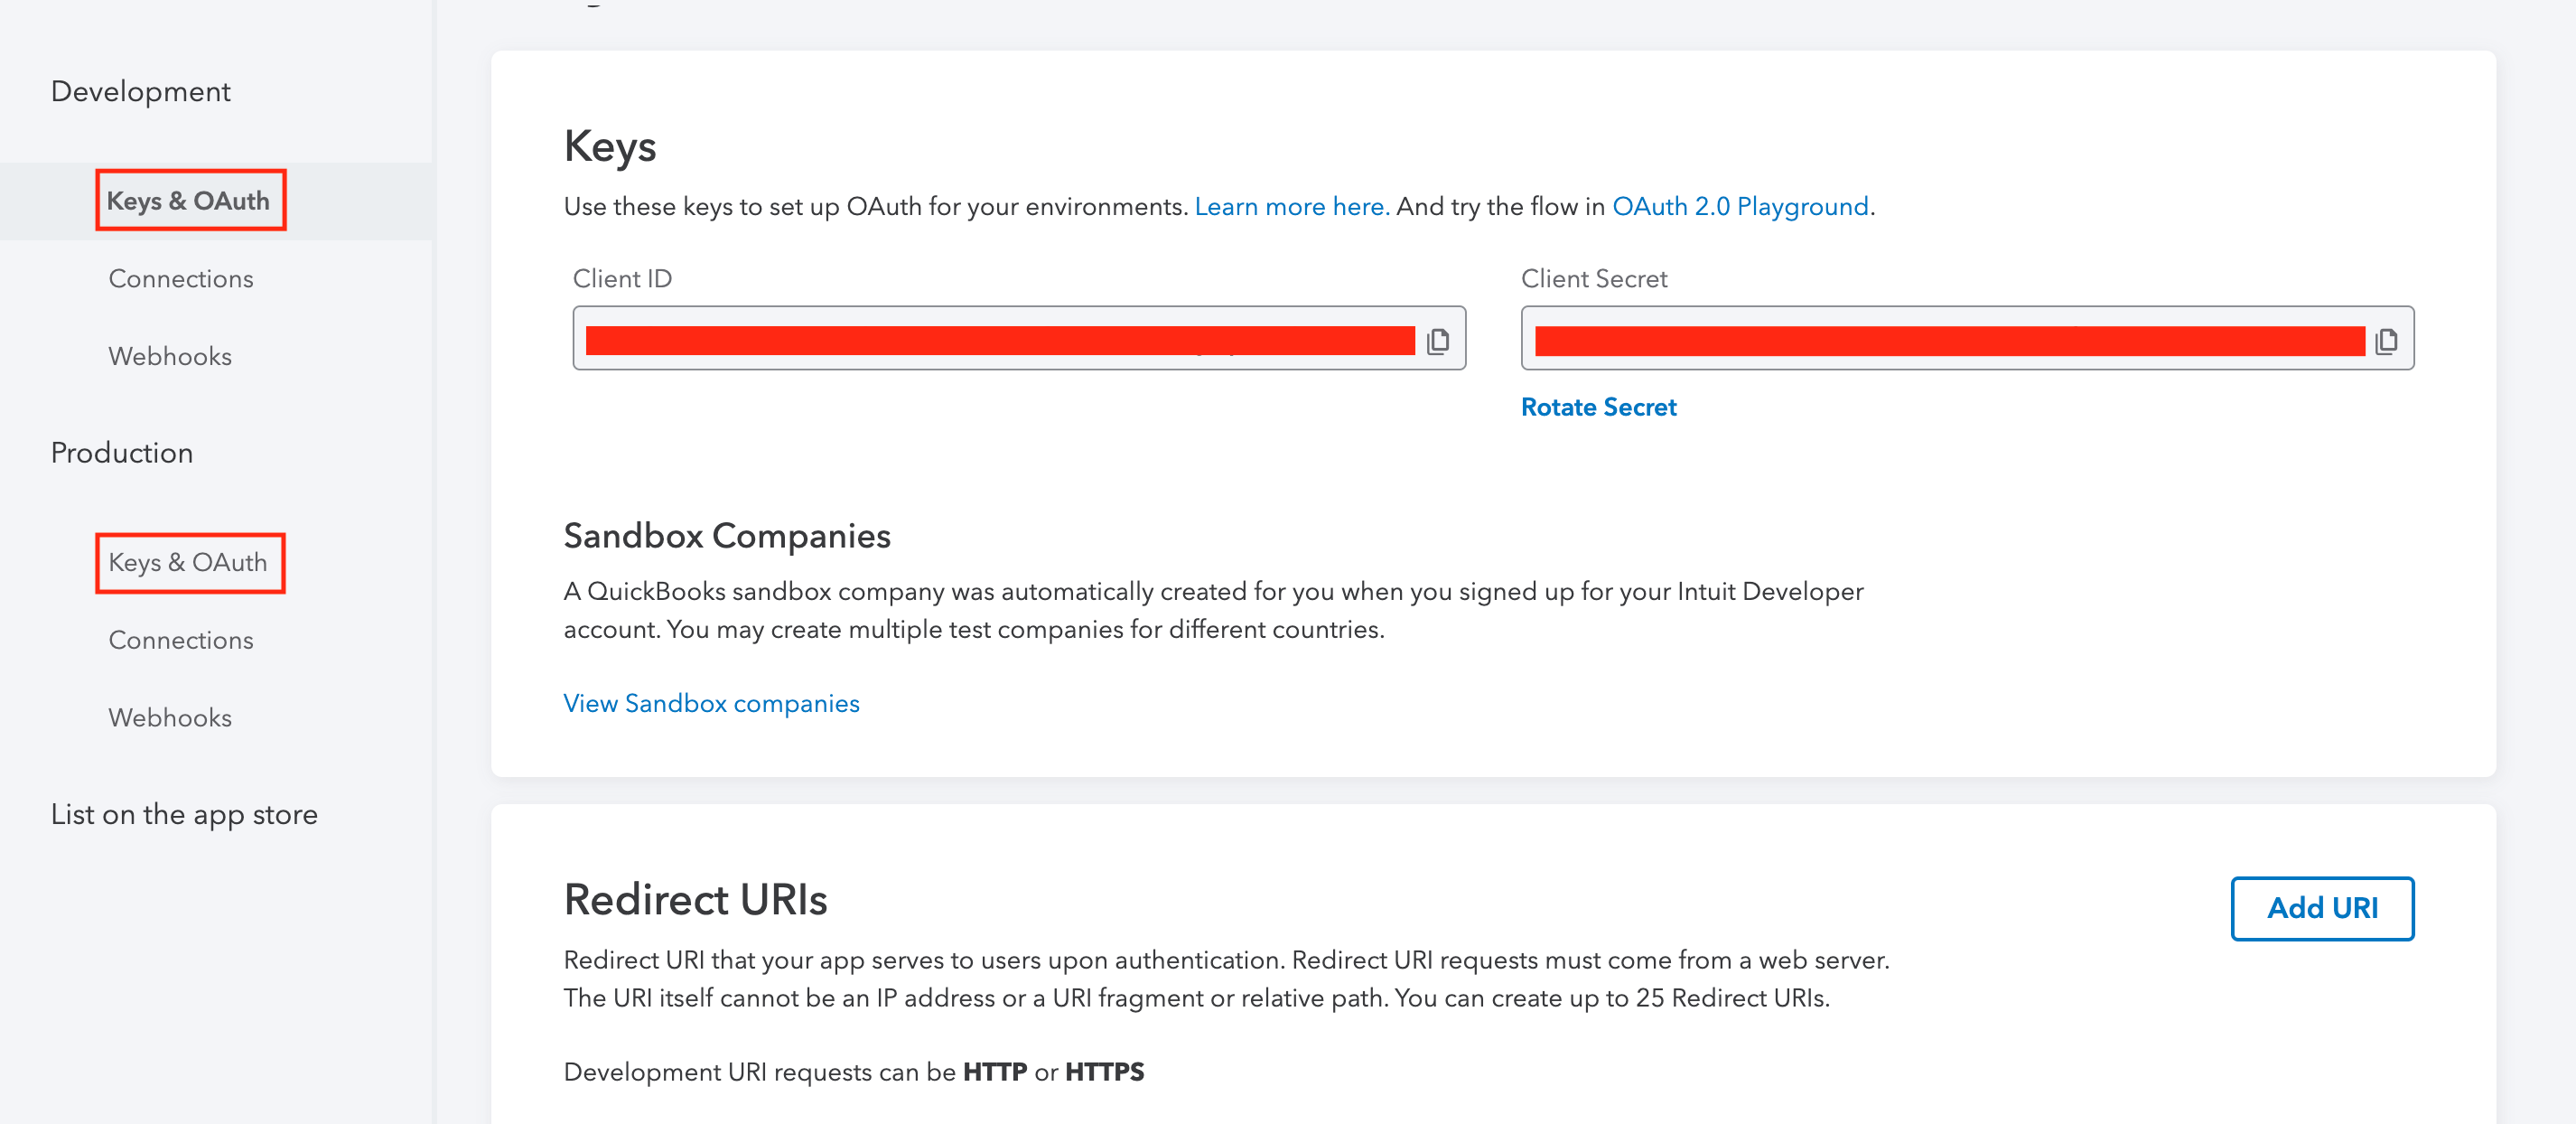
App details page in QuickBooks Online developer portal. Click to Expand.
- In the Redirect URIs section click Add URI and add the URI
https://auth.railz.ai/quickbooks/

QuickBooks Online - Redirect URIs. Click to Expand.
Enable QBO Payments
Support for QBO Payments is specifically designed for US-based QuickBooks Online (QBO) accounts.
Note
This section is for updating an existing application in QBO. Refer to the section Register Your Application for guidance on creating new API keys.
Considerations
Ensure that QBO Payments is compatible with your operations by confirming that all your businesses are all US-based.
It is recommended to create new API keys specifically for enabling QBO Payments to ensure better manageability. Refer to the section Register Your Application for guidance on creating new API keys.
To successfully enable QBO Payments, follow these detailed steps:
- Visit Intuit Developer Portal and sign in or create an account.
- When you're logged in, in the top navigation select My Apps.
- Select the desired application to modify.
- In Production Settings, scroll to Scope for the API, check com.intuit.quickbooks.payment (US only), and save. Note: Scopes cannot be removed once saved.

Complete the App Assessment Questionnaire
Before you can access your application's production keys, you must complete an app assessment questionnaire. Intuit will review your answers to make sure your app meets their publishing requirements and guidelines.
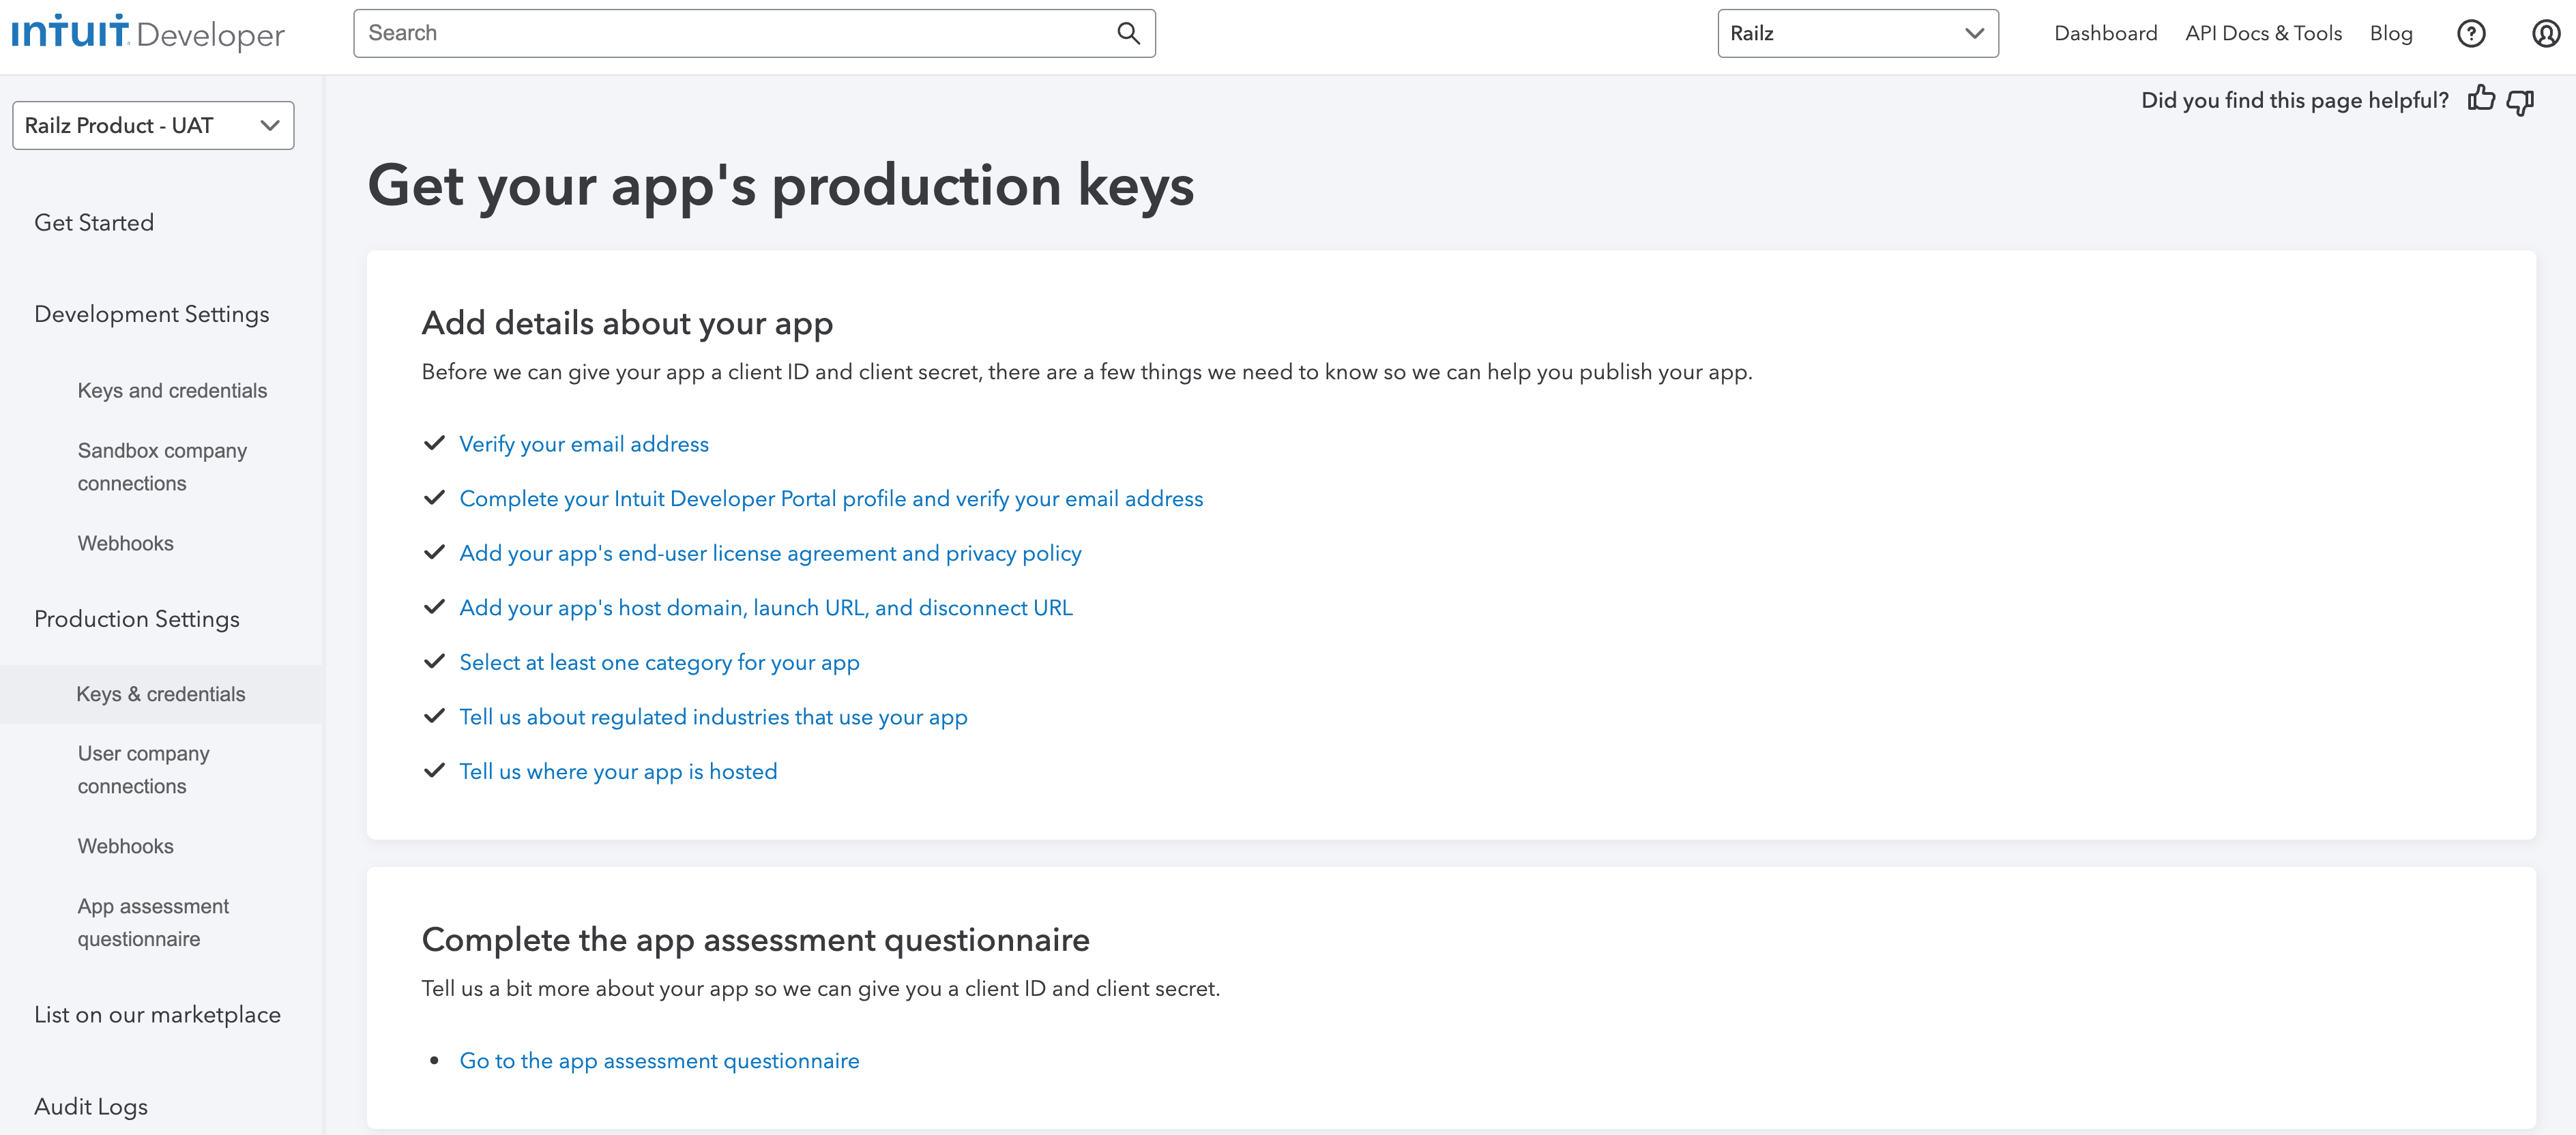
QuickBooks Online app production keys checklist. Click to Expand.
To access the questionnaire:
- Click Go to the app assessment questionnaire at the bottom of the page.
- Enter your answers then submit the questionnaire to Intuit.
- In most cases, Intuit's assessment process is fast. After successfully submitting the questionnaire and providing all other required information, production keys will be unblocked. If not, you’ll be prompted with a request for additional information and the next steps by Intuit. If you are unable to meet Intuit requirements, access to production keys will be blocked.
Need Help With the App Assessment Questionnaire
For more details on how to fill the app assessment questionnaire see our Help Center.
Add your Secure Keys to Accounting Data as a Service™
- Open the Dashboard and log in.
- For Sandbox, ensure to Toggle Sandbox mode on.
- In the left sidebar navigation menu, go to Integrations > Accounting.
- Scroll down to the QuickBooks Online integration and click Configure.
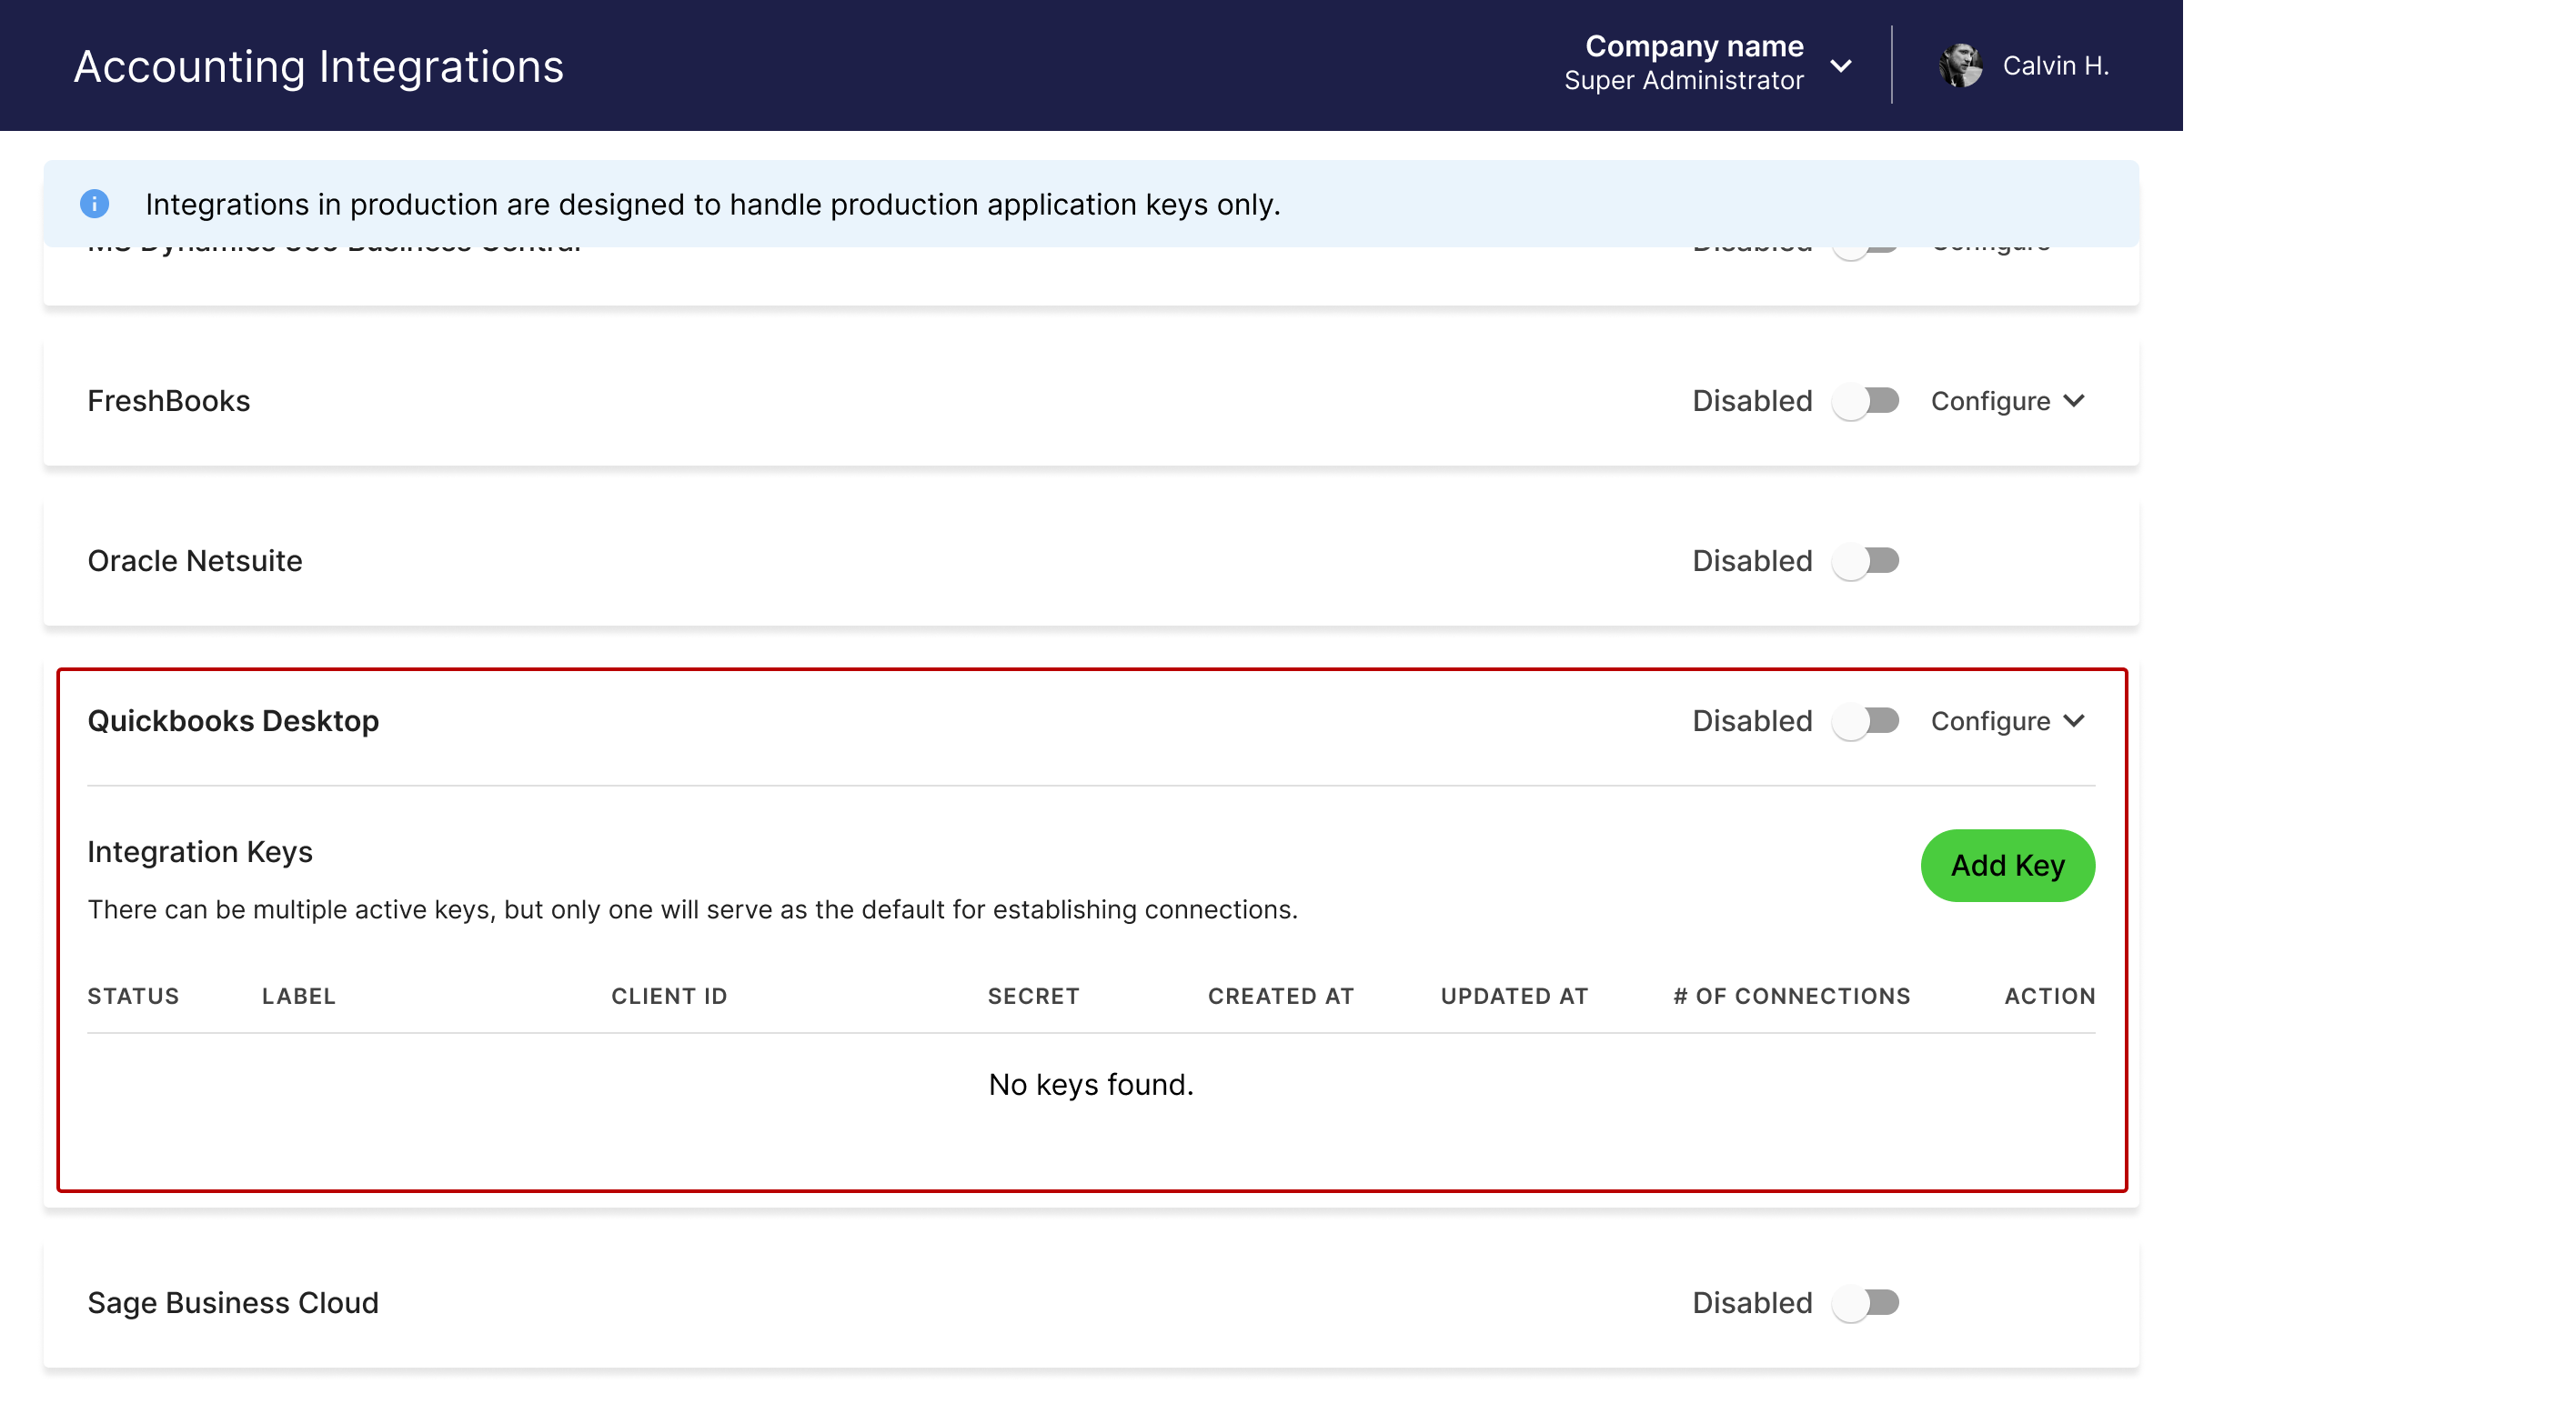
Accounting integrations page in Accounting Data as a Service™ Dashboard. Click to Expand.
- Paste in your Client ID and Client Secret, and then click Save & Enable.
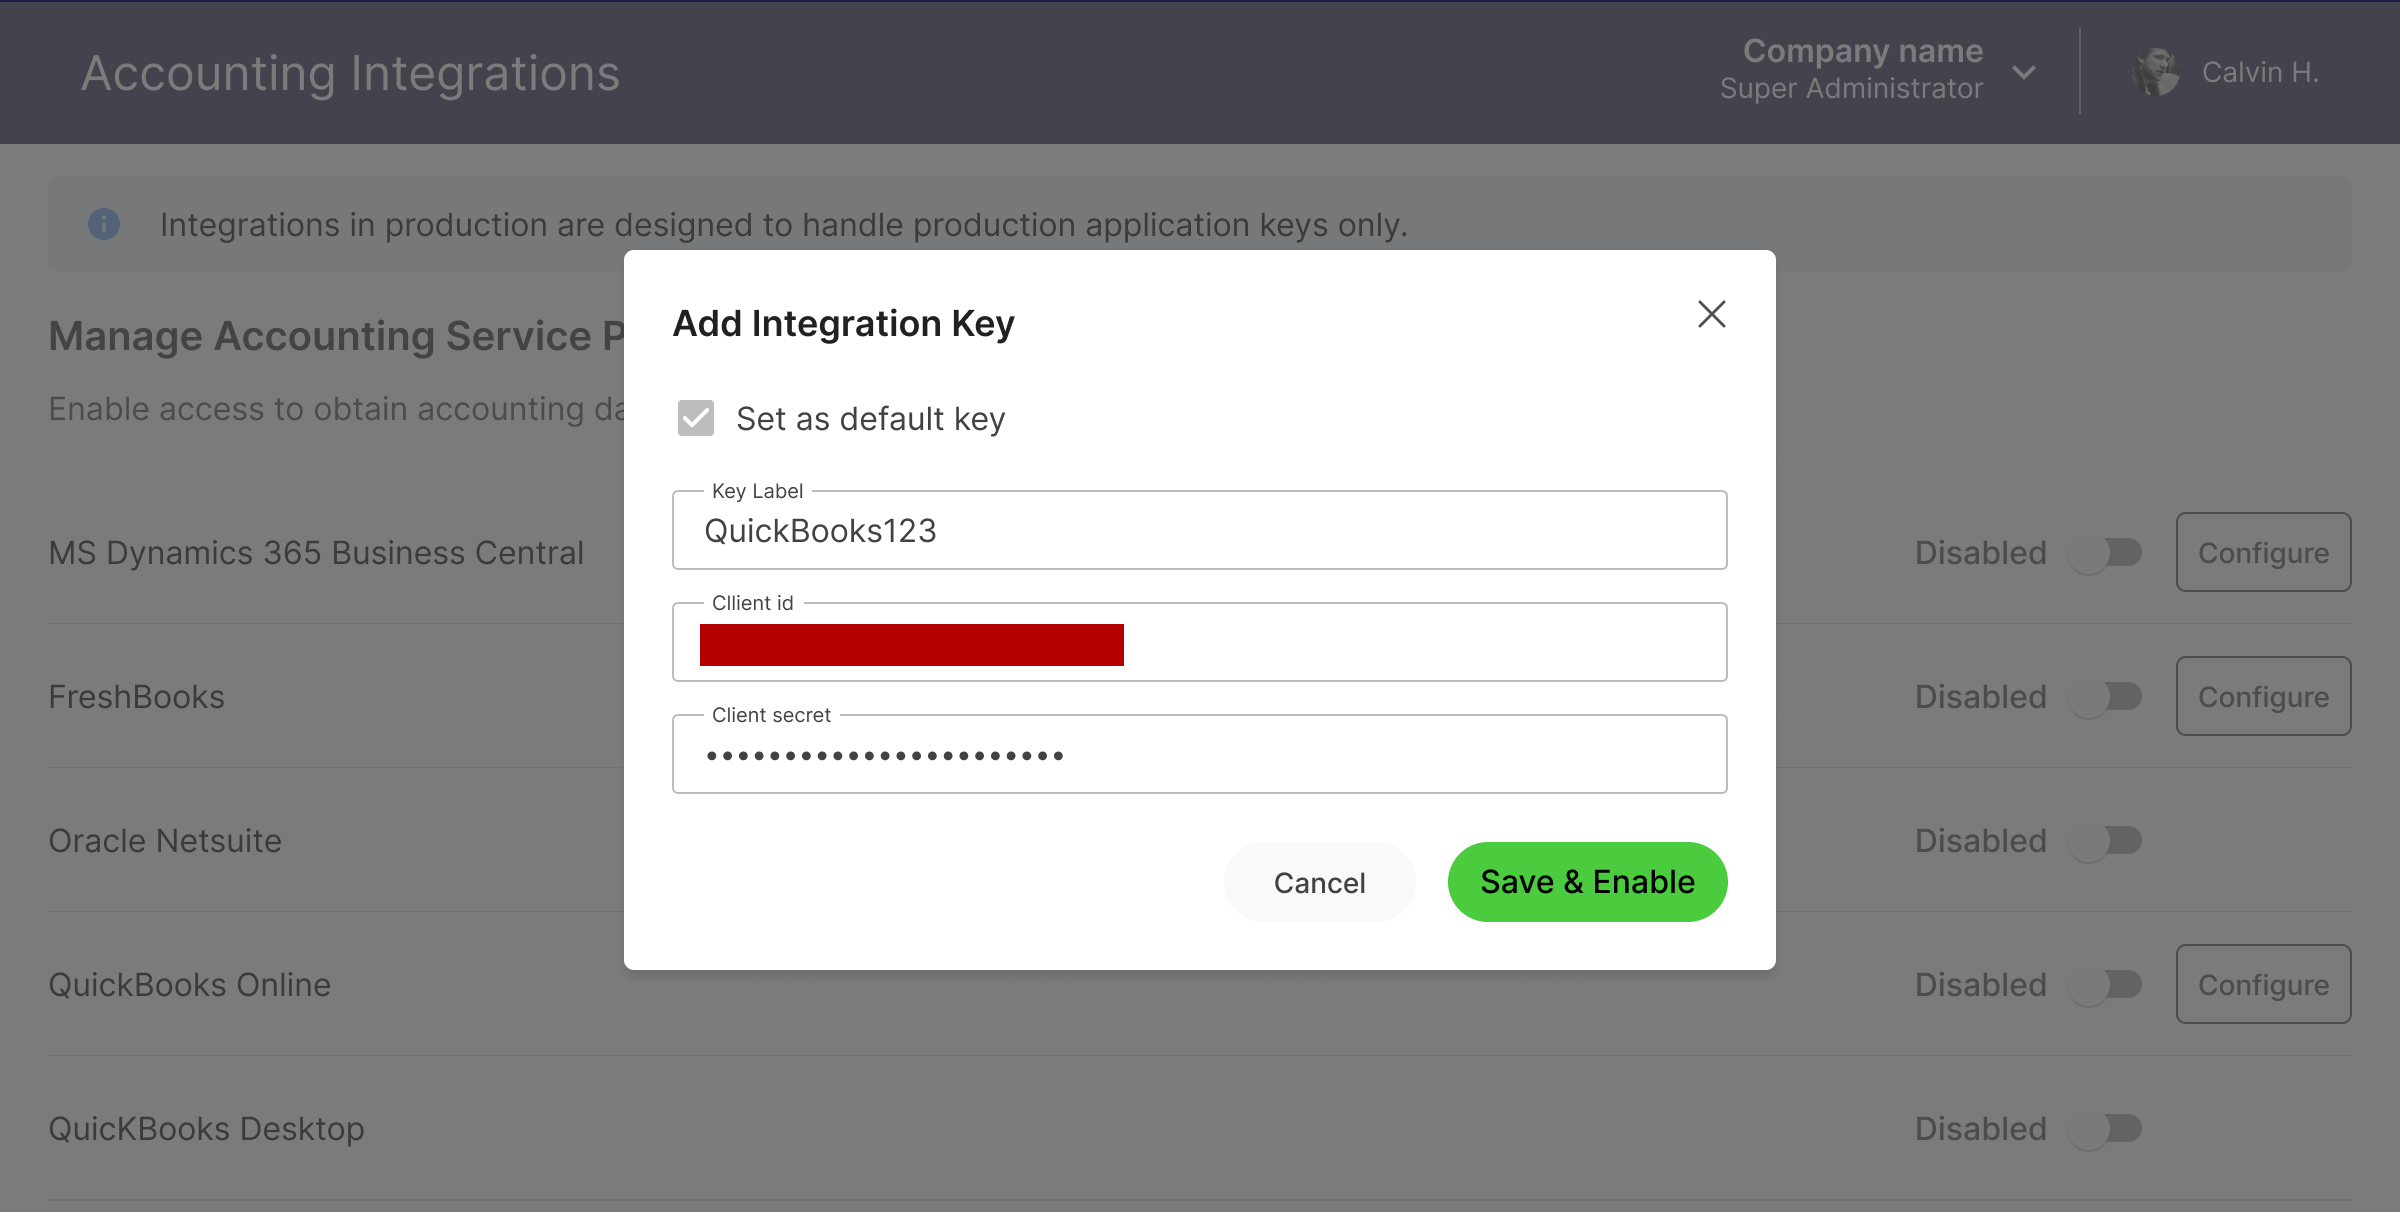
Configure the QuickBooks Online integration modal. Click to Expand.
Updated over 1 year ago