Setup Oracle NetSuite
Enable Oracle NetSuite
Unlike most other integrations, Oracle NetSuite does not require any application credentials for accessing the API. Your business customers will be guided through a couple of steps in Connect to connect their NetSuite instance to Accounting Data as a Service™ (See next step).
- Open the Dashboard and log in.
- In the left sidebar navigation menu, go to Integrations > Accounting.
- Scroll down to the Oracle NetSuite integration and use the toggle to update the Oracle NetSuite integration from Disabled to Enabled.
Your Business Customers' Connection Flow
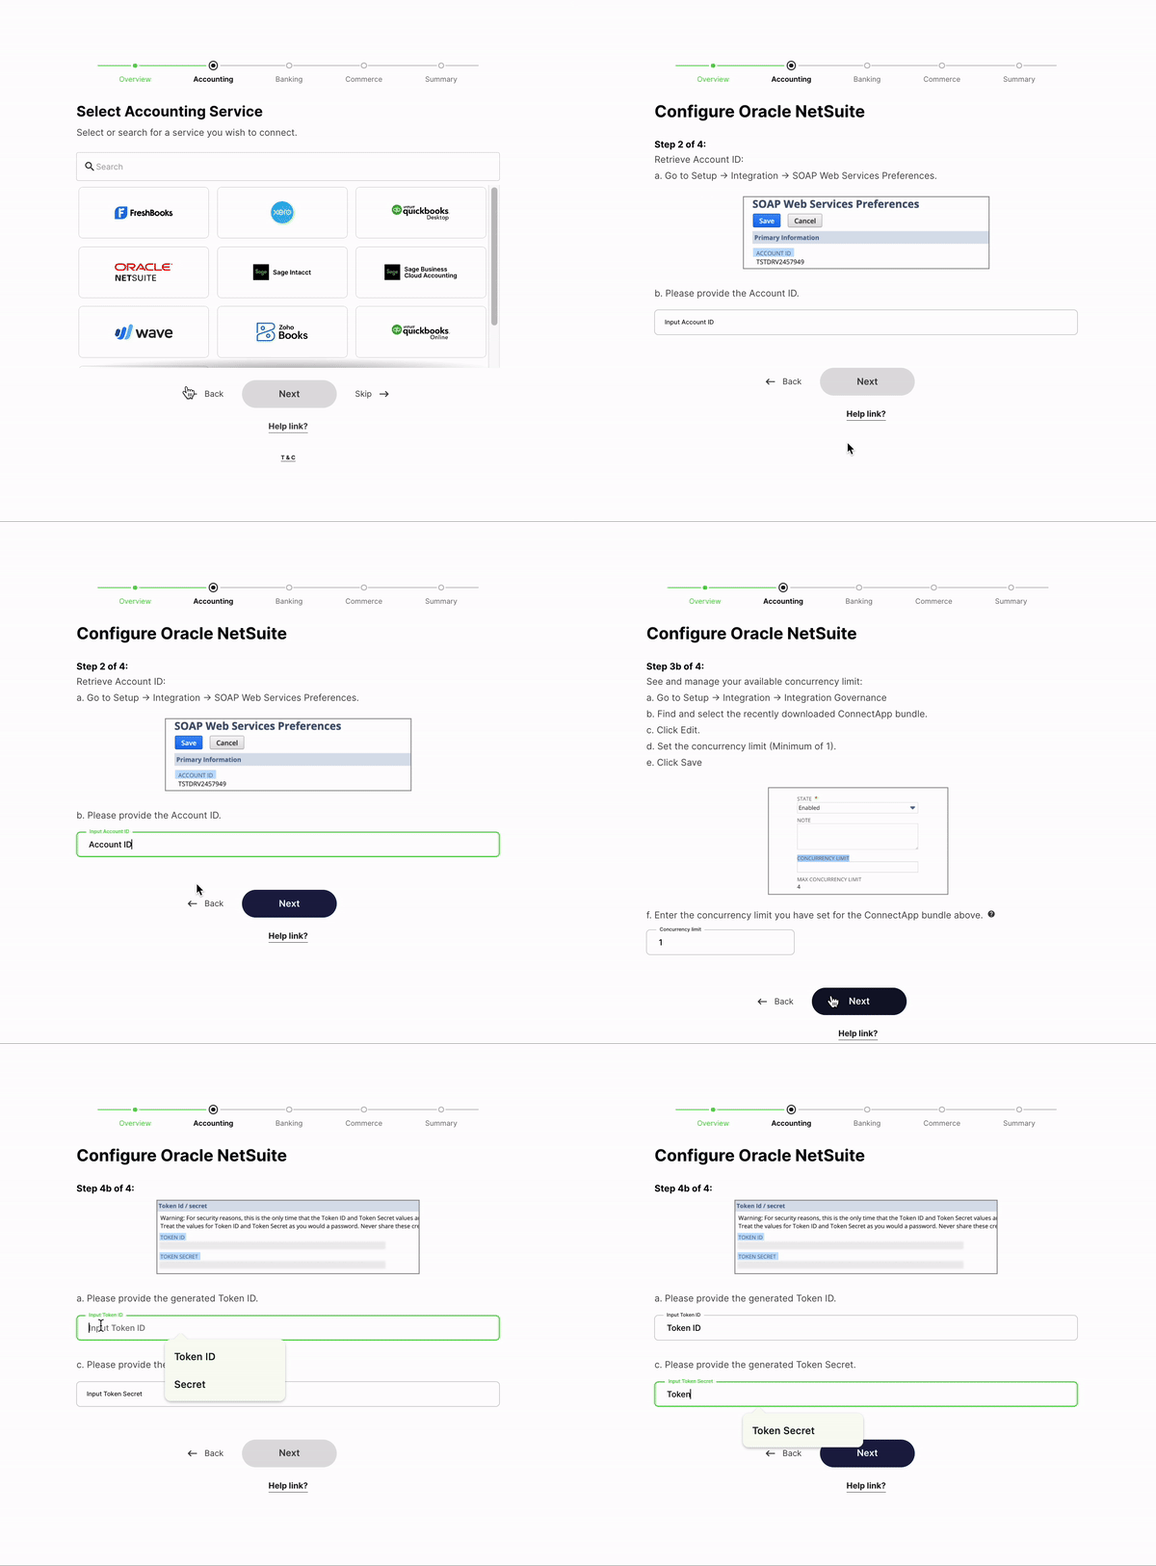
Your business customers will be guided through the flow below to successfully connect & authorize access to their Oracle NetSuite.
If your business customers do not follow these steps correctly the connection & authorization process will fail.
Your business customer must enable and setup the following:
- Enable Multiple Currencies, Token-based Authentication and Soap Web Services by by navigating to Manage Authentication under Setup > Company > Enable features and checking off those features.
- Retrieve the Account ID from Setup > Integration > SOAP Web Services Preferences to inform us of the correct account we are syncing from.
- Install the Bundle that will help improve connection performance when connecting a business.
- To help optimize the syncing speed, set the concurrency limit to the ConnectApp bundle. The higher the concurrency limit, the faster the sync time.
- Assign the role created by the Bundle to a new or existing employee by navigating to Lists > > Employees > Employees > Search or New. The bundle will have the correct permissions in order to retrieve the supported data types.
- Generate an access token per the instructions in Connect by navigating to Setup > Users/Roles > Access Tokens > New, then entering both Token ID and Secret.

Updated 5 months ago