Setup Dynamics 365 Business Central
Before you can access data from users using Dynamics 365 Business Central for their accounting, you need to set up a Dynamics 365 Business Central integration in the Dashboard. You'll need to:
- Register a new application on Dynamics 365 Business Central developer portal.
- Add your secure keys to Accounting Data as a Service™.
Register your Application
- Visit the Azure Portal and sign in or create an account.
Dynamics 365 Business Central and Azure Account details
- If your organization is using Azure Active Directory to control access to Dynamics 365 Business Central, ask your Azure Active Directory administrator to add your account to the correct permission group.
- If you're unable to sign up for a new account, contact your Dynamics 365 Business Central administrator. They may have disabled this feature.
- Once logged in, select Azure Active Directory from the left sidebar navigation or in-page menu. If you can't see this entry on the home page or menu, click All Services and then select Azure Active Directory.
Multi Tenant Access
You might have been granted access to more than one tenant, so check the details are correct. If they're incorrect, select Switch tenant and choose the right one.

Manage/switch tenants in Azure Active Directory. Click to Expand.
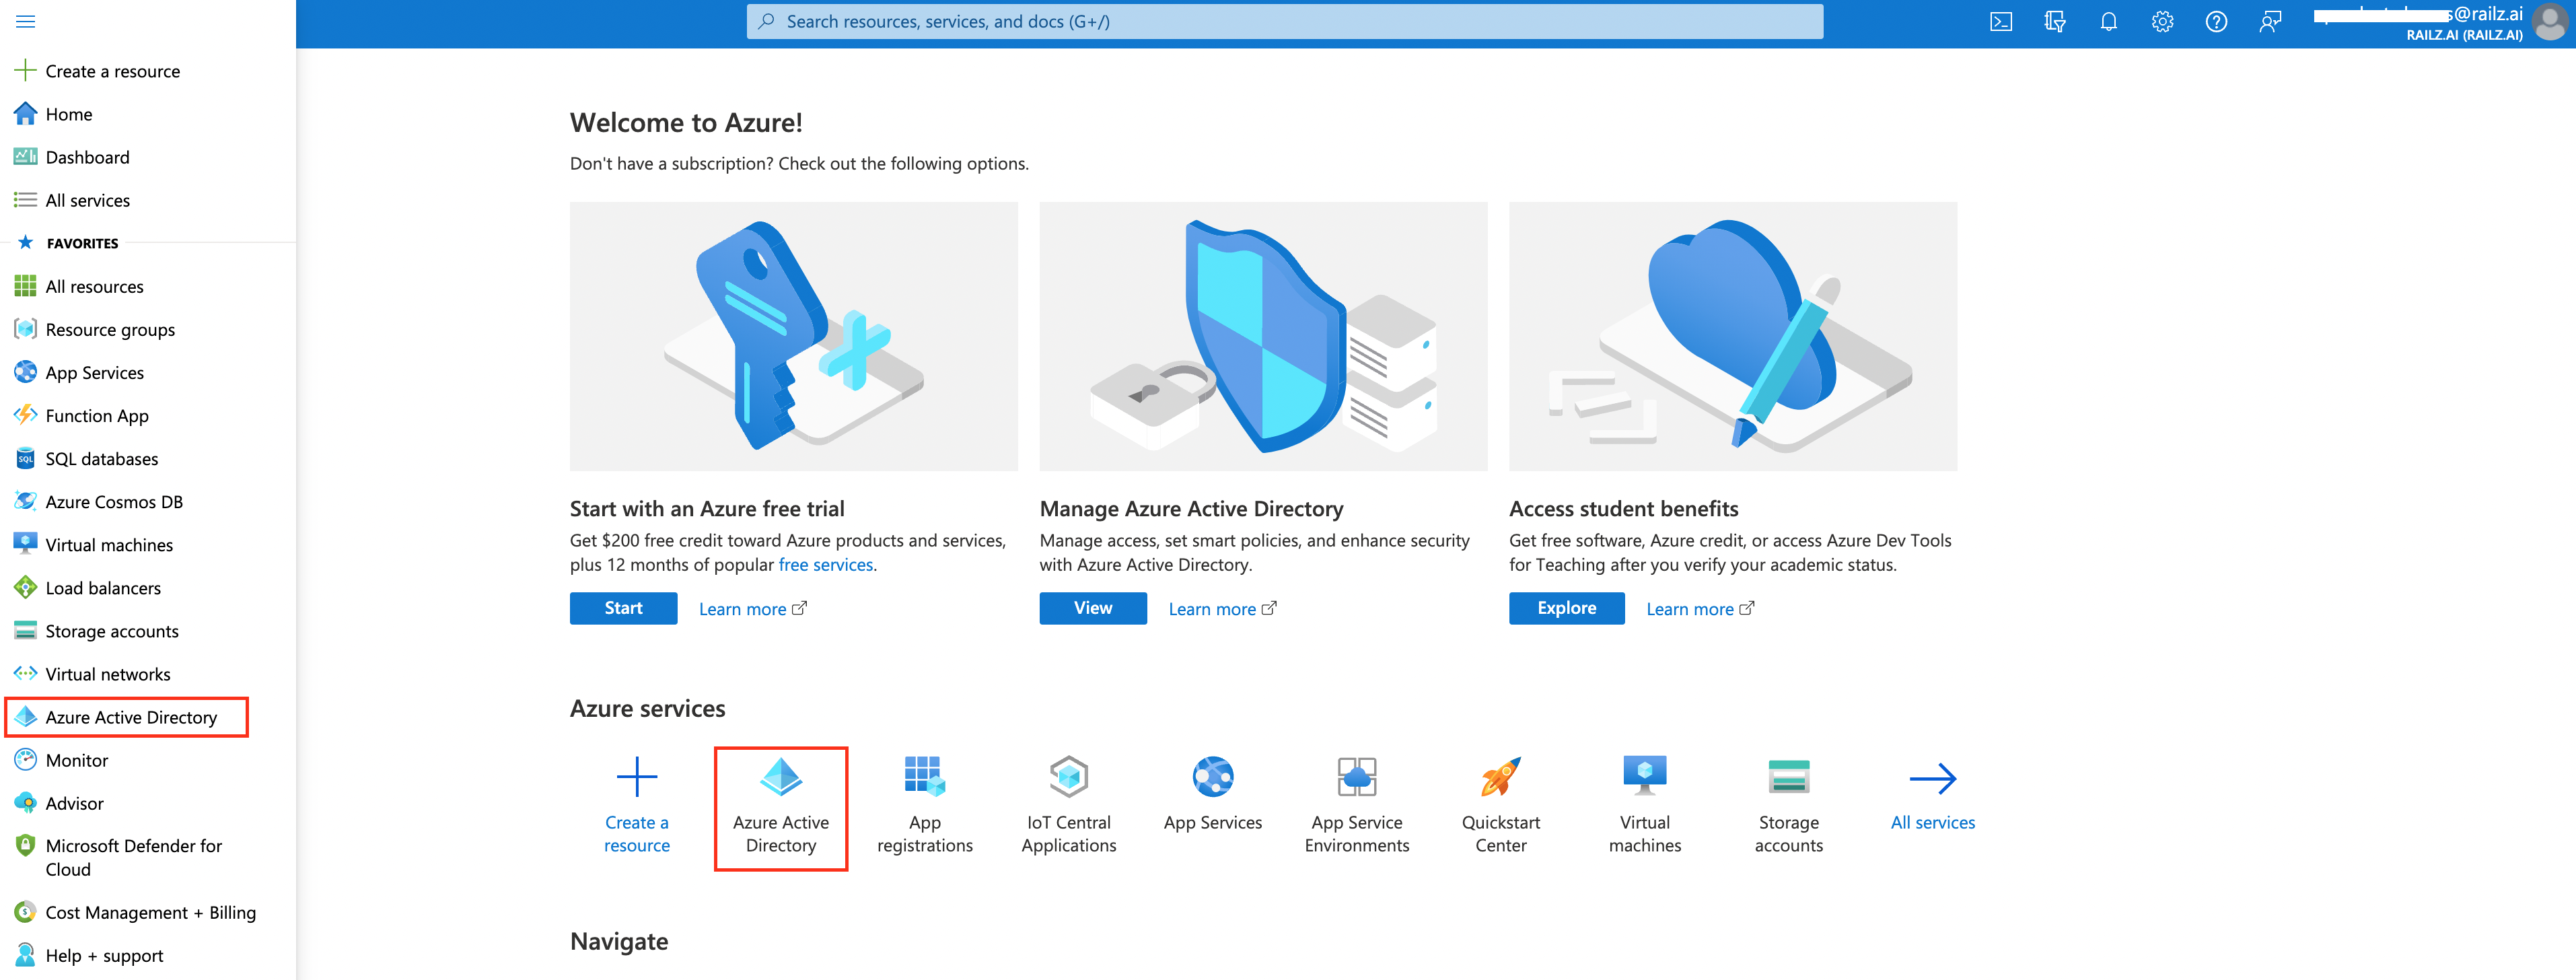
Azure Active Directory main page. Click to Expand.
- From the left sidebar navigation or in-page menu, select App Registrations.

App registration in Azure Active Directory. Click to Expand.
- Enter your app details.
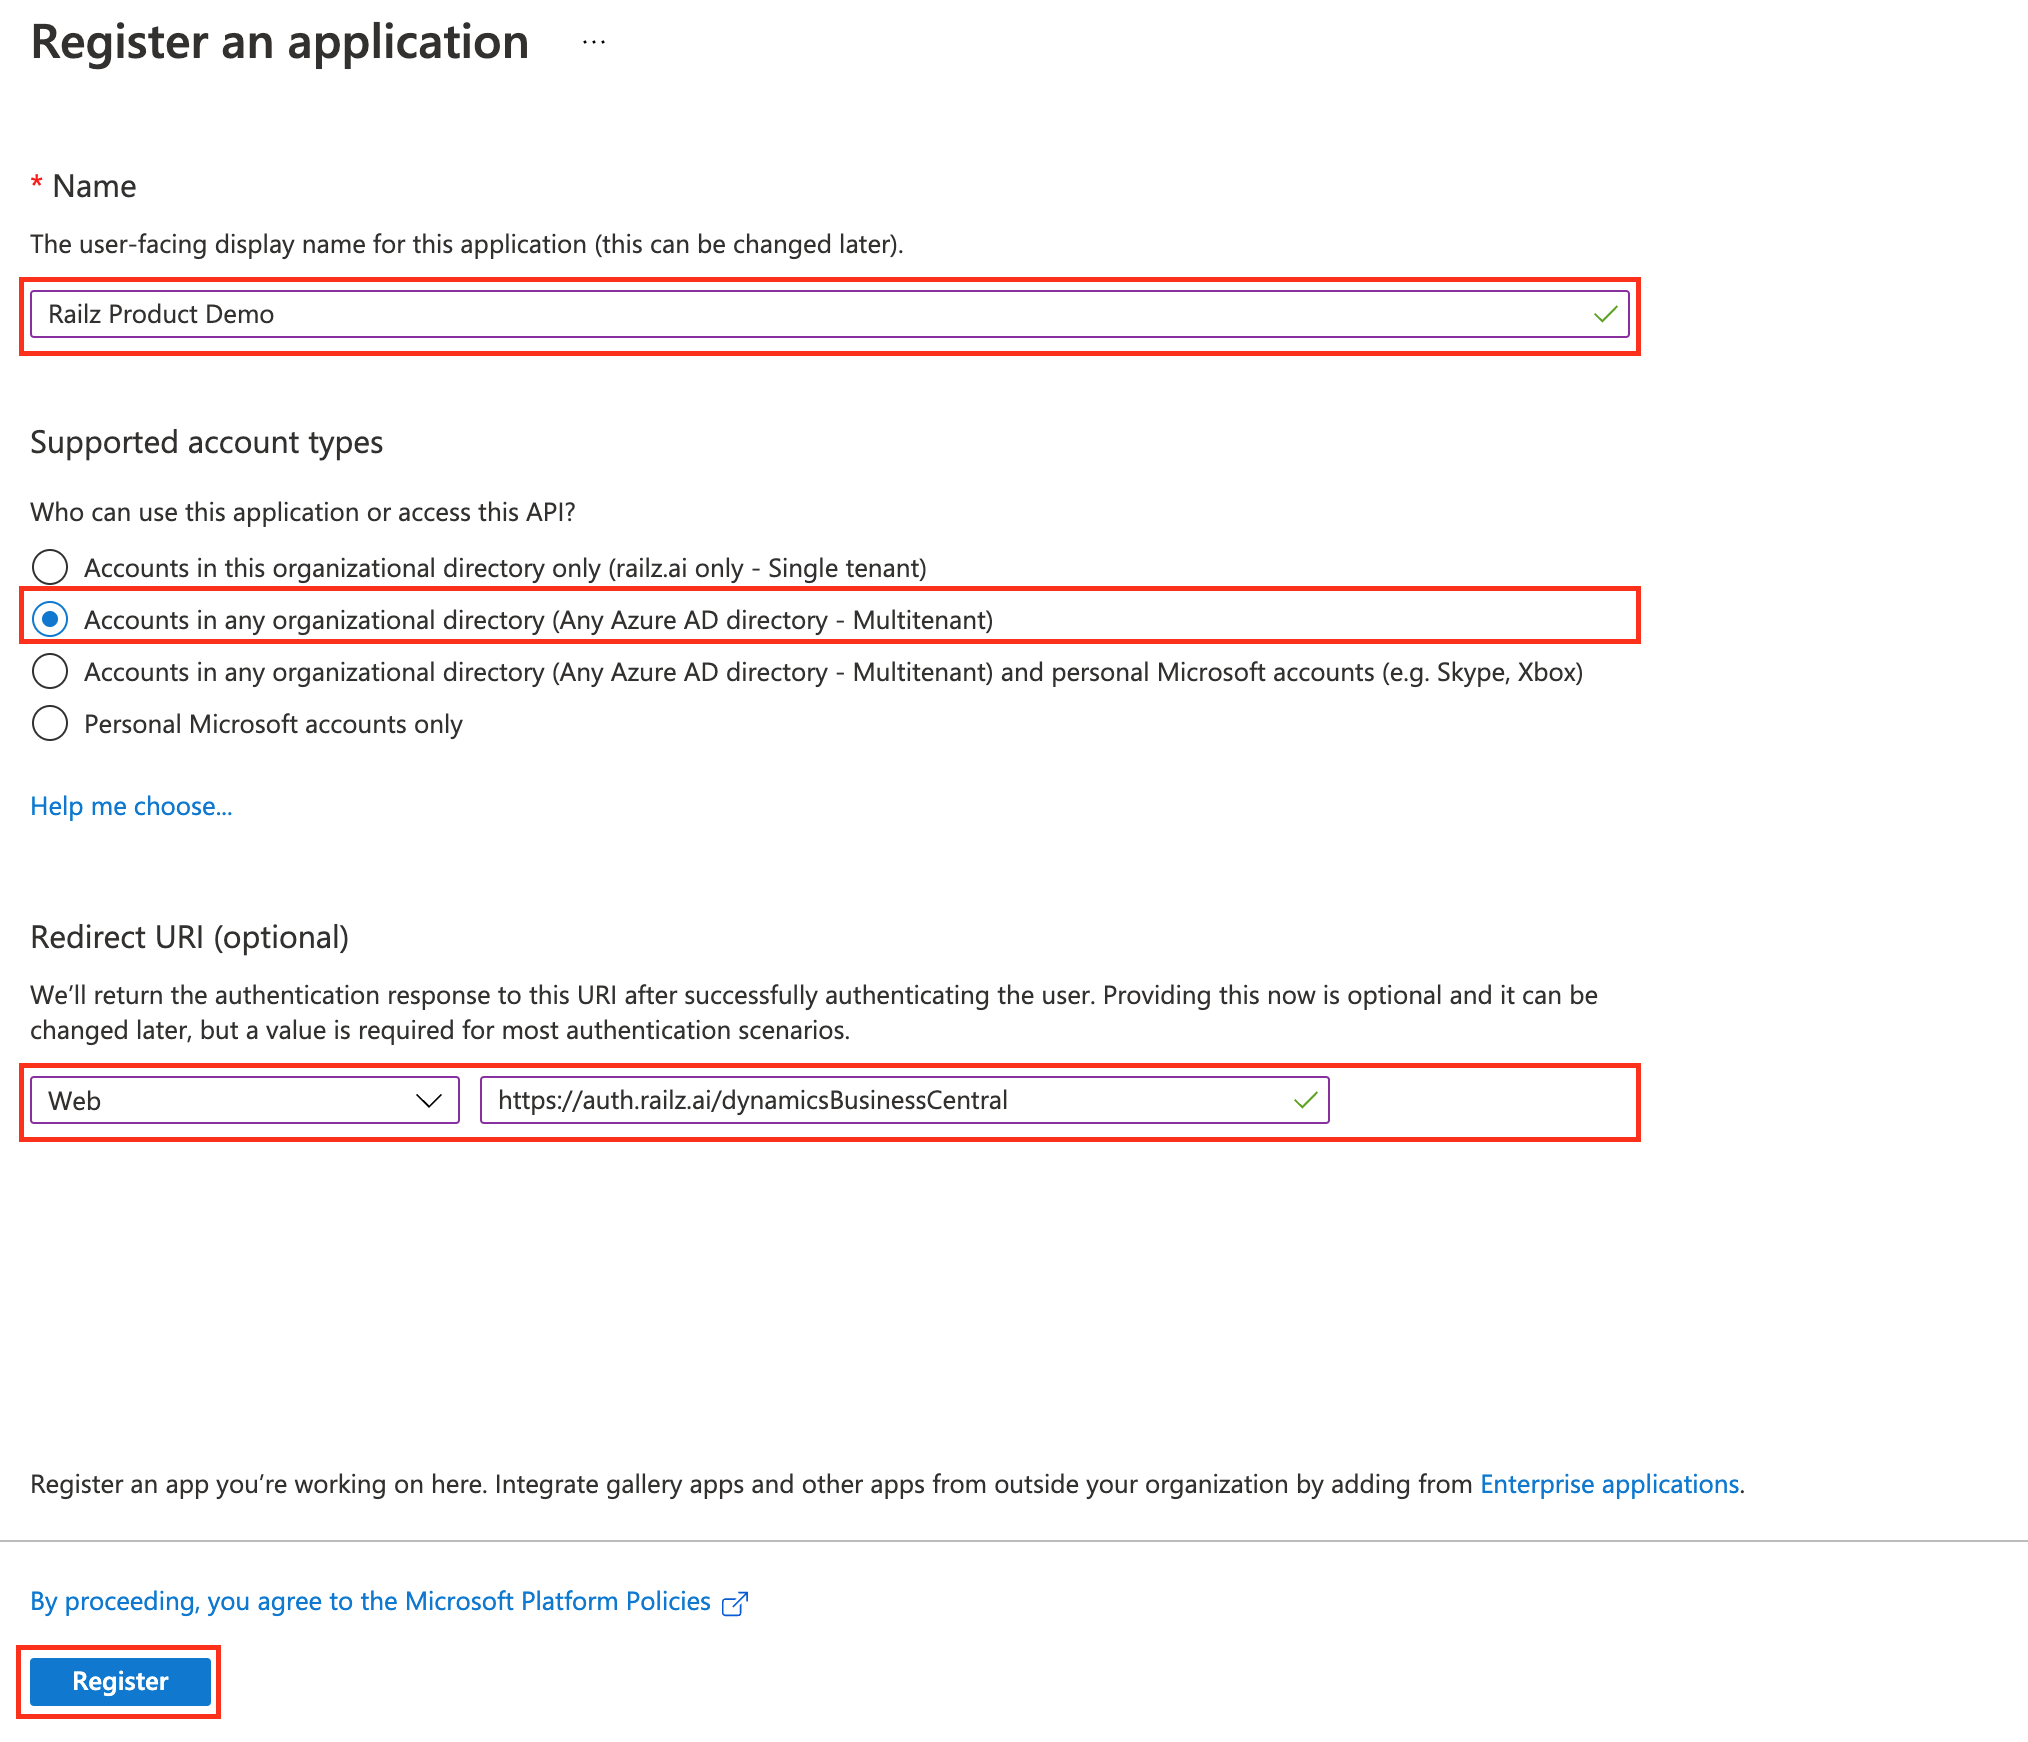
New app registration in Azure Active Directory. Click to Expand.
- The application Name is displayed to your users when connecting, so should have your company or application name.
- Under Redirect URI, select Web and then enter
<https://auth.railz.ai/dynamicsBusinessCentral>. - Click Register. Once the app is created you will be redirected automatically to the Applications page where you will see your Client ID. You'll need these for the next stage of the process.
Your Client ID will not be displayed after you leave this page. So make sure you store this somewhere safe.

Azure Active Directory app details. Click to Expand.
- Click Add a certificate or secret.
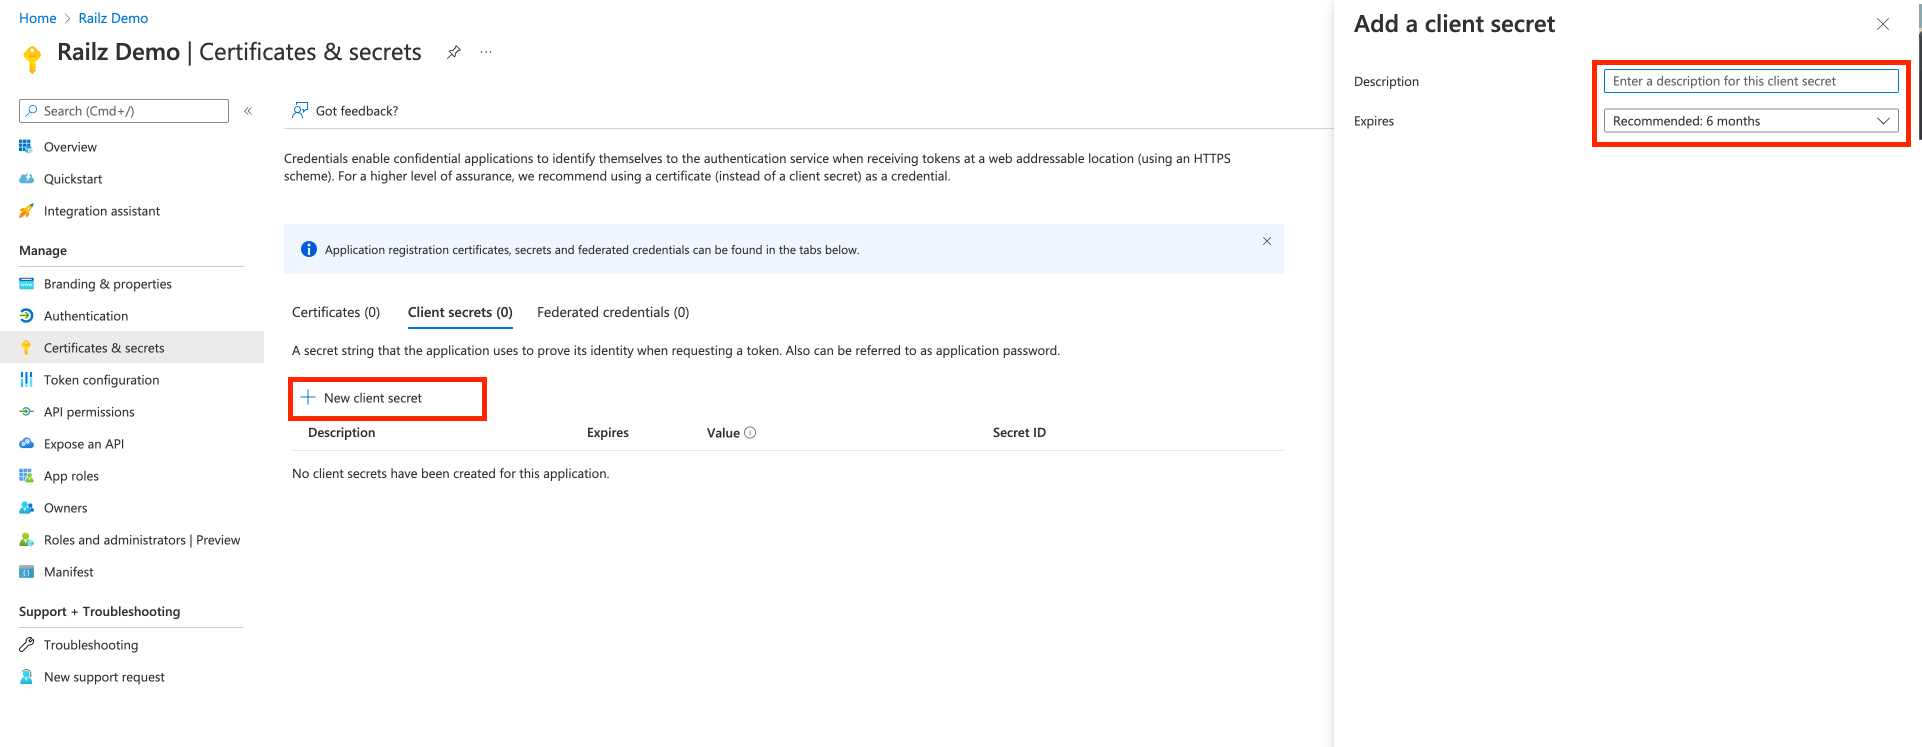
Azure Active Directory certificates & secrets page. Click to Expand.
- In the Add a client secret dialogue box. enter a short Description for your client secret to make it easier to find. Under Expires, select the most appropriate option that complies with your company's security policy.
- Click Add. Your client secret is generated and displayed at the bottom of the page. The Secret Value won't be displayed again in full so copy it and store it somewhere safe. You'll need these for the next stage of the process.
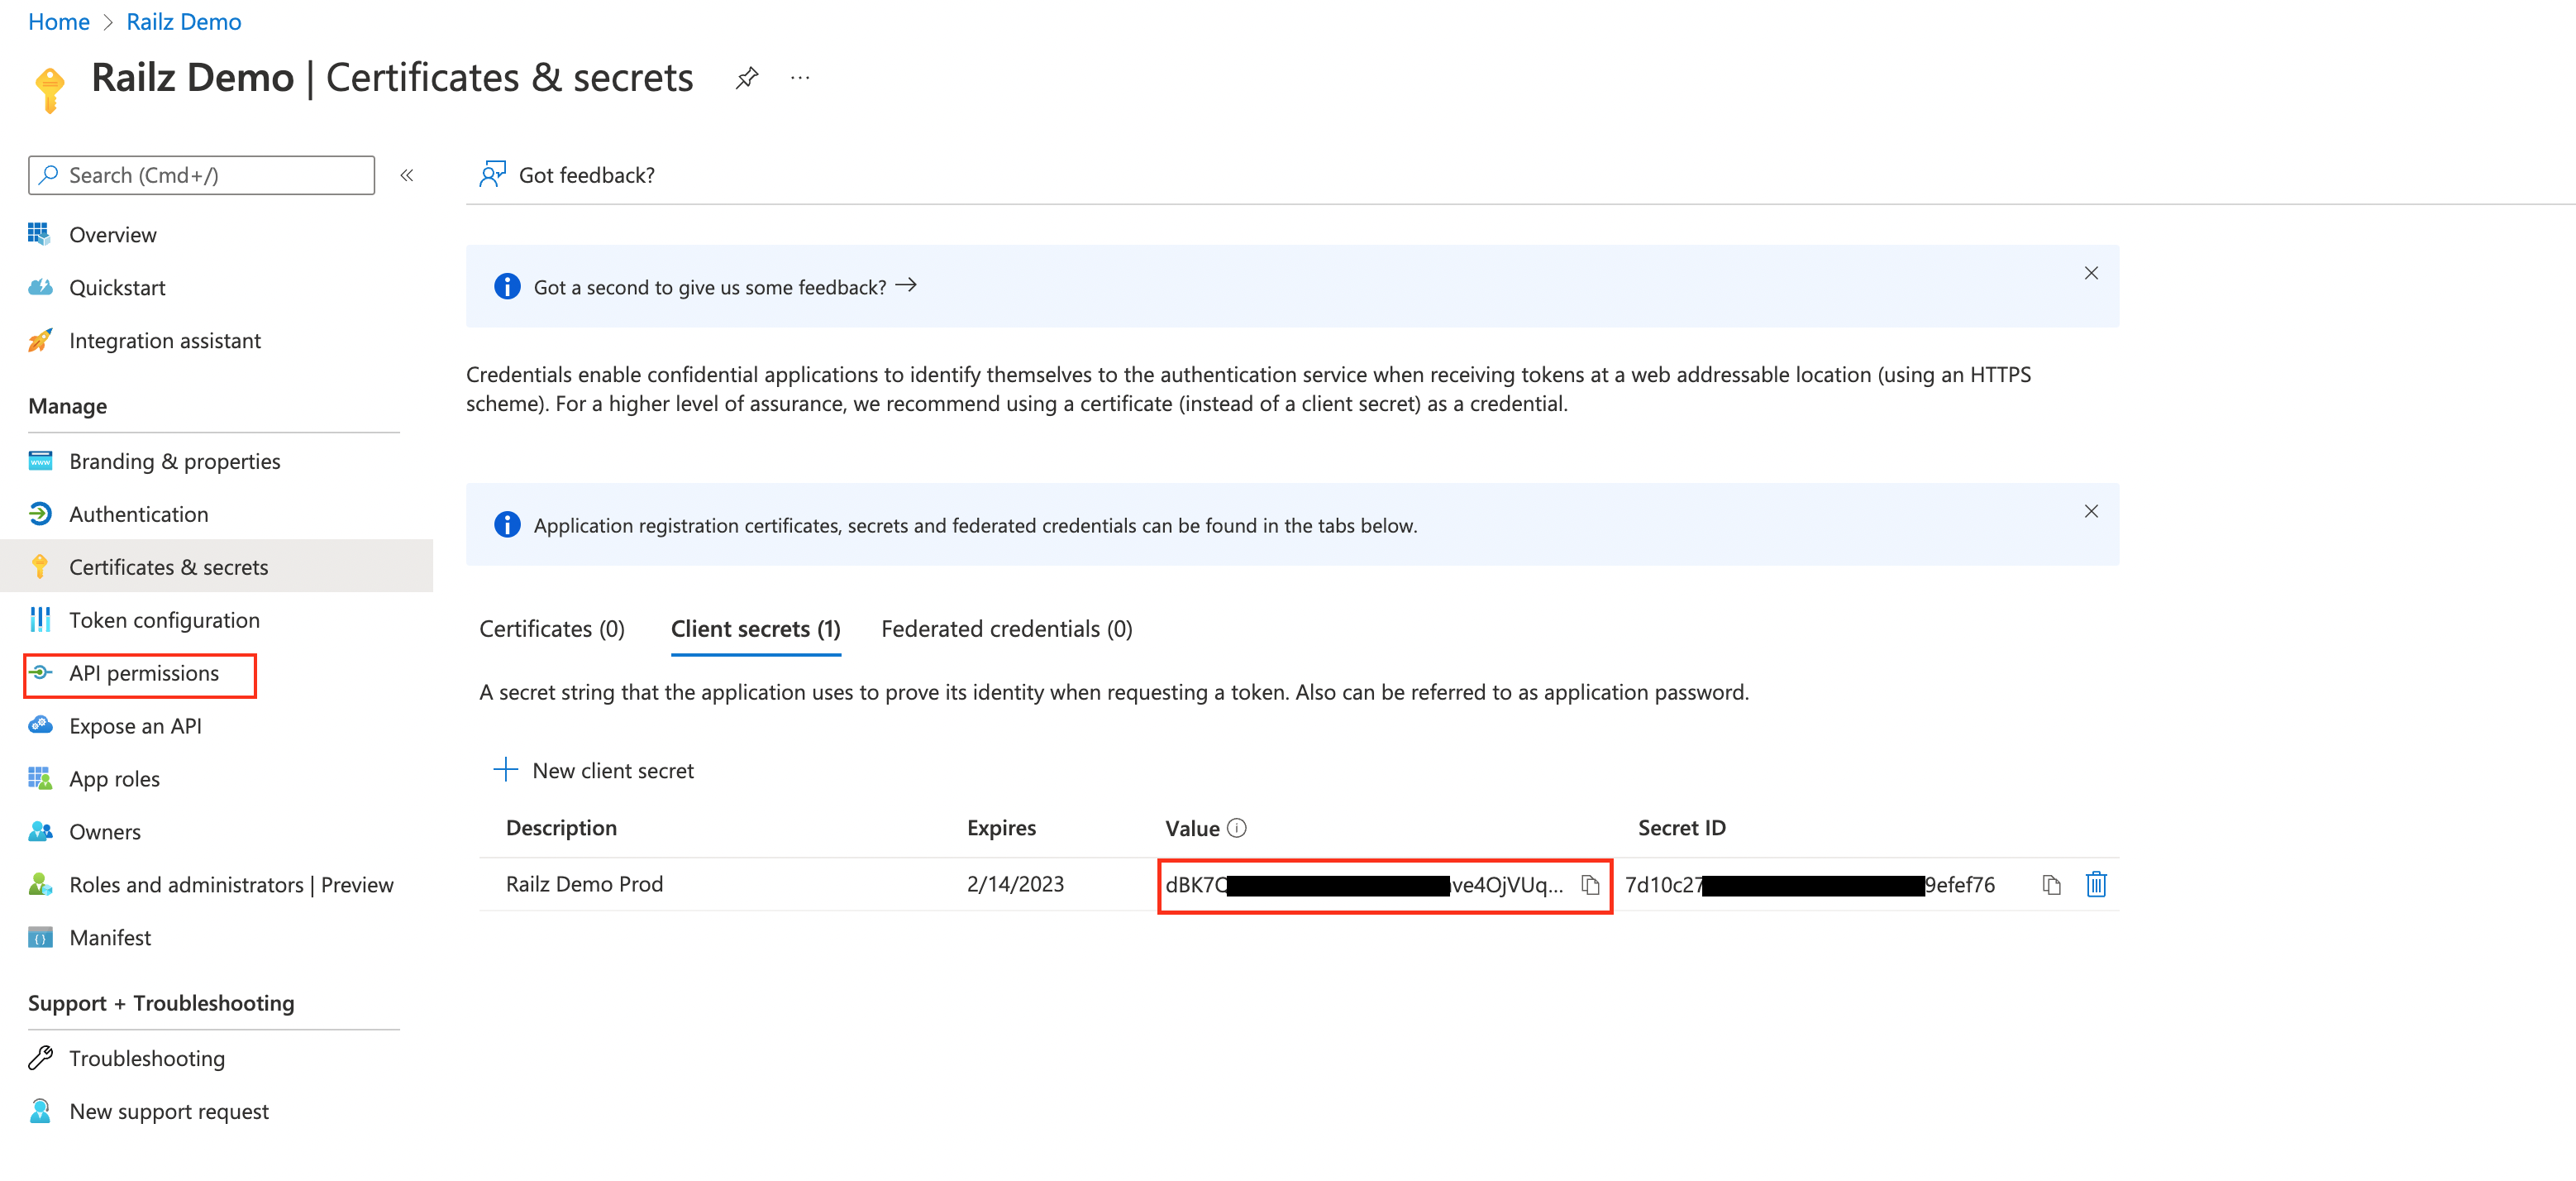
Azure Active Directory - Client Secret. Click to Expand.
- As a final step, you will need to update the access permissions for your application, which control the data that your app can access in Dynamics 365 Business Central. In the left sidebar navigation menu, go to API permissions, then click + Add a permission.
- In the Request API permissions menu, select Select “Dynamics 365 Business Central”.
- Click Delegated permissions, then choose both user_impersonation and Financials.ReadWrite.All
- Click Add permissions, then above the listed permissions, click Grant admin consent, and click Yes to confirm your change. Note that this option may not be available for all subscription types.
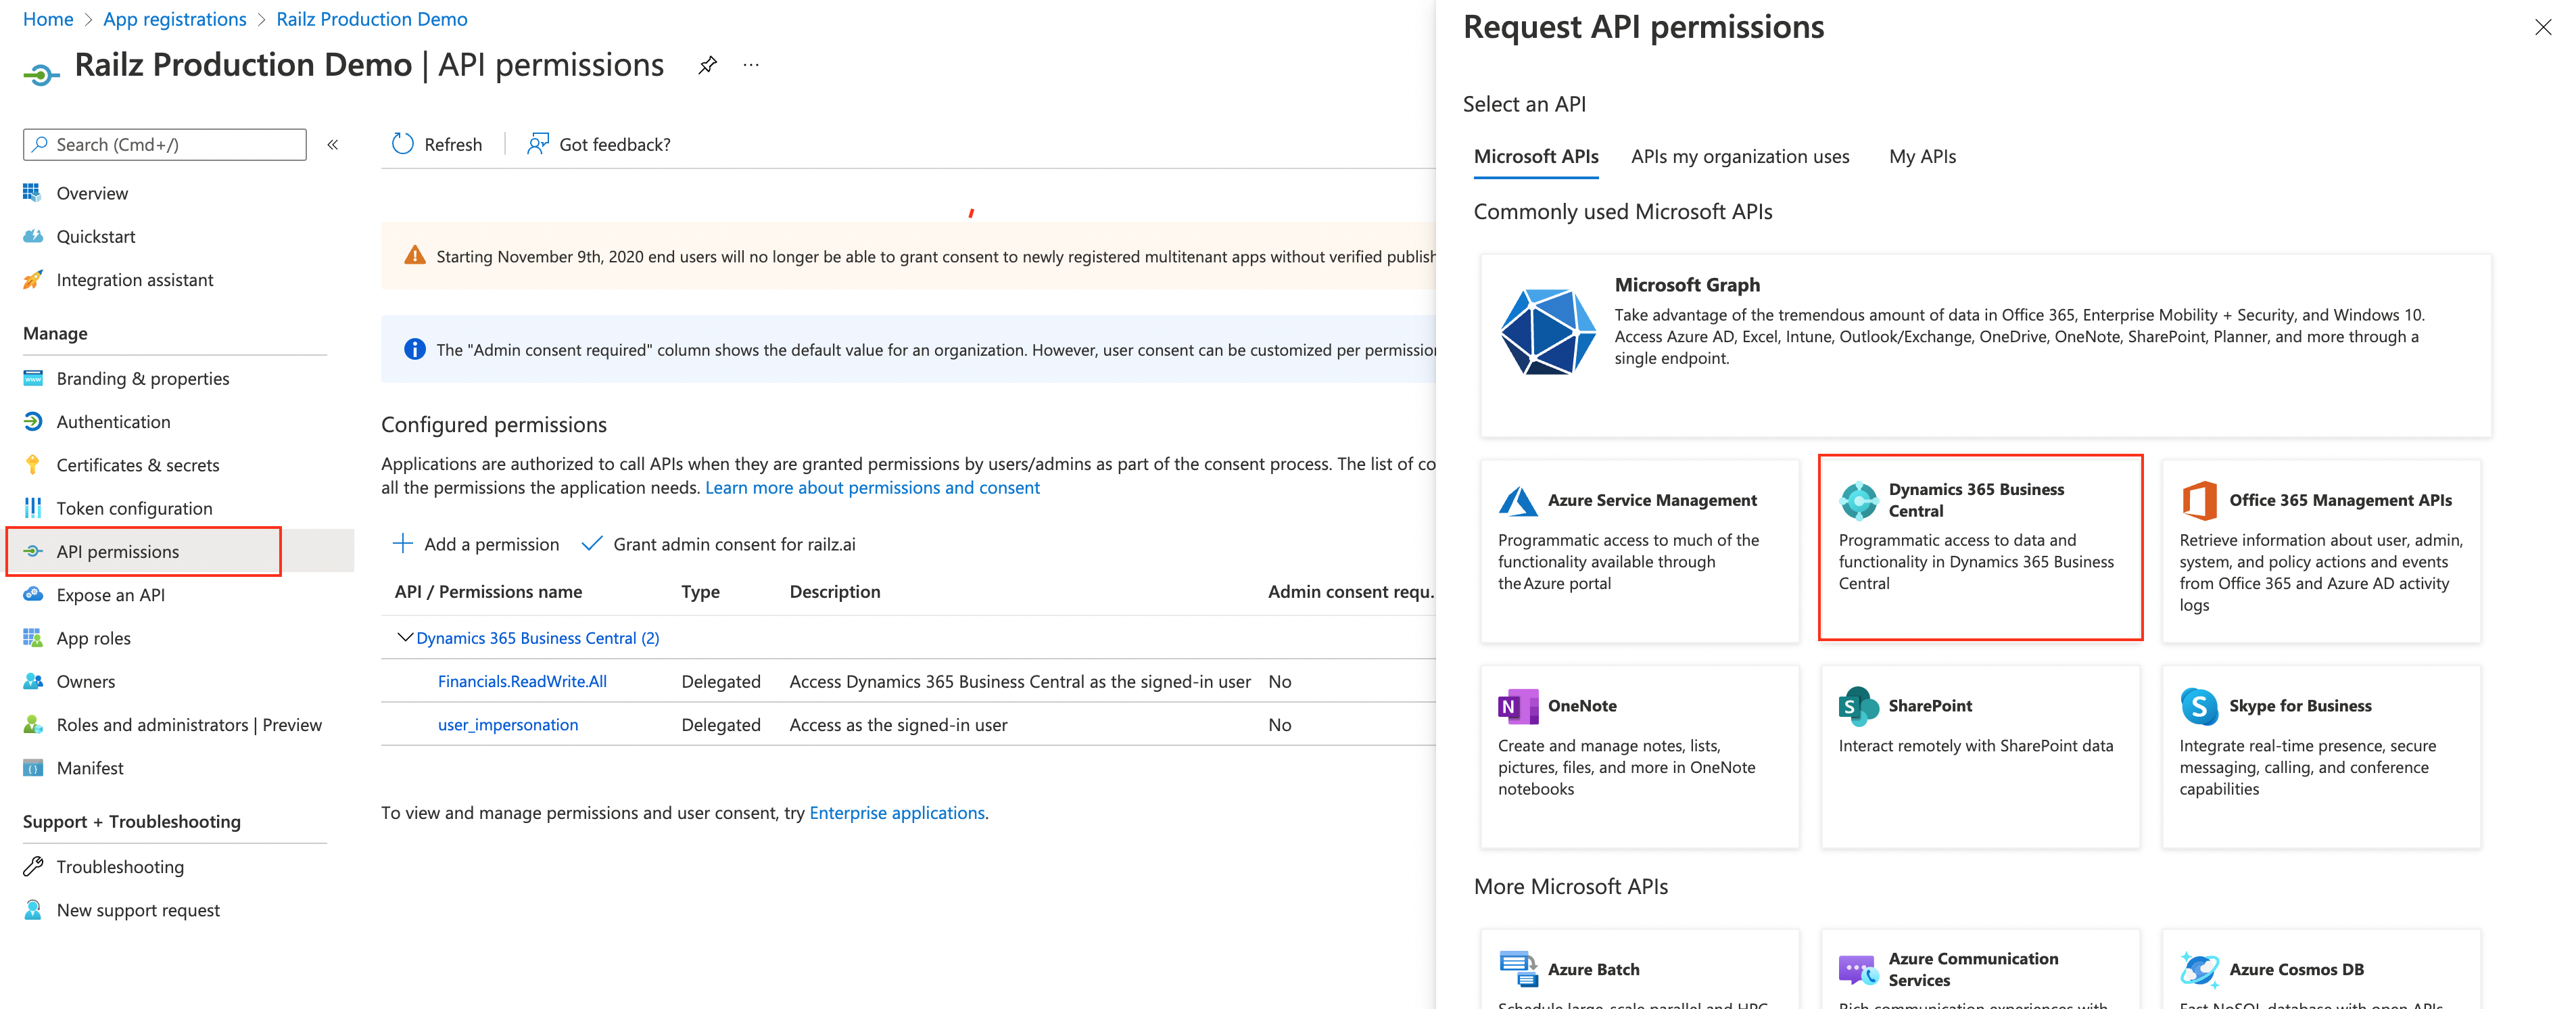
Azure Active Directory API permissions page. Click to Expand.
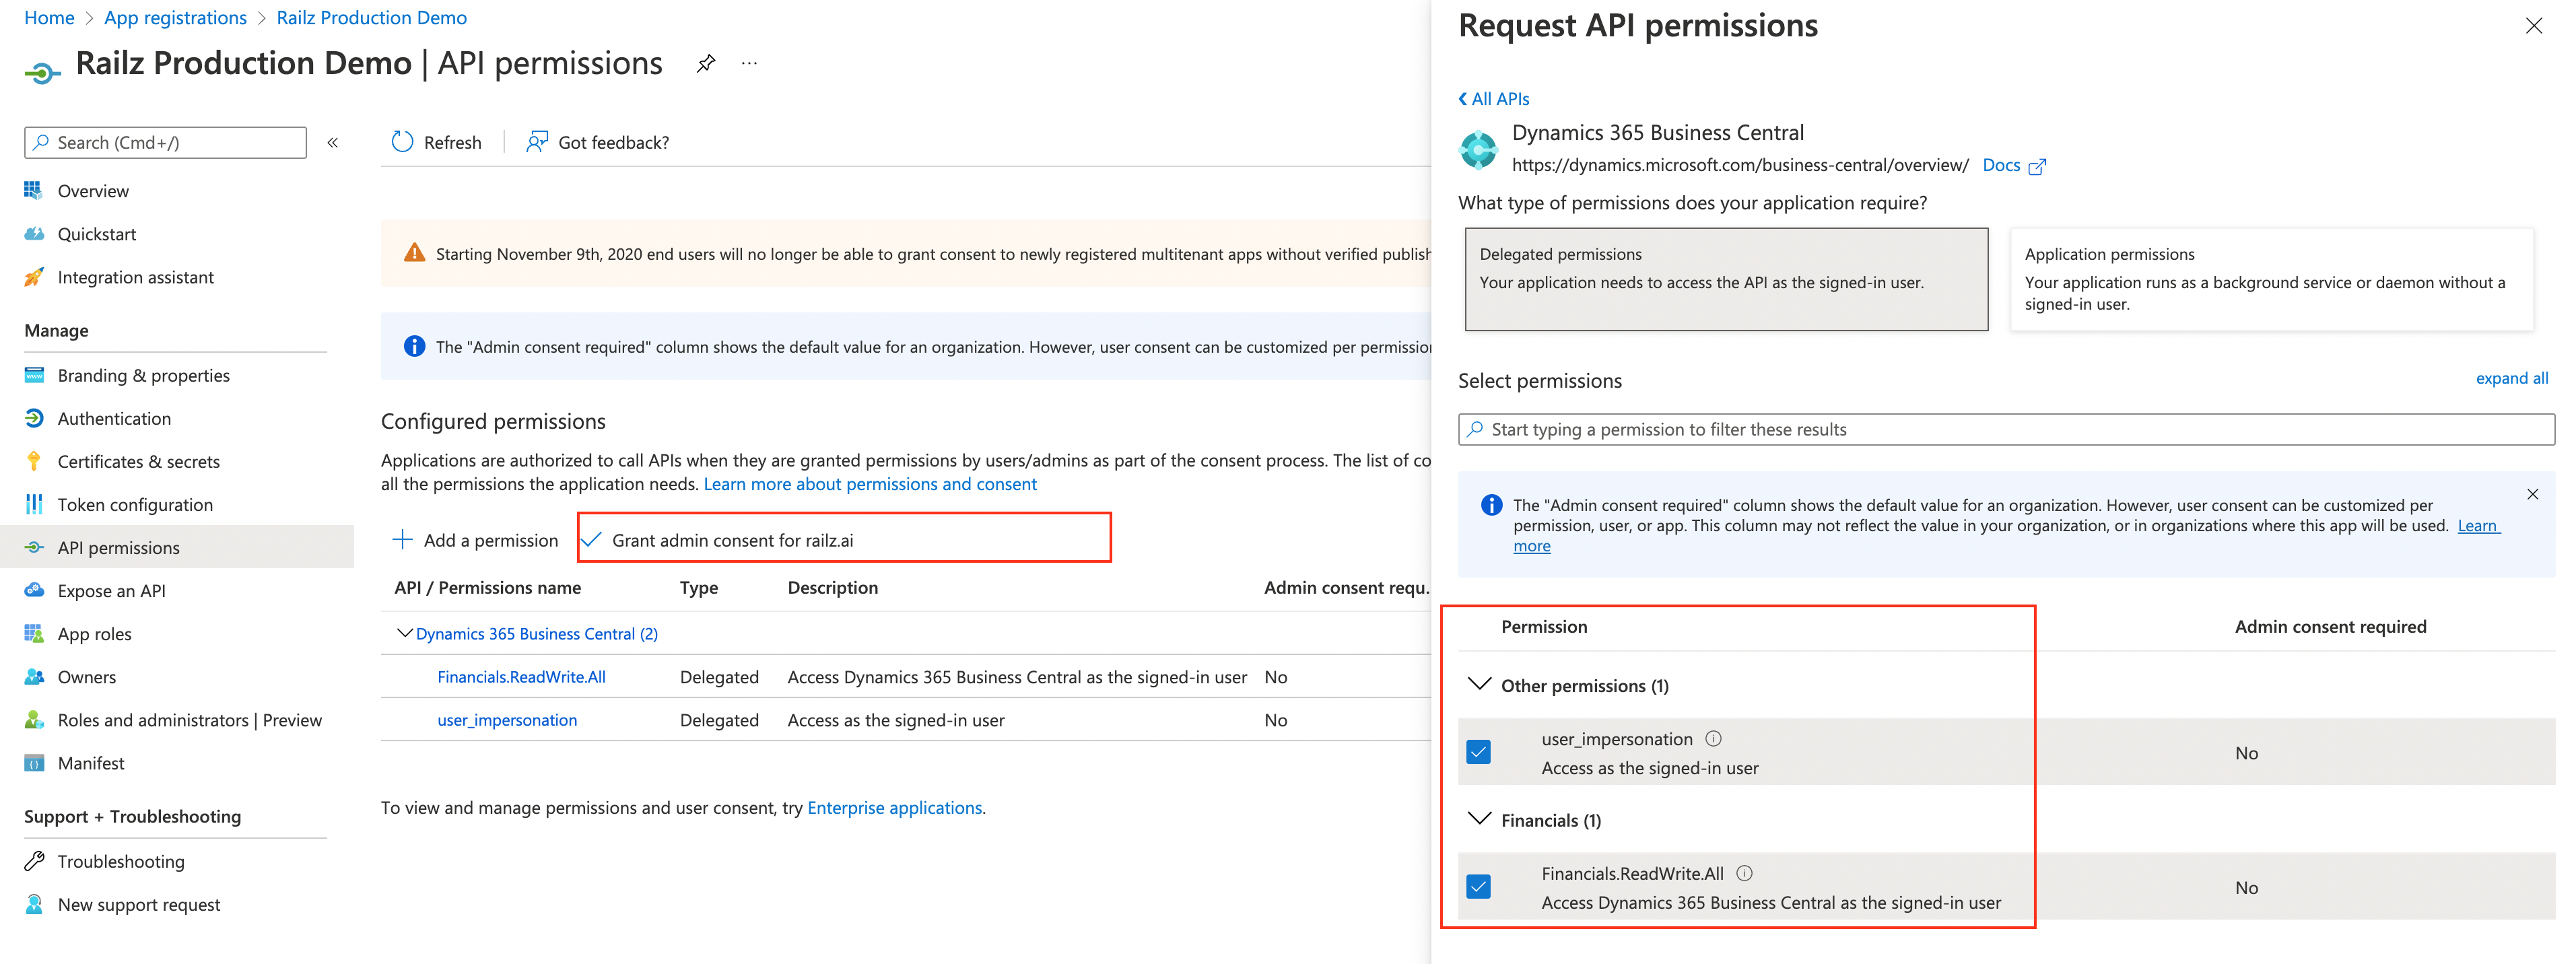
Azure Active Directory API permissions page. Click to Expand.
Add your Secure Keys to Accounting Data as a Service™
- Open the Dashboard and log in.
- In the left sidebar navigation menu, go to Integrations > Accounting.
- Scroll down to the MS Dynamics 365 Business Central integration and click Configure.
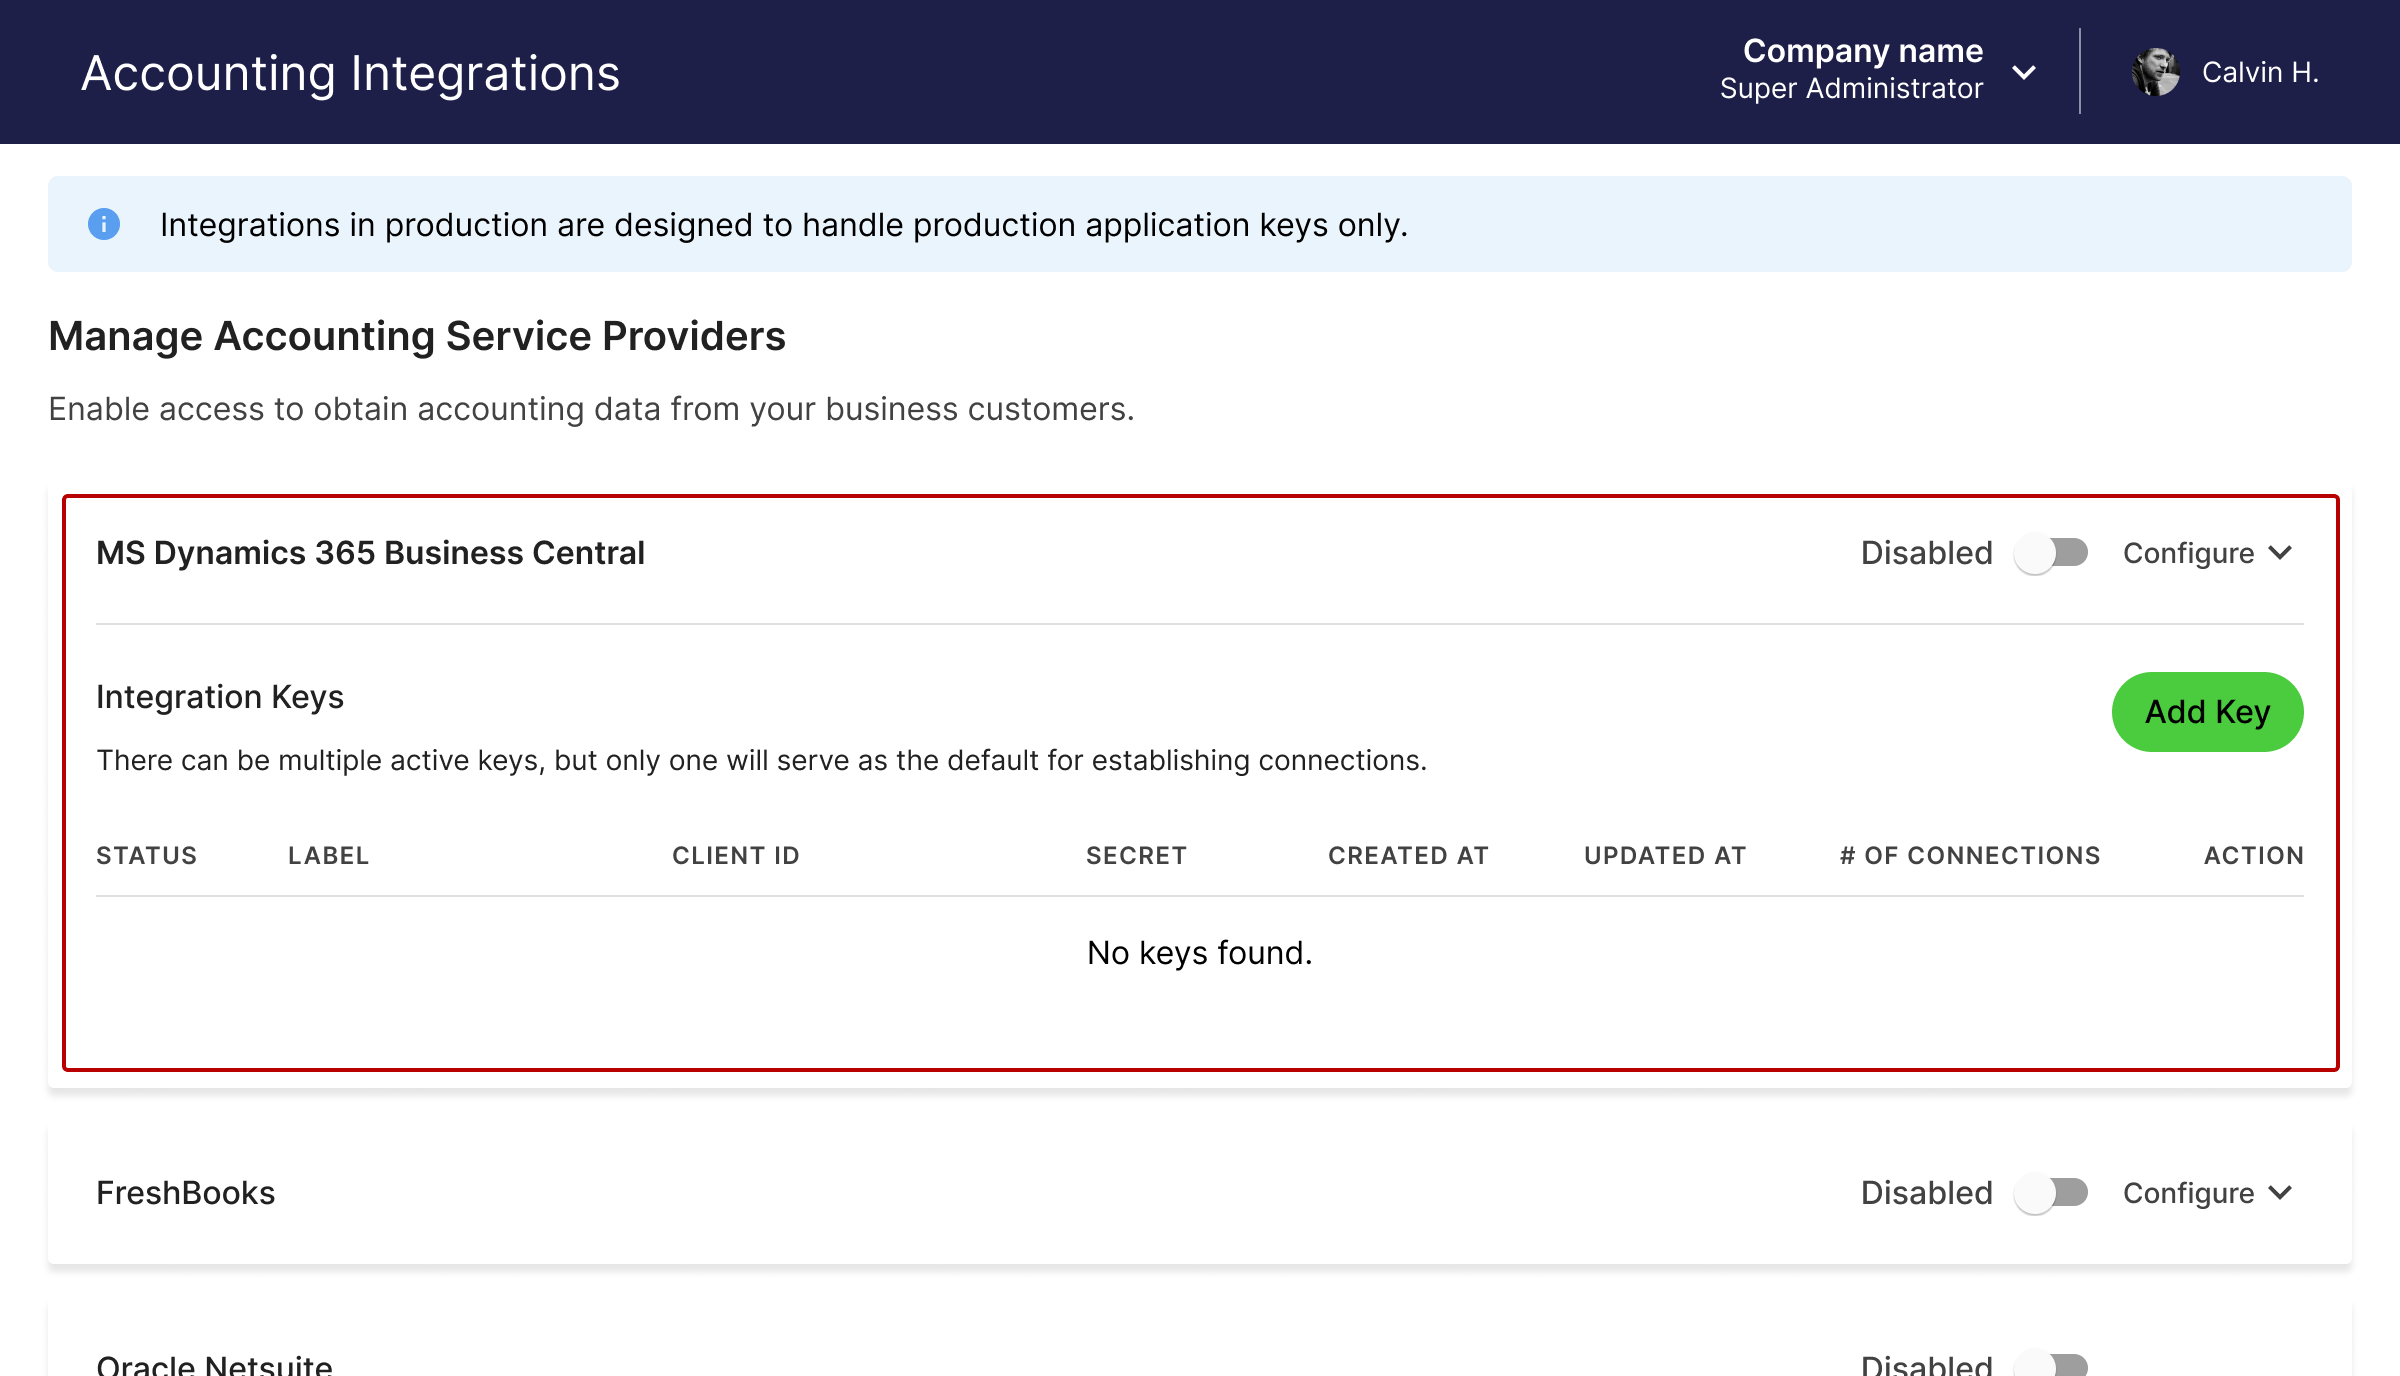
Accounting integrations page in Accounting Data as a Service™ Dashboard. Click to Expand.
- Paste in your Client ID and Client Secret from the above steps, and then click Save & Enable.
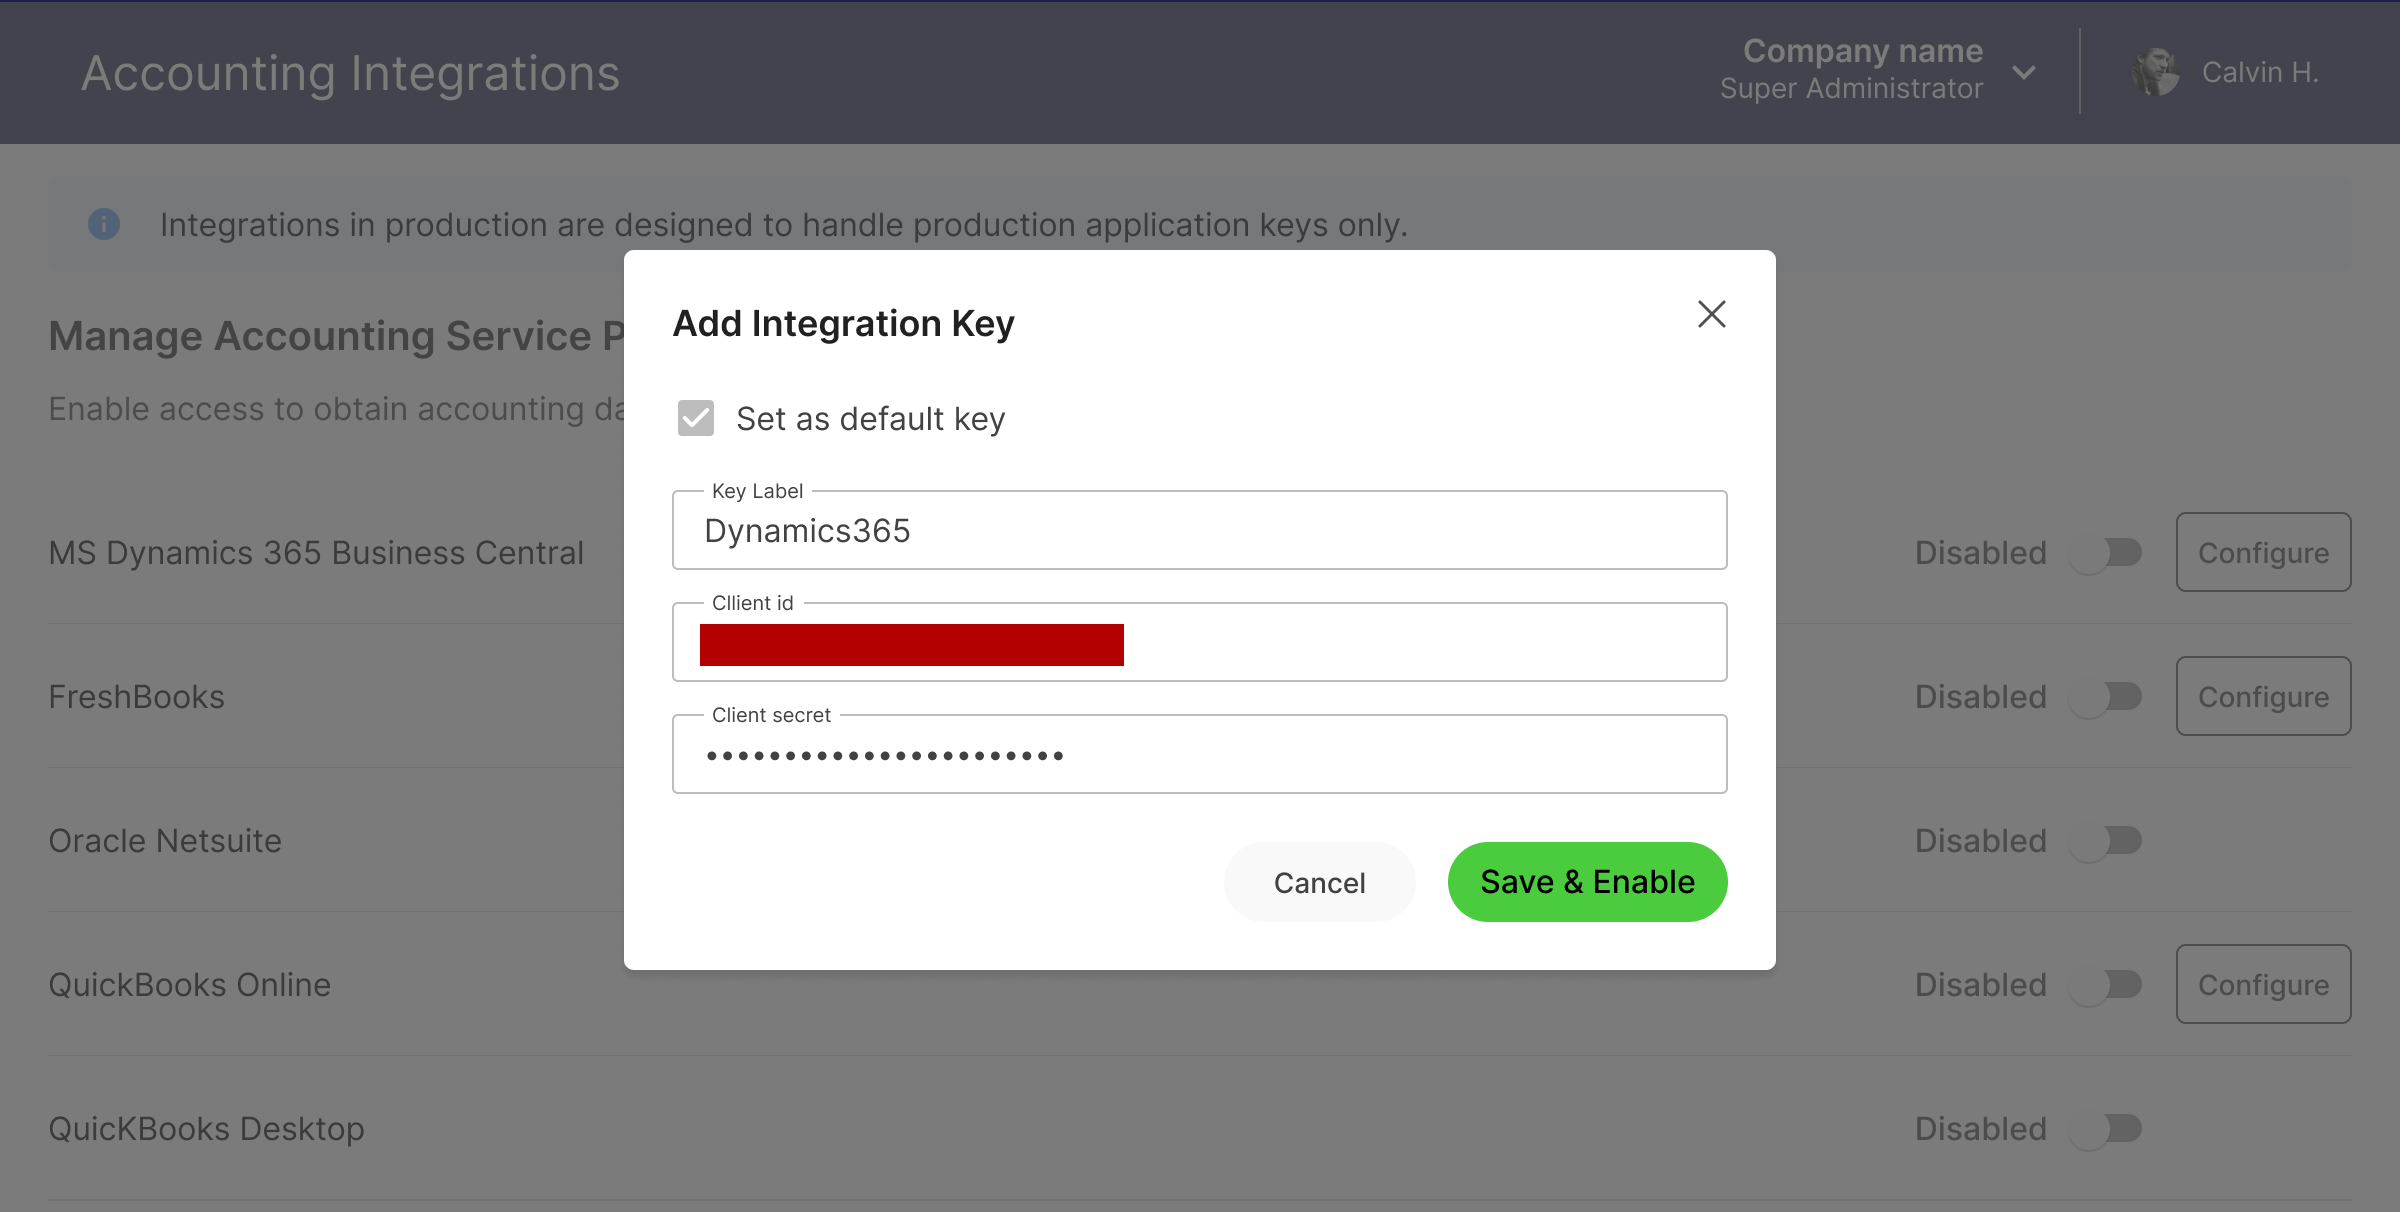
Configure the Dynamics 365 Business Central integration modal. Click to Expand.
Business Authorization Flow
Depending on the end user's Azure Active Directory settings for Dynamics 365 Business Central they may need the connection to your app to be approved by an admin of their Azure Active Directory. If this is the case the user will be guided to request access and the admins will be notified. Once approved the user can run through the link flow process again to complete the connection to your app.
Multiple Environment selection (Sandbox and Production)
- When connecting their Dynamics 365 Business Central account, Accounting Data as a Service™ will only allow access to production accounts.
- According to their access level, a company called Cronus may also be available for selection in their account. This is a Microsoft test company populated with sample data.
Updated over 1 year ago