
Setup Wave
Setup Wave
Before you can access data from users using Wave for their accounting, you need to set up a Wave integration in the Dashboard. You'll need to:
- Create a new application on Wave's developer portal.
- Retrieve your application's secure keys from the Wave developer portal.
- Add your secure keys to Accounting Data as a Service™.
Create your Application
- Create an account at wave.com.
- Once logged in, visit Wave's Manage Applications page and click Create an application
- Enter the following:
- In the Name box, add a short name for your application. Your customers see this when they authorize your connection to their account.
- In the Redirect URIs box, enter the URI
https://auth.railz.ai/wave
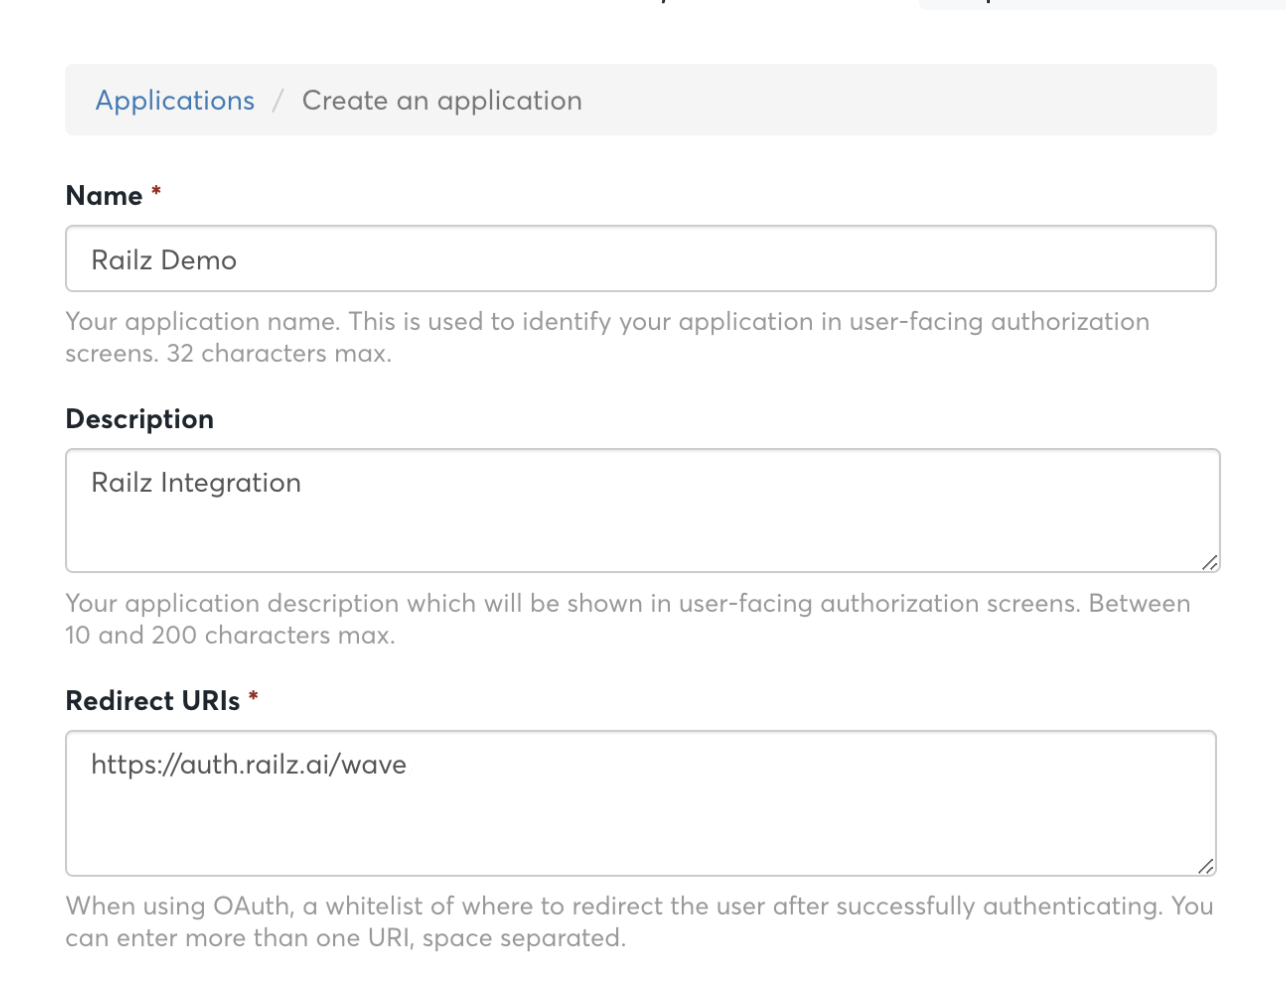
Create a Wave application form page. Click to Expand.
- Read and accept Wave's Terms of Use, and then click Create your application.
- You will be navigated back to Wave's Manage Applications page. Select the application you created per the steps above.

Manage the Wave application page with a created app. Click to Expand.
- Keep this tab open to copy the ClientID and Client Secret into the next stage of the process.

Created Wave applications page with client id and secret. Click to Expand.
Add your Secure Keys to Accounting Data as a Service™
- Open the Dashboard and log in.
- In the left sidebar navigation menu, go to Integrations > Accounting.
- Scroll down to the Wave integration and click Configure.

Accounting integrations page in Accounting Data as a Service™ Dashboard. Click to Expand.
- Paste in your Client ID and Client Secret, and then click Save & Enable.
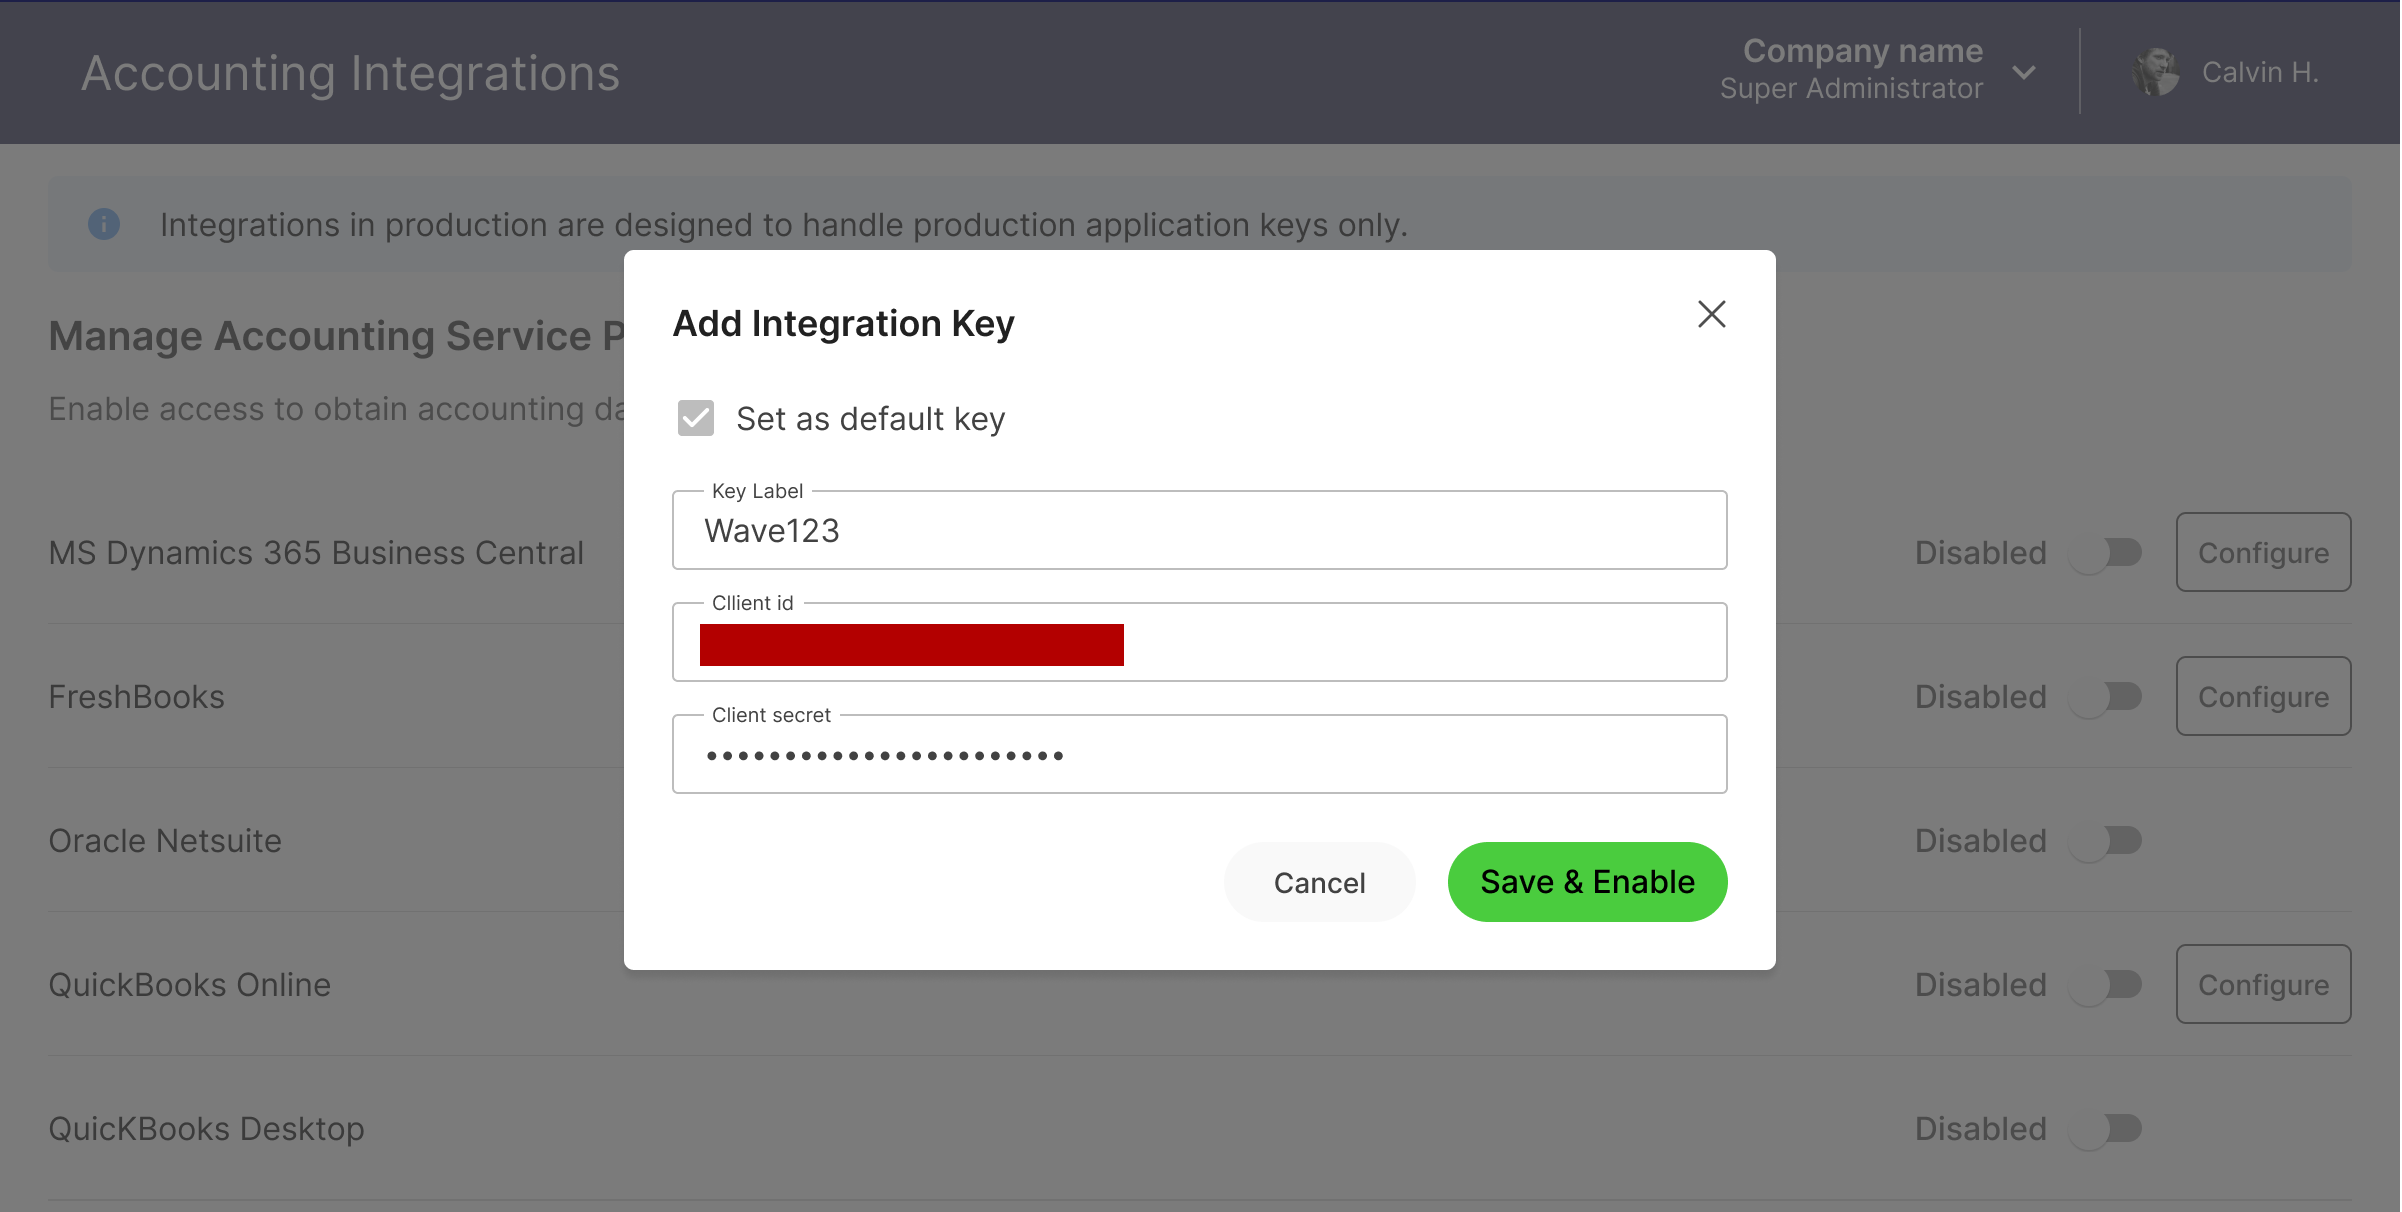
Configure the Wave integration modal. Click to Expand.
Updated over 1 year ago
Did this page help you?