Setup QuickBooks Desktop
Enable QuickBooks Desktop
Unlike most other integrations, QuickBooks Desktop does not require any application credentials for accessing the API. Your business customers will be asked to download, install and configure a connector along with a configuration file (See next step).
- Open the Dashboard and log in.
- In the left sidebar navigation menu, go to Integrations > Accounting.
- Scroll down to the QuickBooks Desktop integration and use the toggle to update the QuickBooks Desktop integration from Disabled to Enabled.
Your Business Customers' Connection Flow
Your business customers will be guided through the flow below to successfully connect & authorize access to their QuickBooks Desktop account.
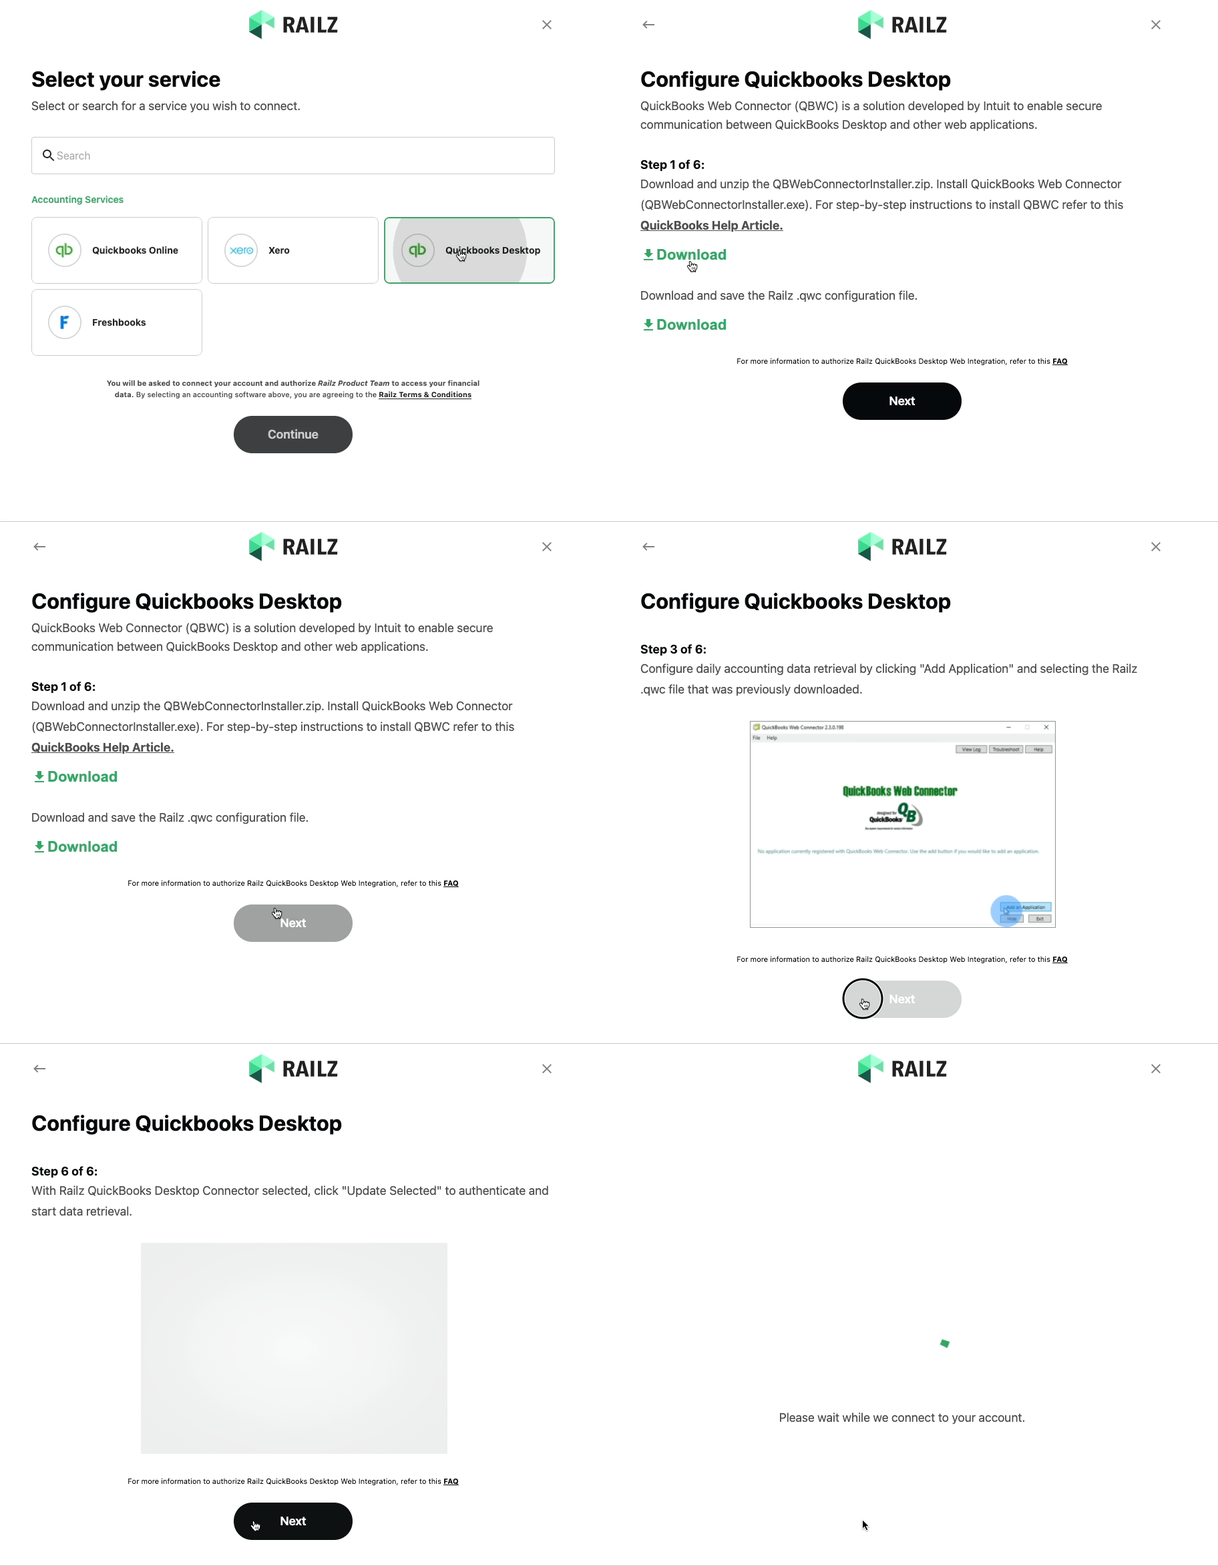
Connect QuickBooks Desktop connection flow. Click to Expand.
If your business customers do not follow these steps correctly the connection & authorization process will fail.
1. Download QuickBooks Web Connector
QuickBooks Web Connector
We support Quickbooks Desktop version 2.3.0.215.
QuickBooks Web Connector (QBWC) is a solution developed by Intuit to enable secure communication between QuickBooks Desktop and other web applications. The QuickBooks Web Connector must be run on the same computer where QuickBooks Desktop is installed.
Before starting the connection process, the user must open QuickBooks Desktop and log in to the business they wish to connect.
You should make it clear to your businesses that they must run the connector on the machine they use to access QuickBooks Desktop.
The first step is for the business to download the QuickBooks Web Connector and .qwc configuration file from Connect.
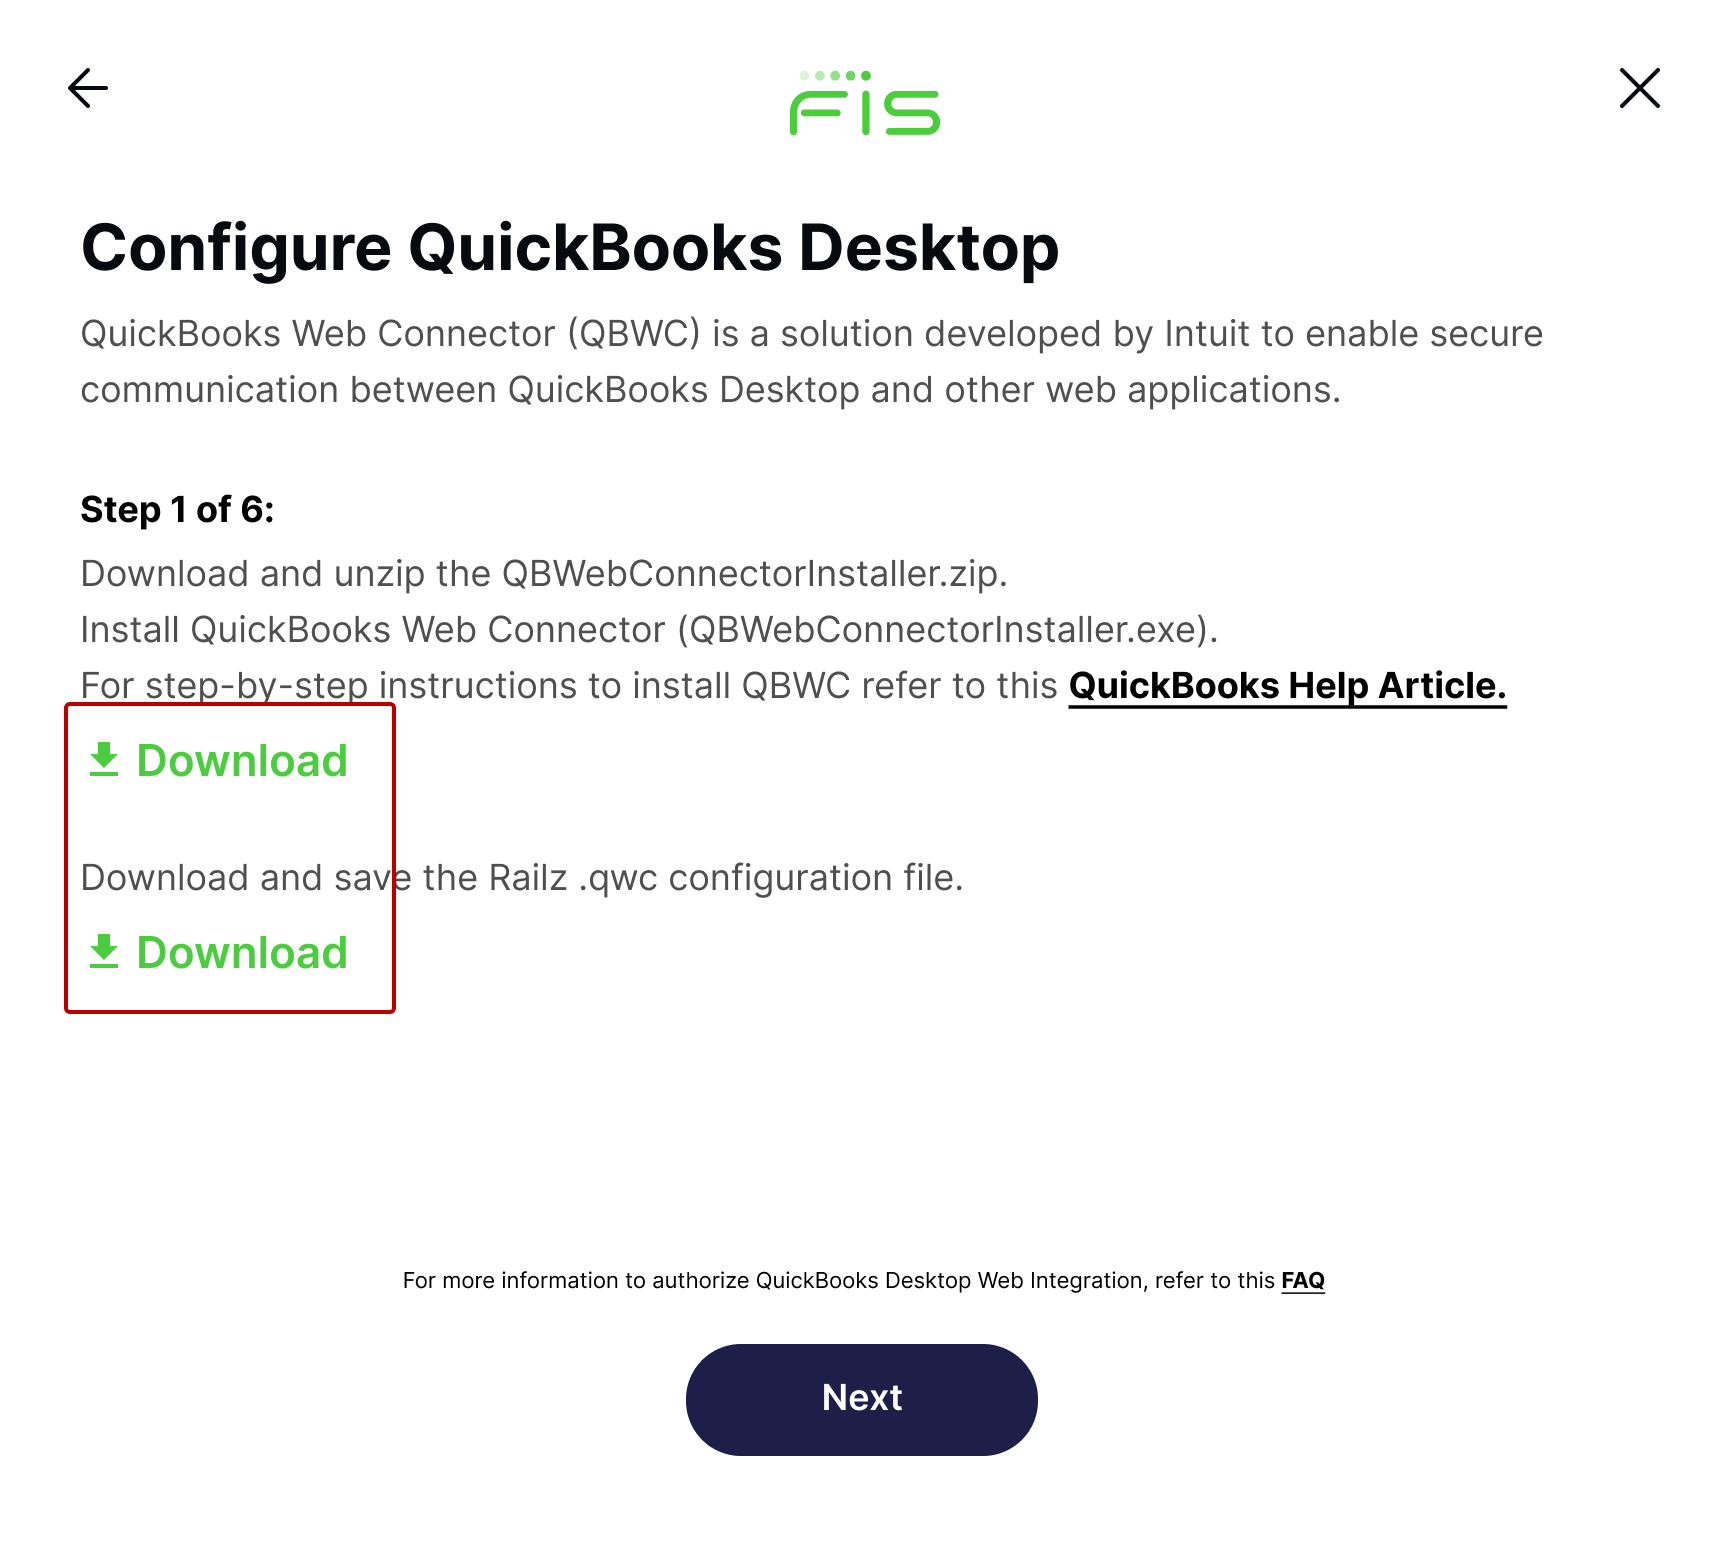
Connect QuickBooks Desktop connection flow step 1. Click to Expand.
QWC Configuration File
- Each business will have access to a unique configuration file with the following name convention: ADaaS-[BUSINESS_NAME].qwc.
- Businesses must save their unique Accounting Data as a Service™ .qwc configuration file before proceeding.
- Note that the QuickBooks Web Connector will require this file.
2. Install QuickBooks Web Connector
Each business should install the QuickBooks Web Connector (QBWebConnectorInstaller.exe).
QuickBooks Web Connector Permissions
The QuickBooks Web Connector operates on a user level, meaning it does not require administrator privileges/rights to run on most systems. Some stricter corporate policies may require admin rights to run; in these instances, users should be familiar with their internal process for requesting permission from their IT department.
3. Configure QuickBooks Web Connector
In steps 2-5 of Connect, a business will be prompted to configure the QuickBooks Web Connector.
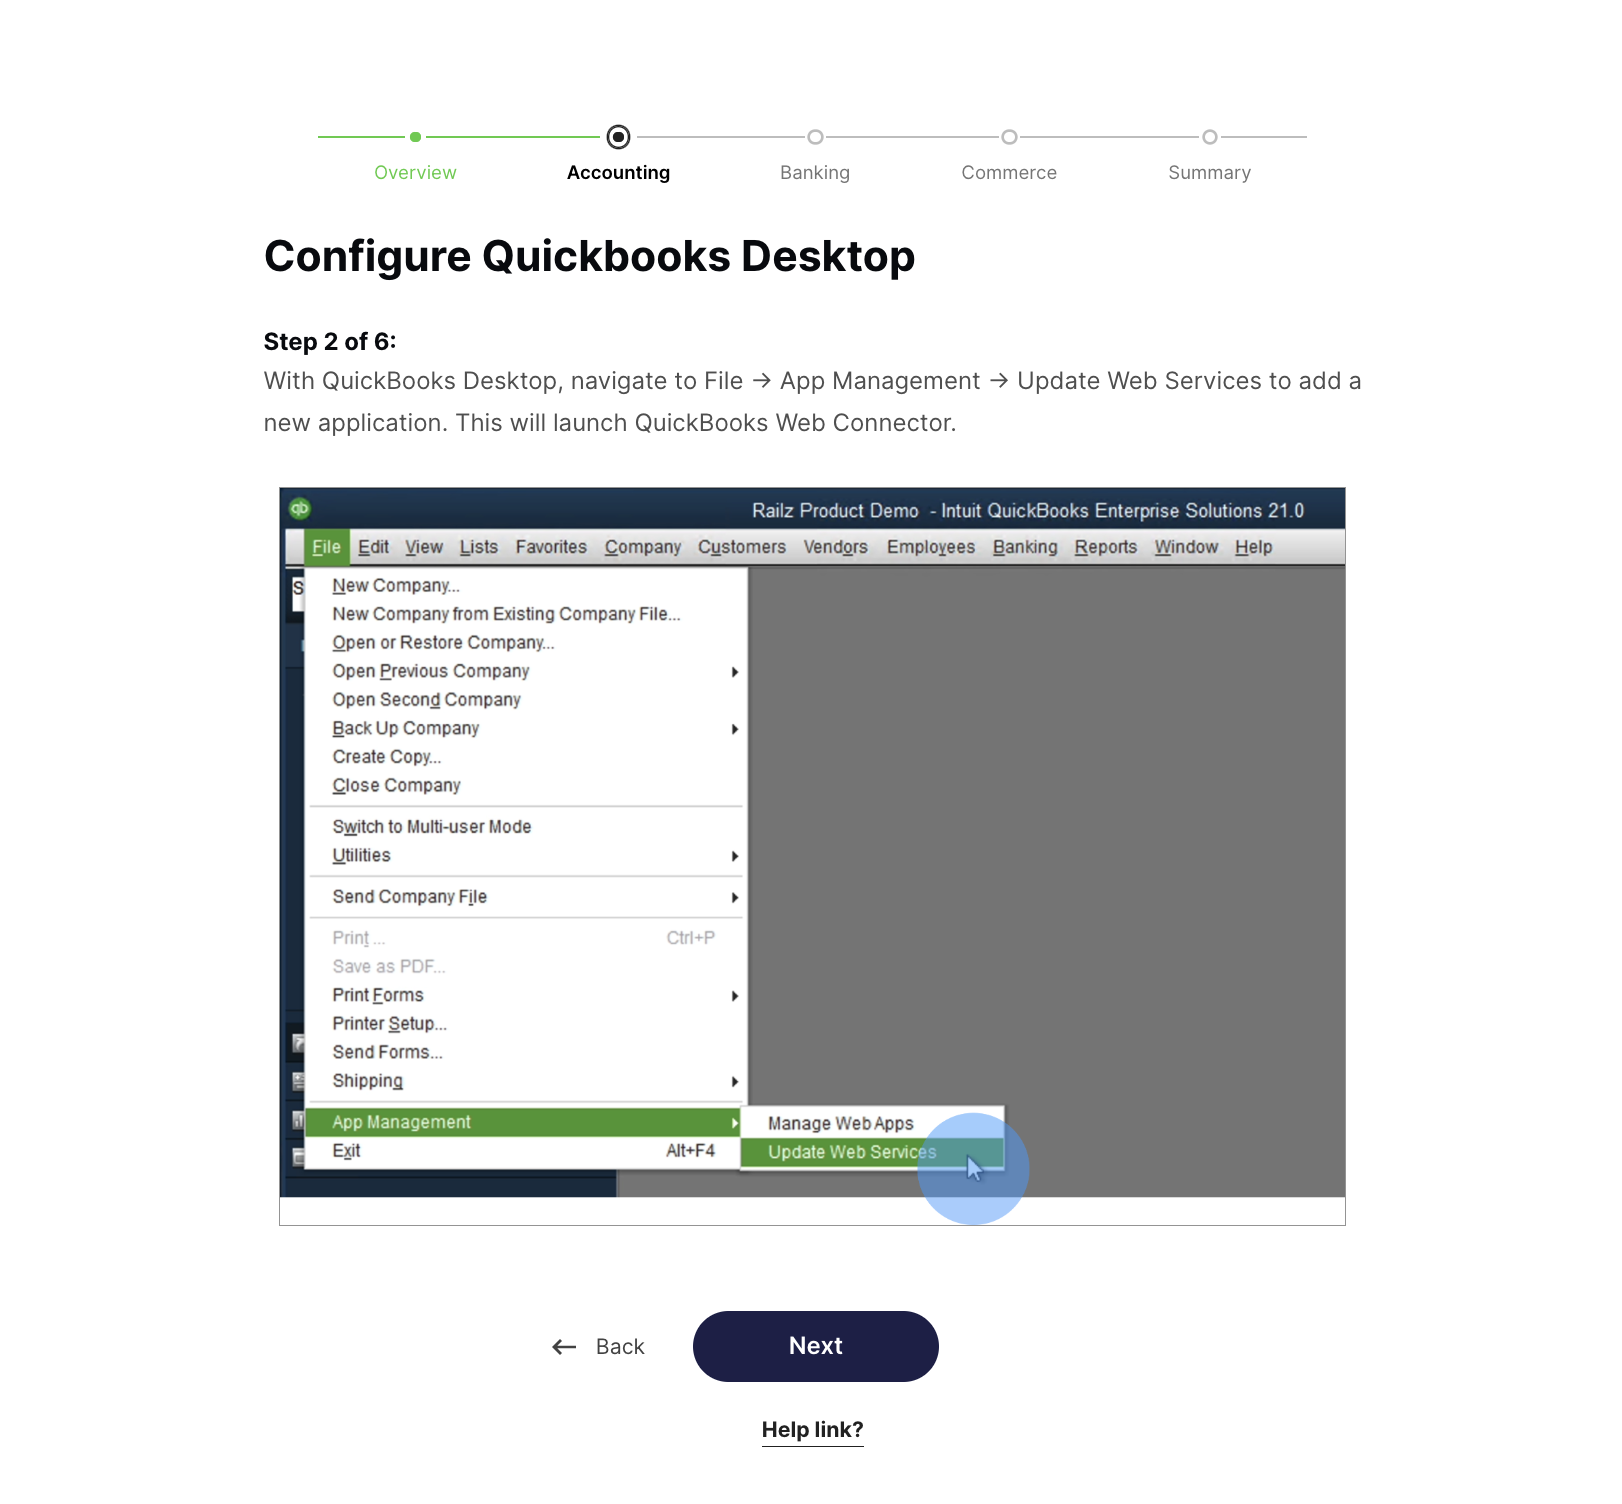
Connect QuickBooks Desktop connection flow step 2. Click to Expand.
- With QuickBooks Desktop open, a business should navigate to File > App Management > Update Web Services to launch the QuickBooks Web Connector and add a new application.
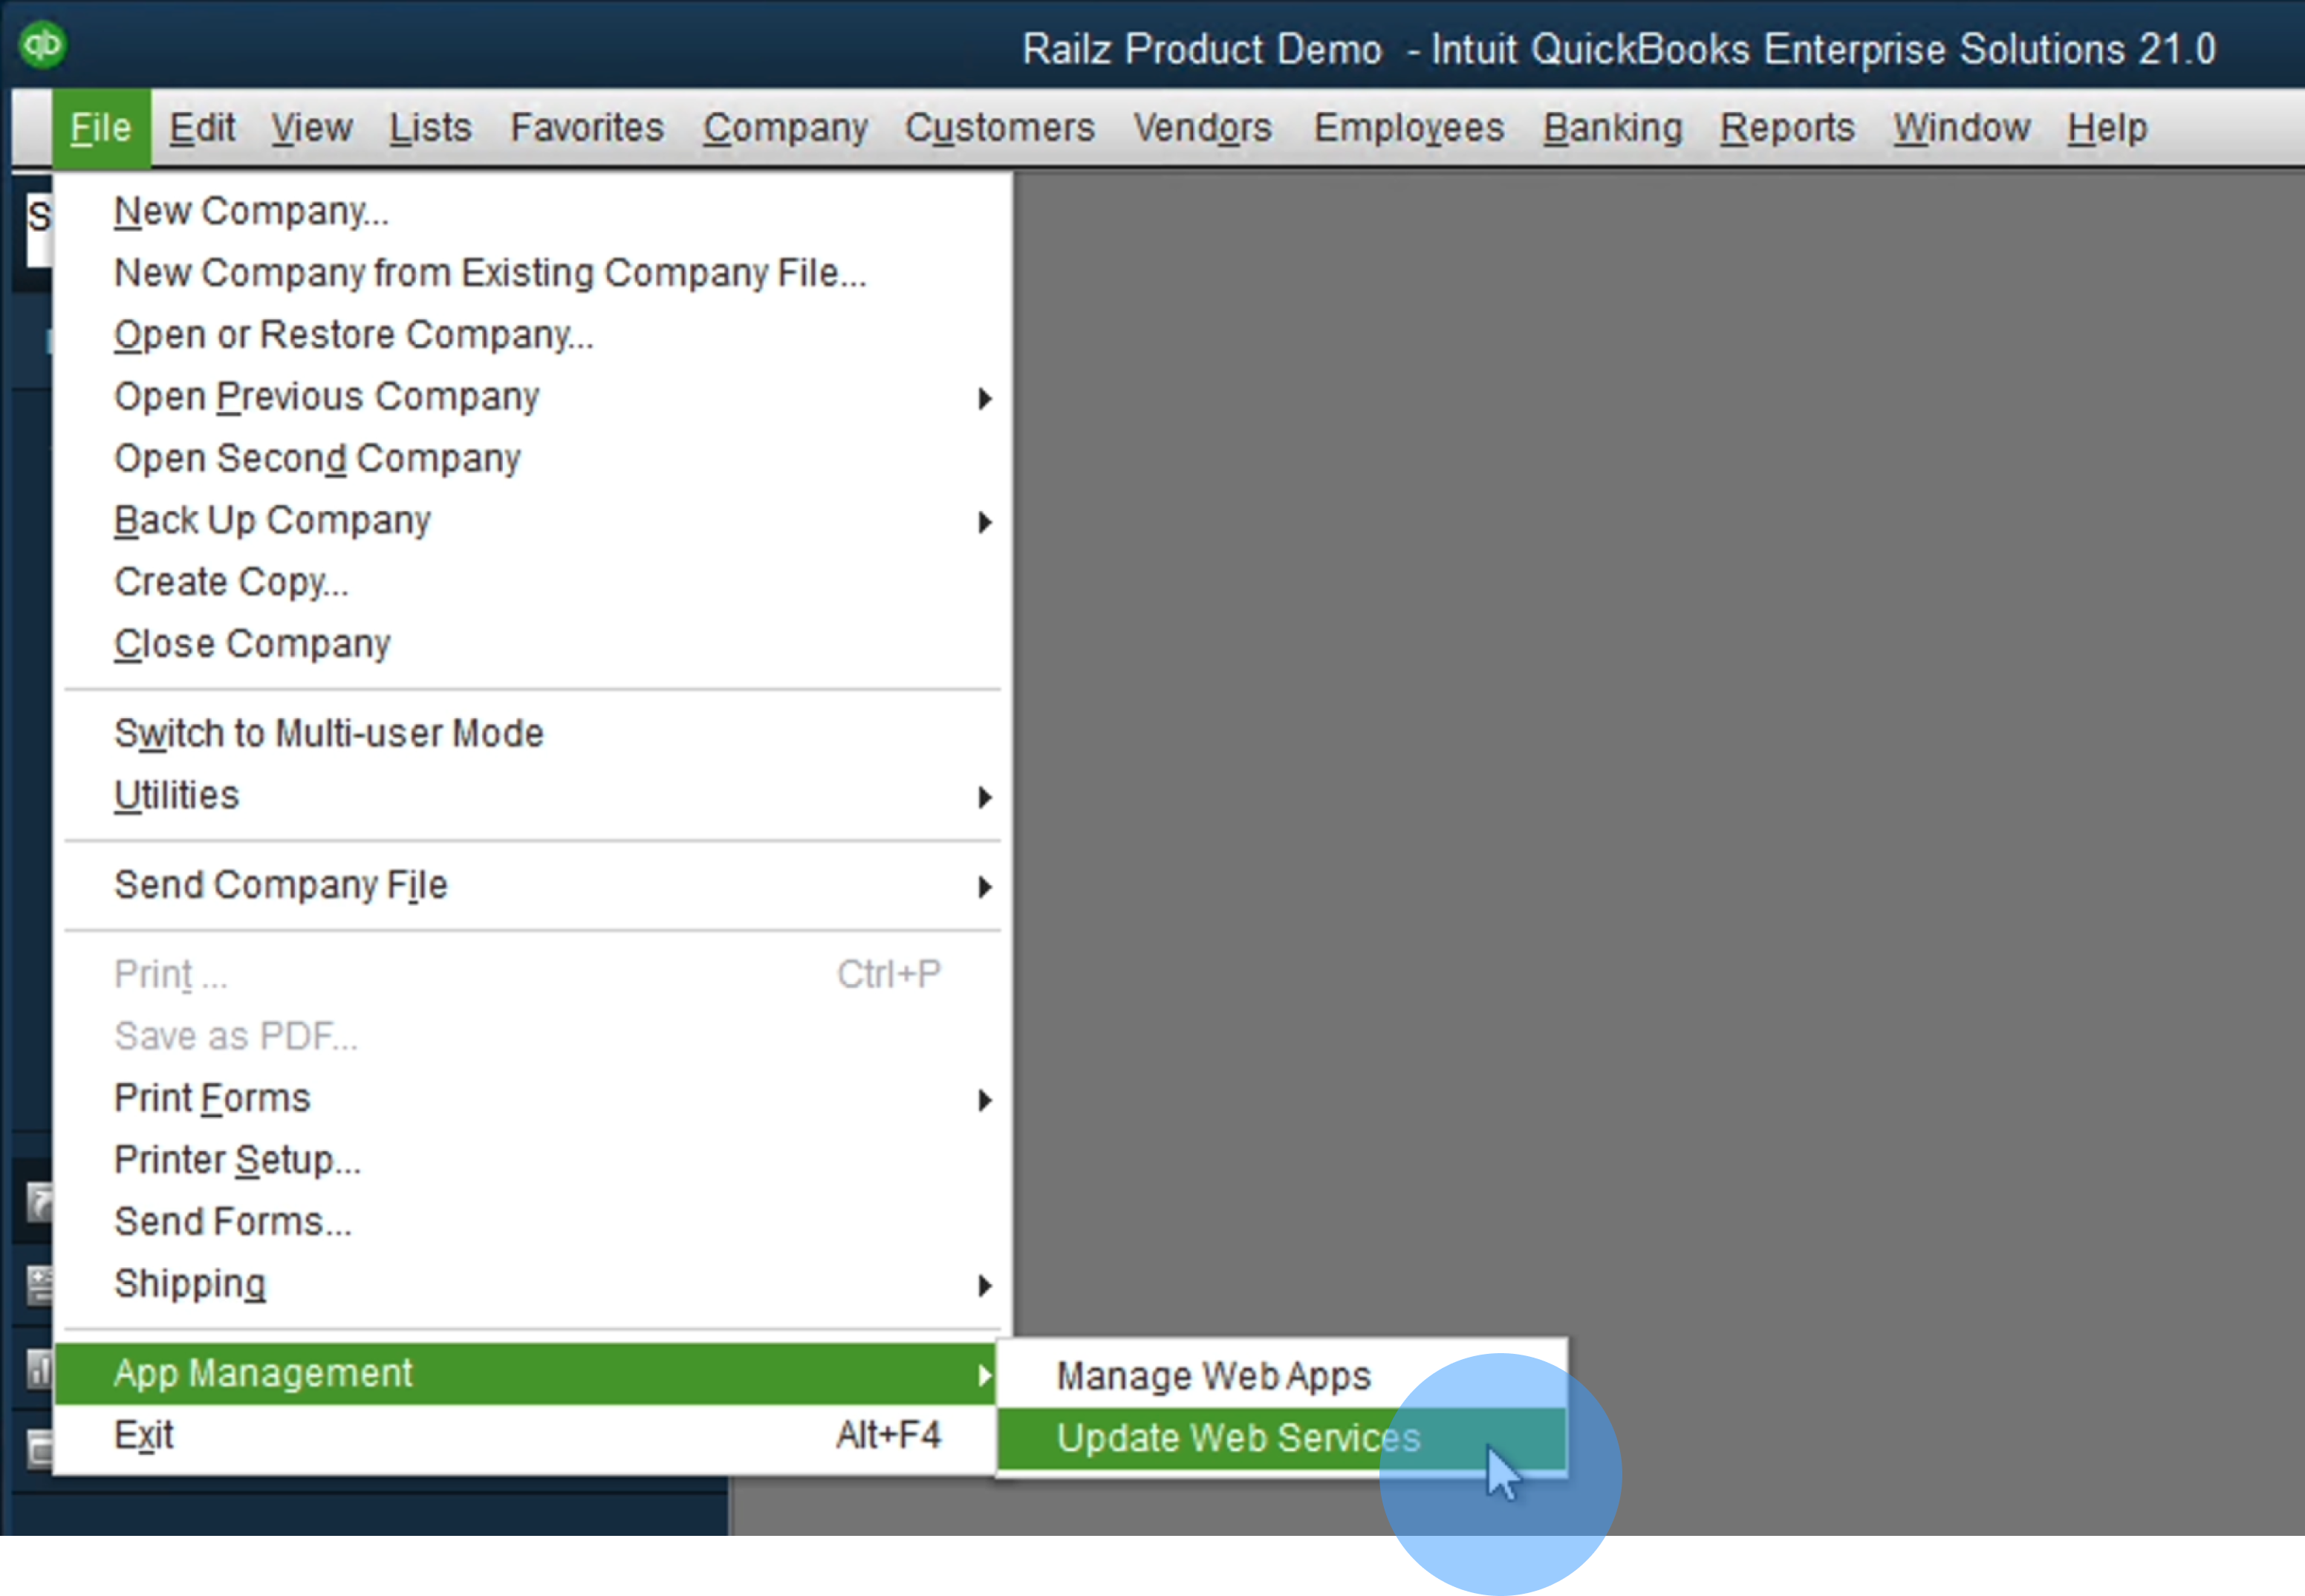
Add a new application in QuickBooks Desktop. Click to Expand.
- In the QuickBooks Web Connector, a business should click Add an Application and choose the previously downloaded ADaaS .qwc file from their windows file viewer.
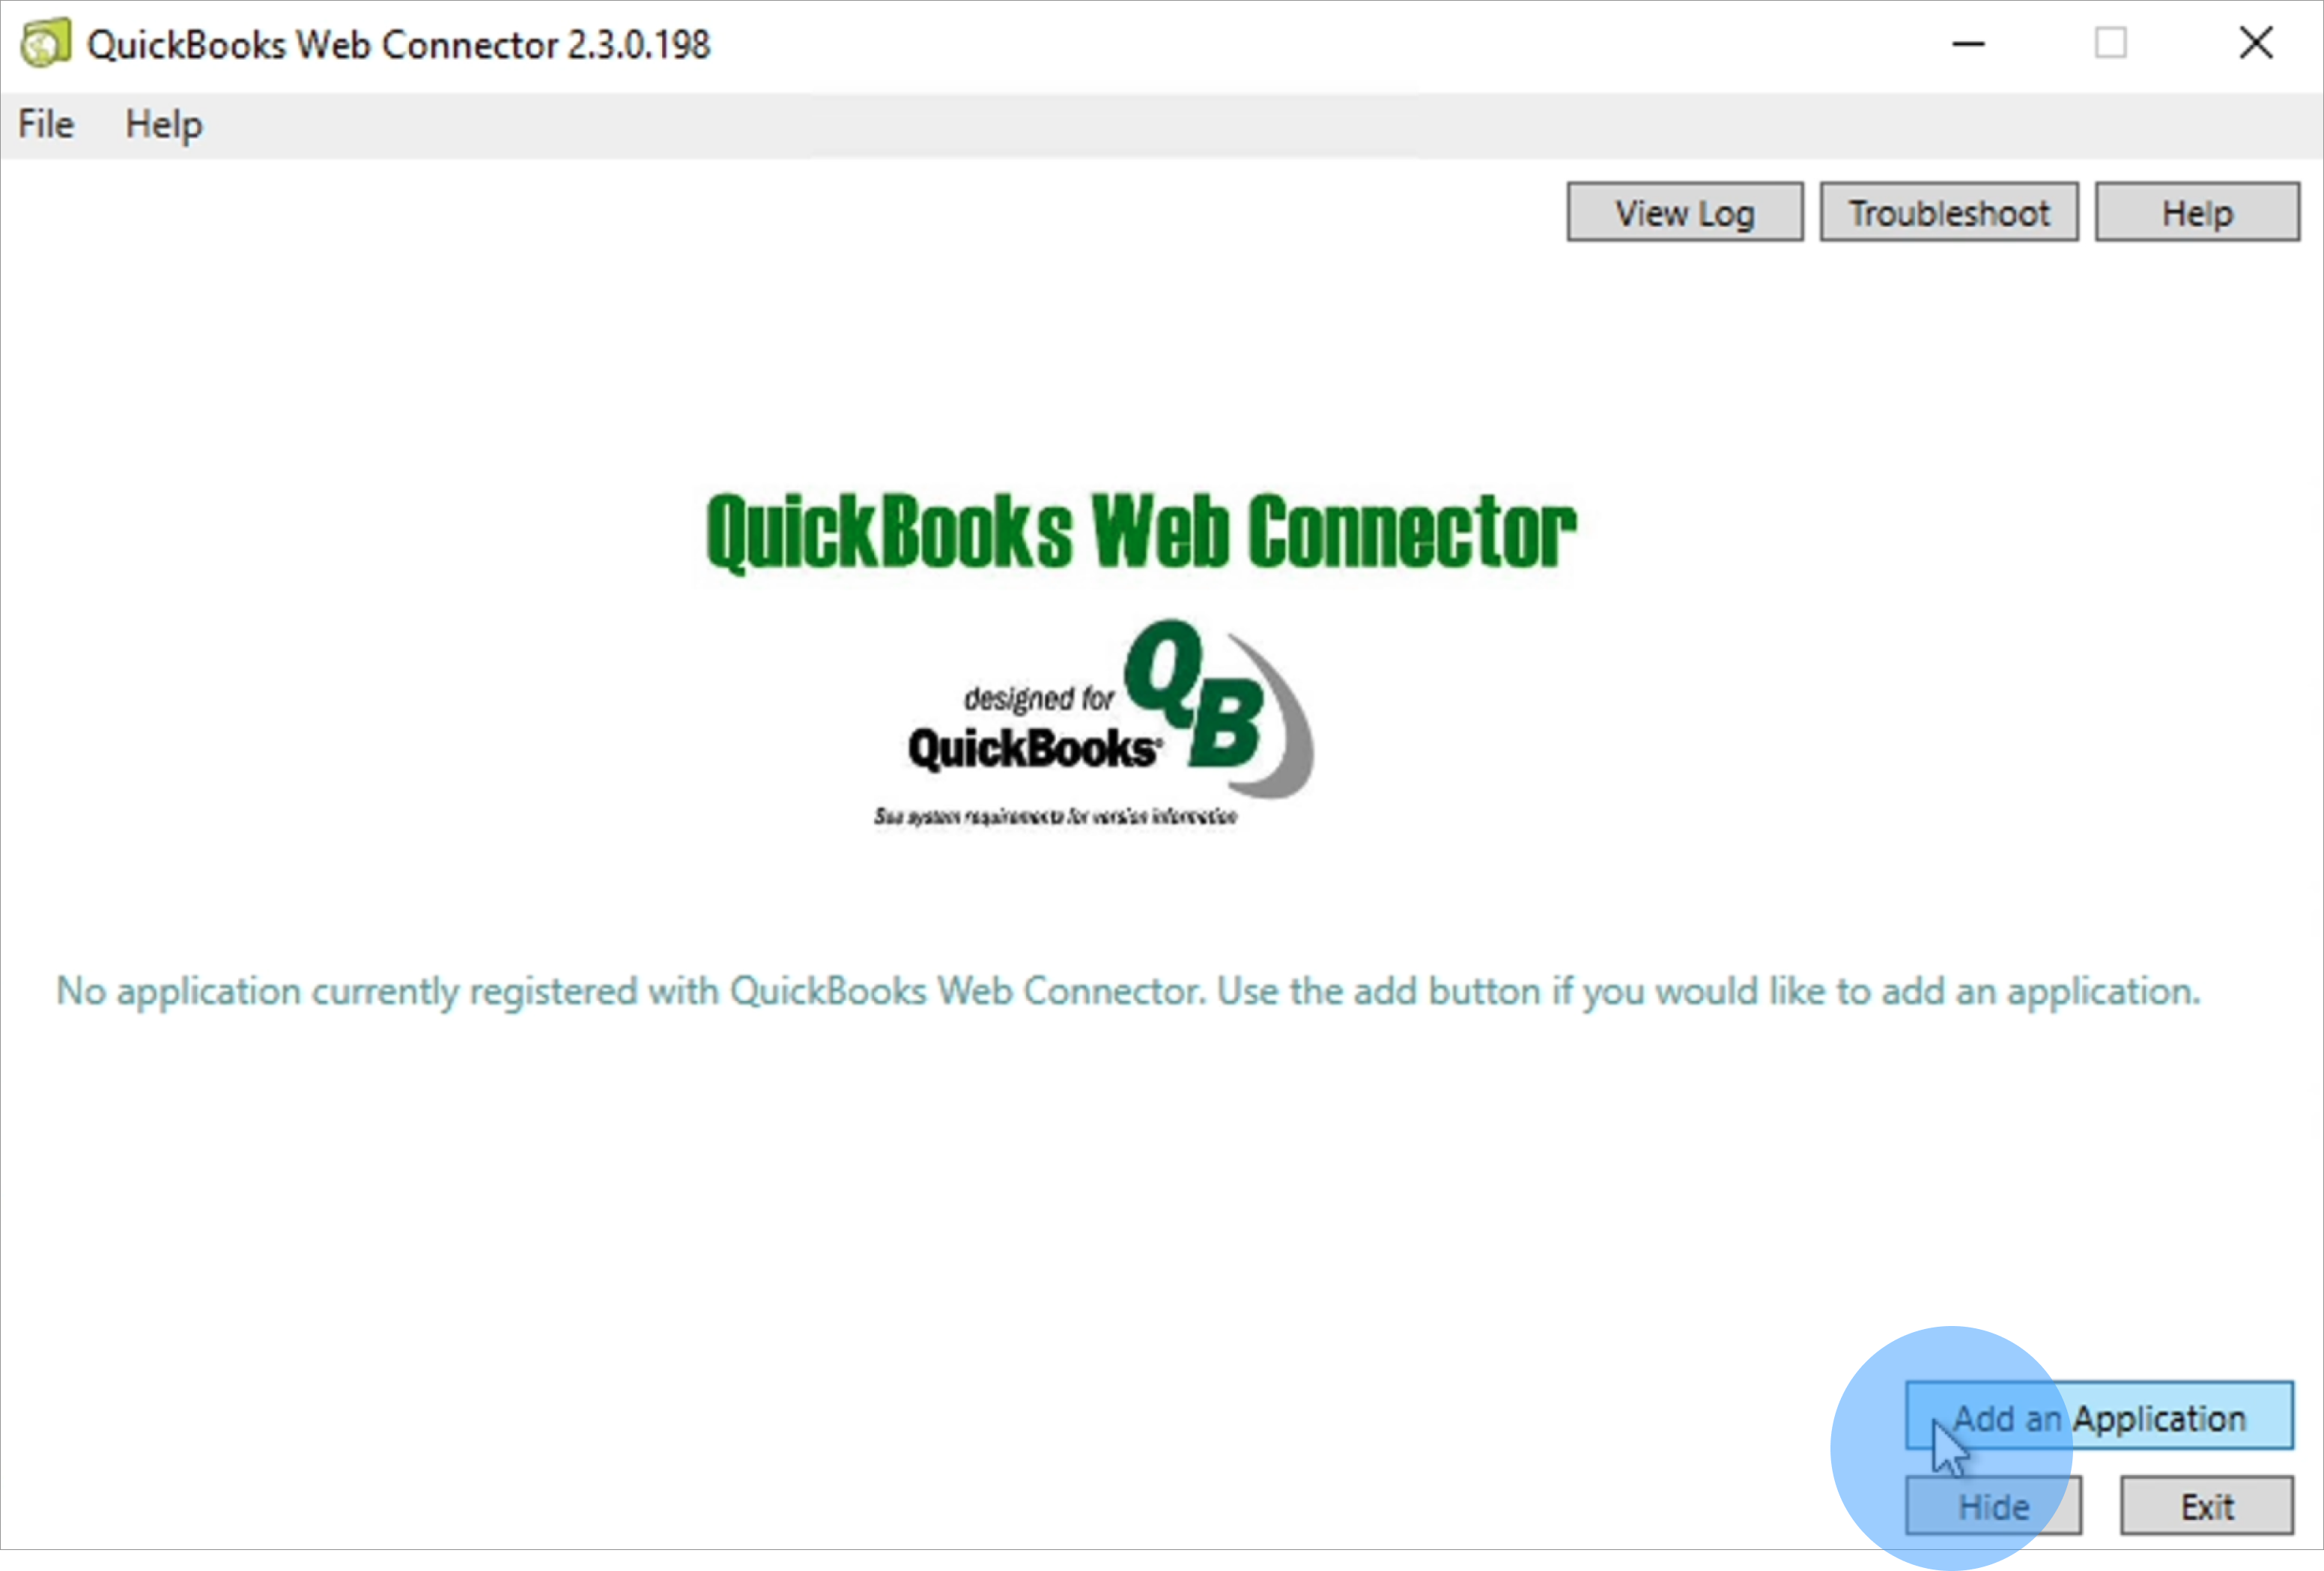
QuickBooks Desktop configure connector. Click to Expand.
- In the QuickBooks Web Connector, the business should then select the option to allow access even if QuickBooks is not running.
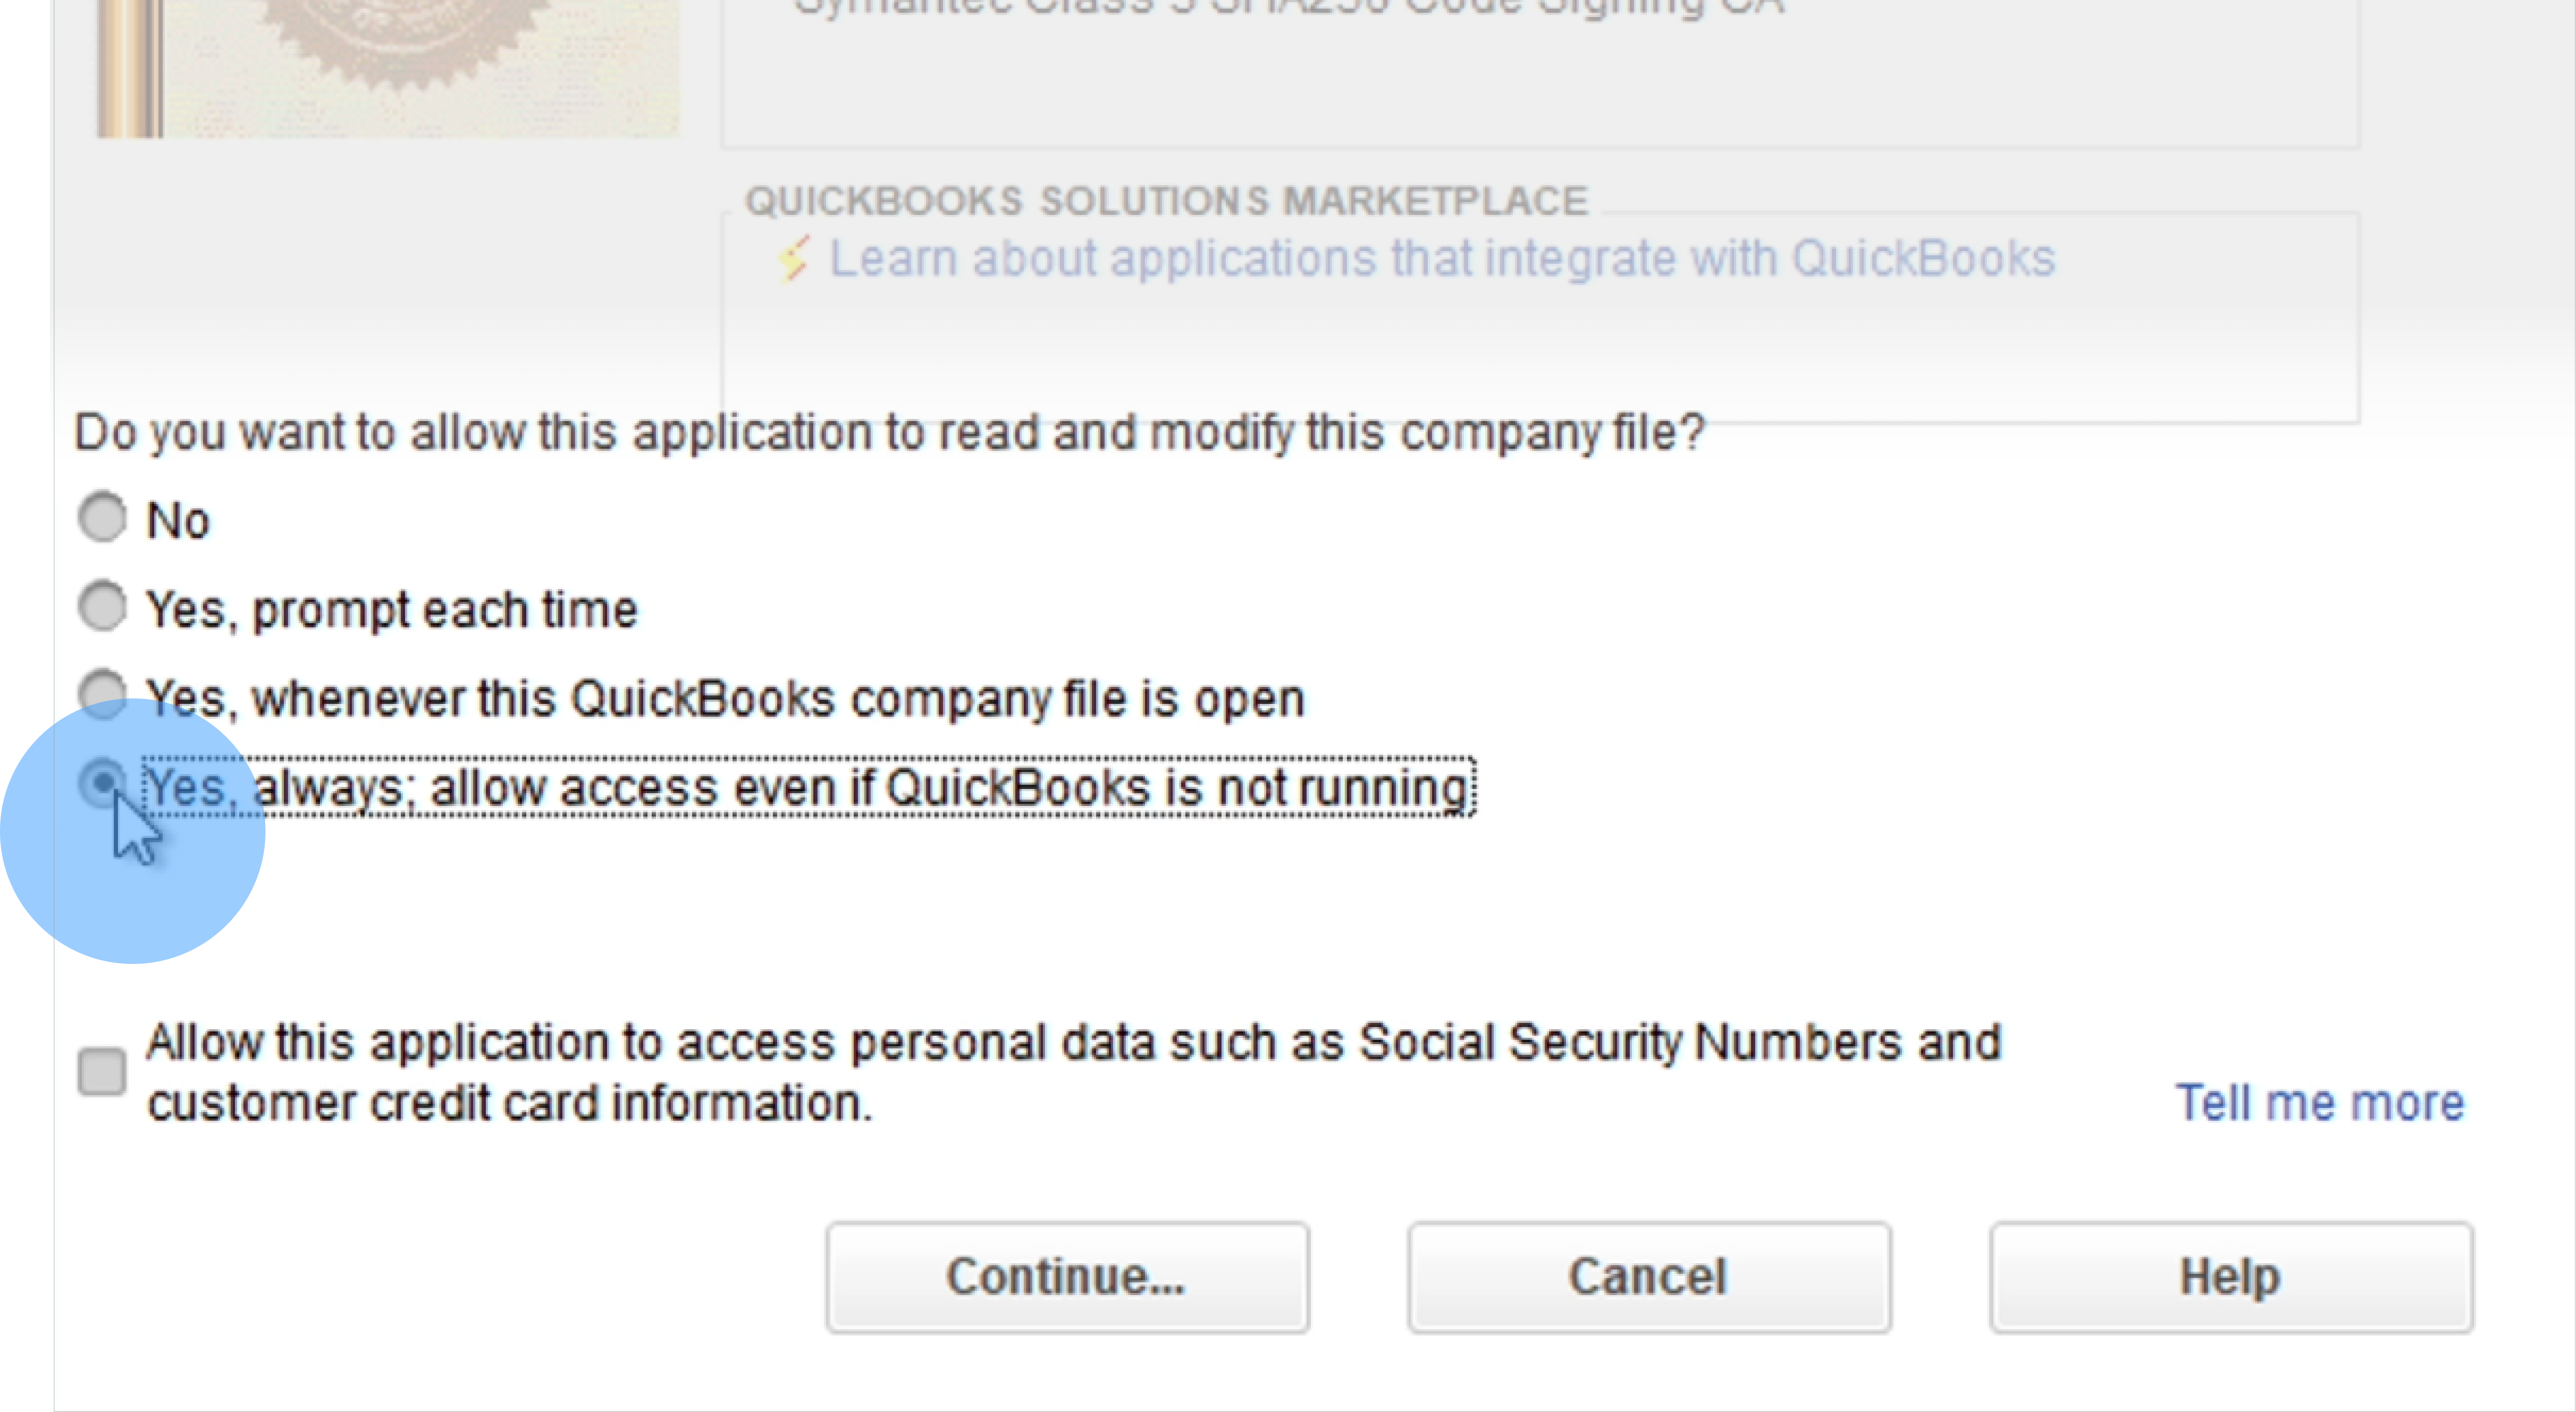
QuickBooks Desktop confirm the authorization prompt. Click to Expand.
Do not allow access to personal data.
- In the QuickBooks Web Connector, the business should then select the checkbox and enter the password provided in step 5 of Connect when prompted.
Backup Password
Businesses should save this unique password before proceeding.

QuickBooks Desktop password prompt page. Click to Expand.
- After being prompted for the password, a business should click Update Selected to initiate data retrieval.
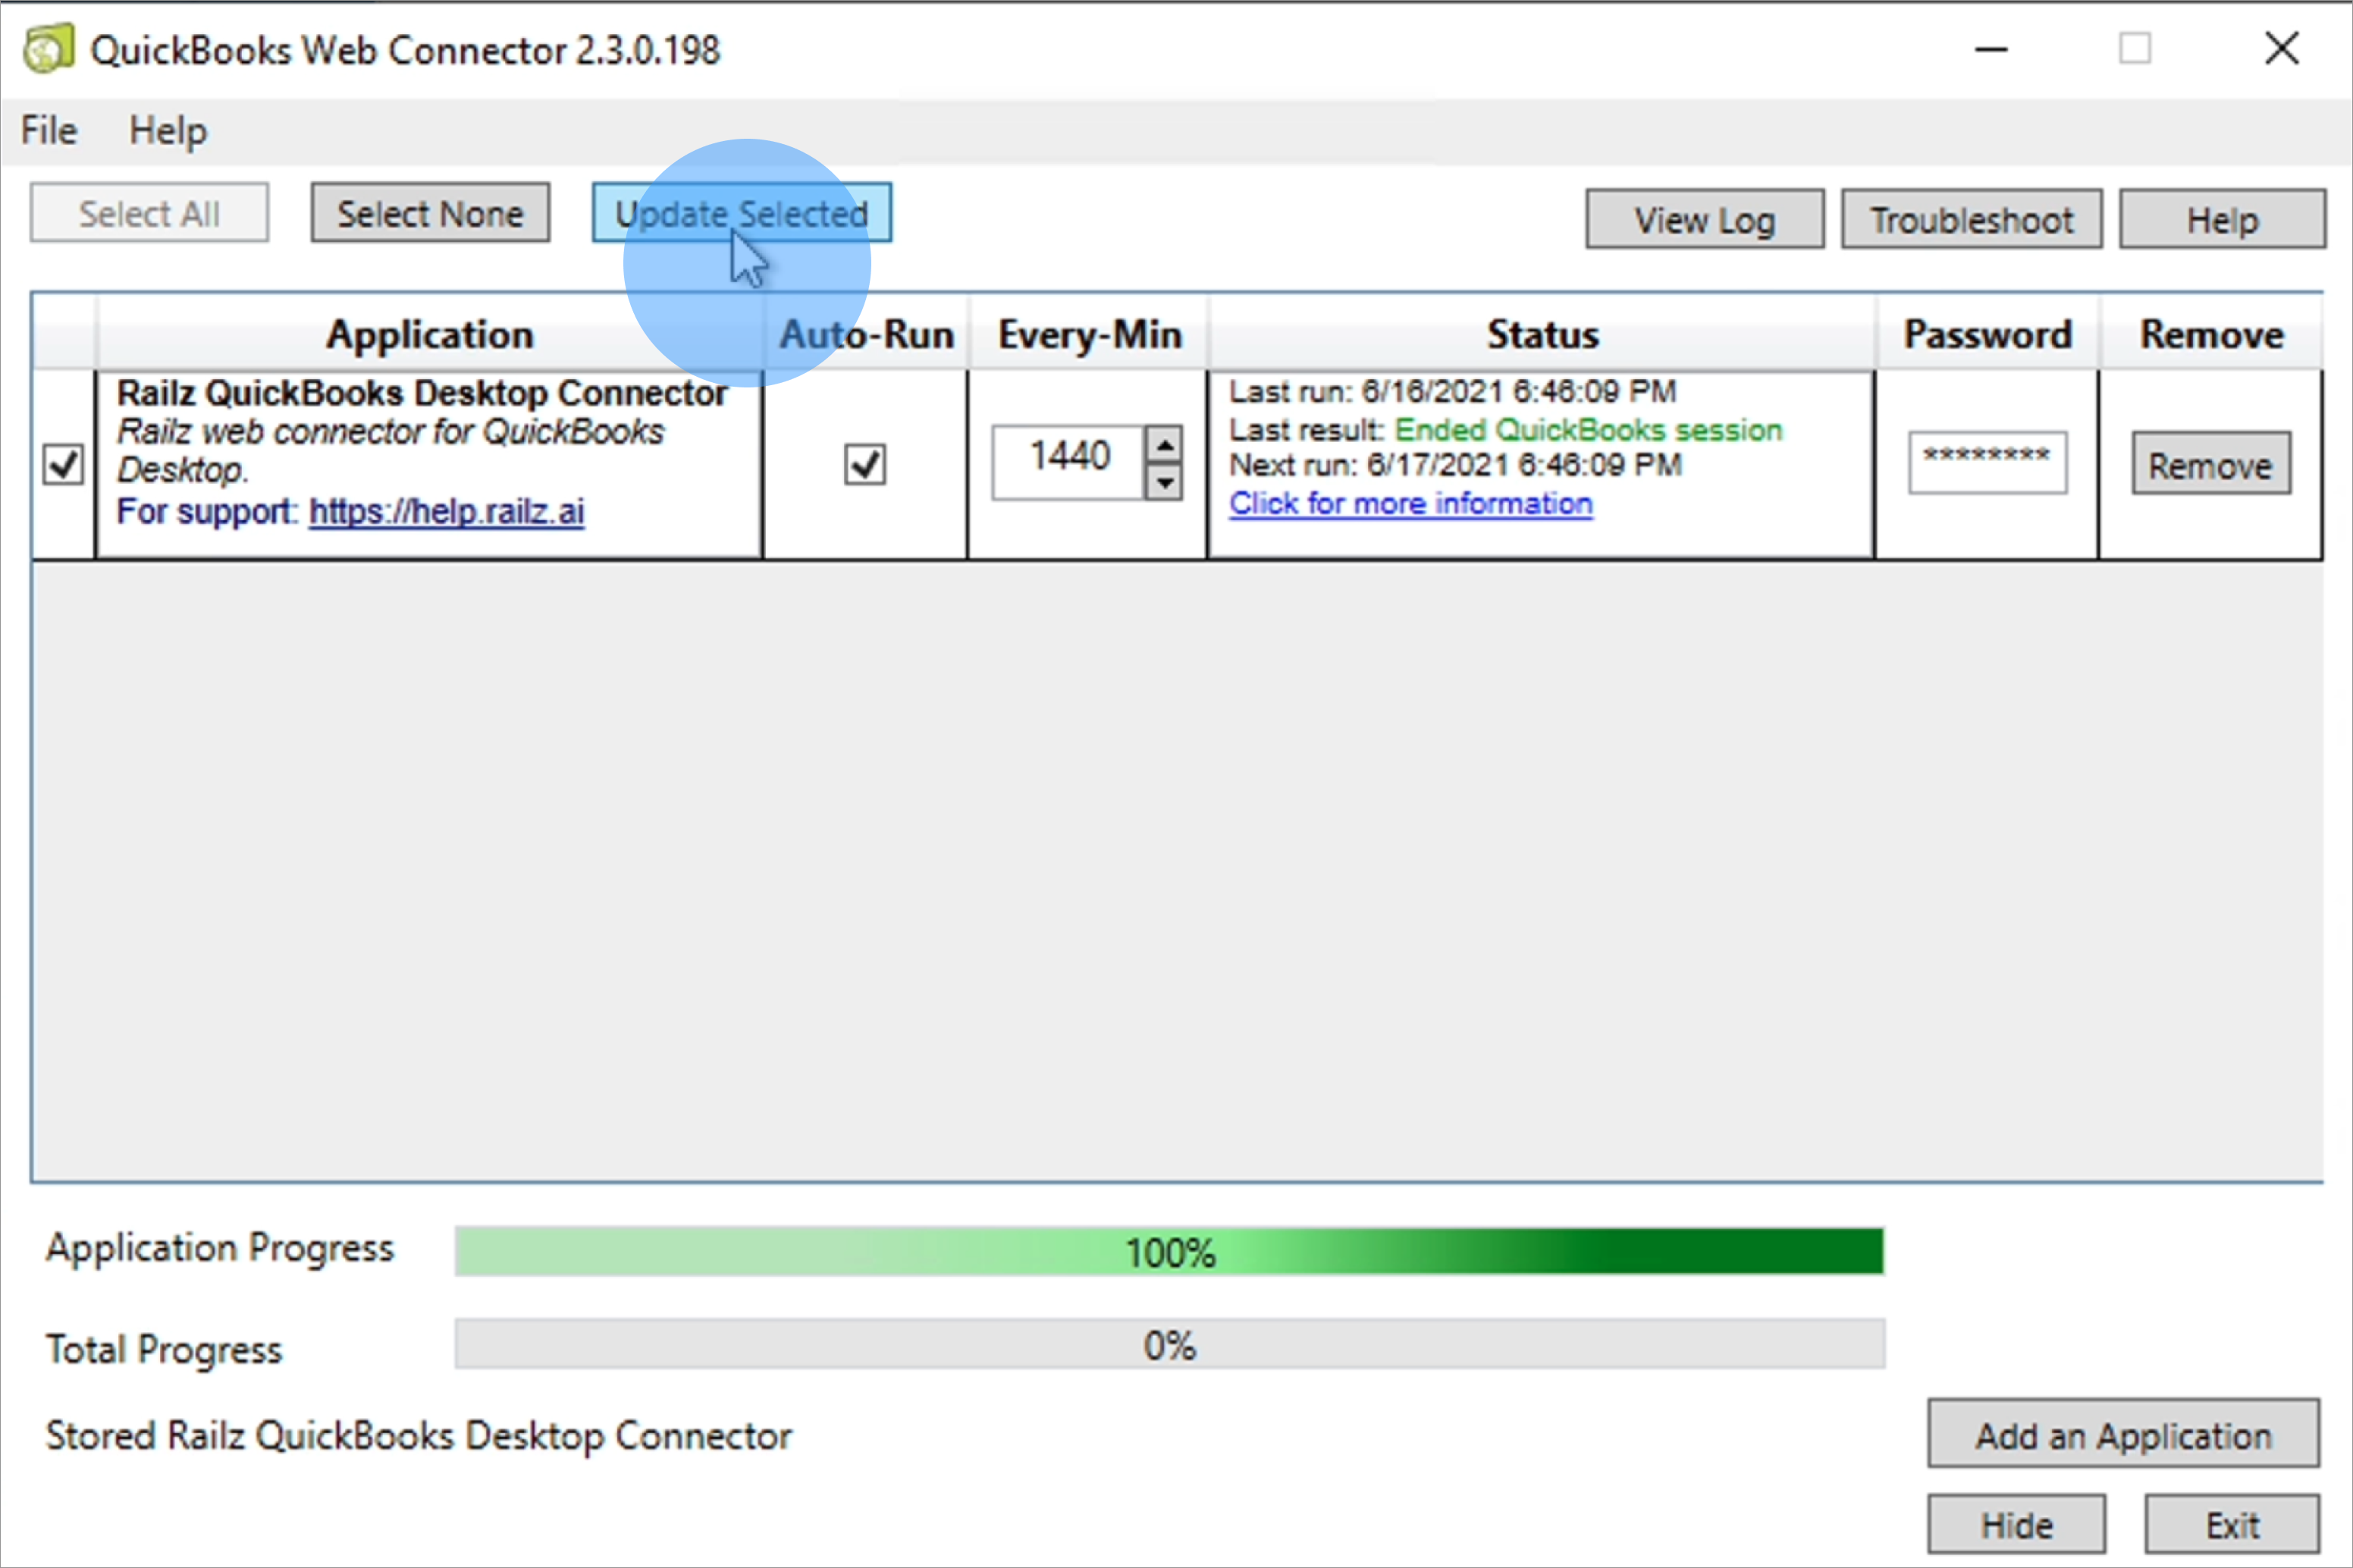
QuickBooks Desktop update web connector settings page. Click to Expand.
Businesses do not need to wait for the sync to complete before clicking next on the last step (Step 6) of Connect.
Updated over 1 year ago