Create a Connection
Use Connect to connect to your business users' financial data with the Accounting Data as a Service™ API
Connect is the client-side component that your business users will interact with in order to connect their accounts to Accounting Data as a Service™ and authorize you to access their financial data via the API. In this step, you will be:
- Adding a business.
- Initializing Connect.
- Creating a business connection in Sandbox.
- Synchronizing business financial data.
Adding a Business
- Businesses in Accounting Data as a Service™ are your customers. You can create new businesses using the POST /businesses endpoint. For testing purposes, you can use the sample request below and paste it into the request body.
{
  "businessName": "Test Business"
}
- Upon successful execution of the API, you will get a response code of
200and the response body will contain details of the new business. Copy thebusinessName. You will need it to complete the next steps.
{
    "businessUUID": "BIZ-67679345-ab8e-4880-b22a-f6ac59183d24",
    "businessName": "Test Business",
    "status": "new",
    "createdAt": "2021-10-11T05:50:10.091Z"
}
Initializing Connect
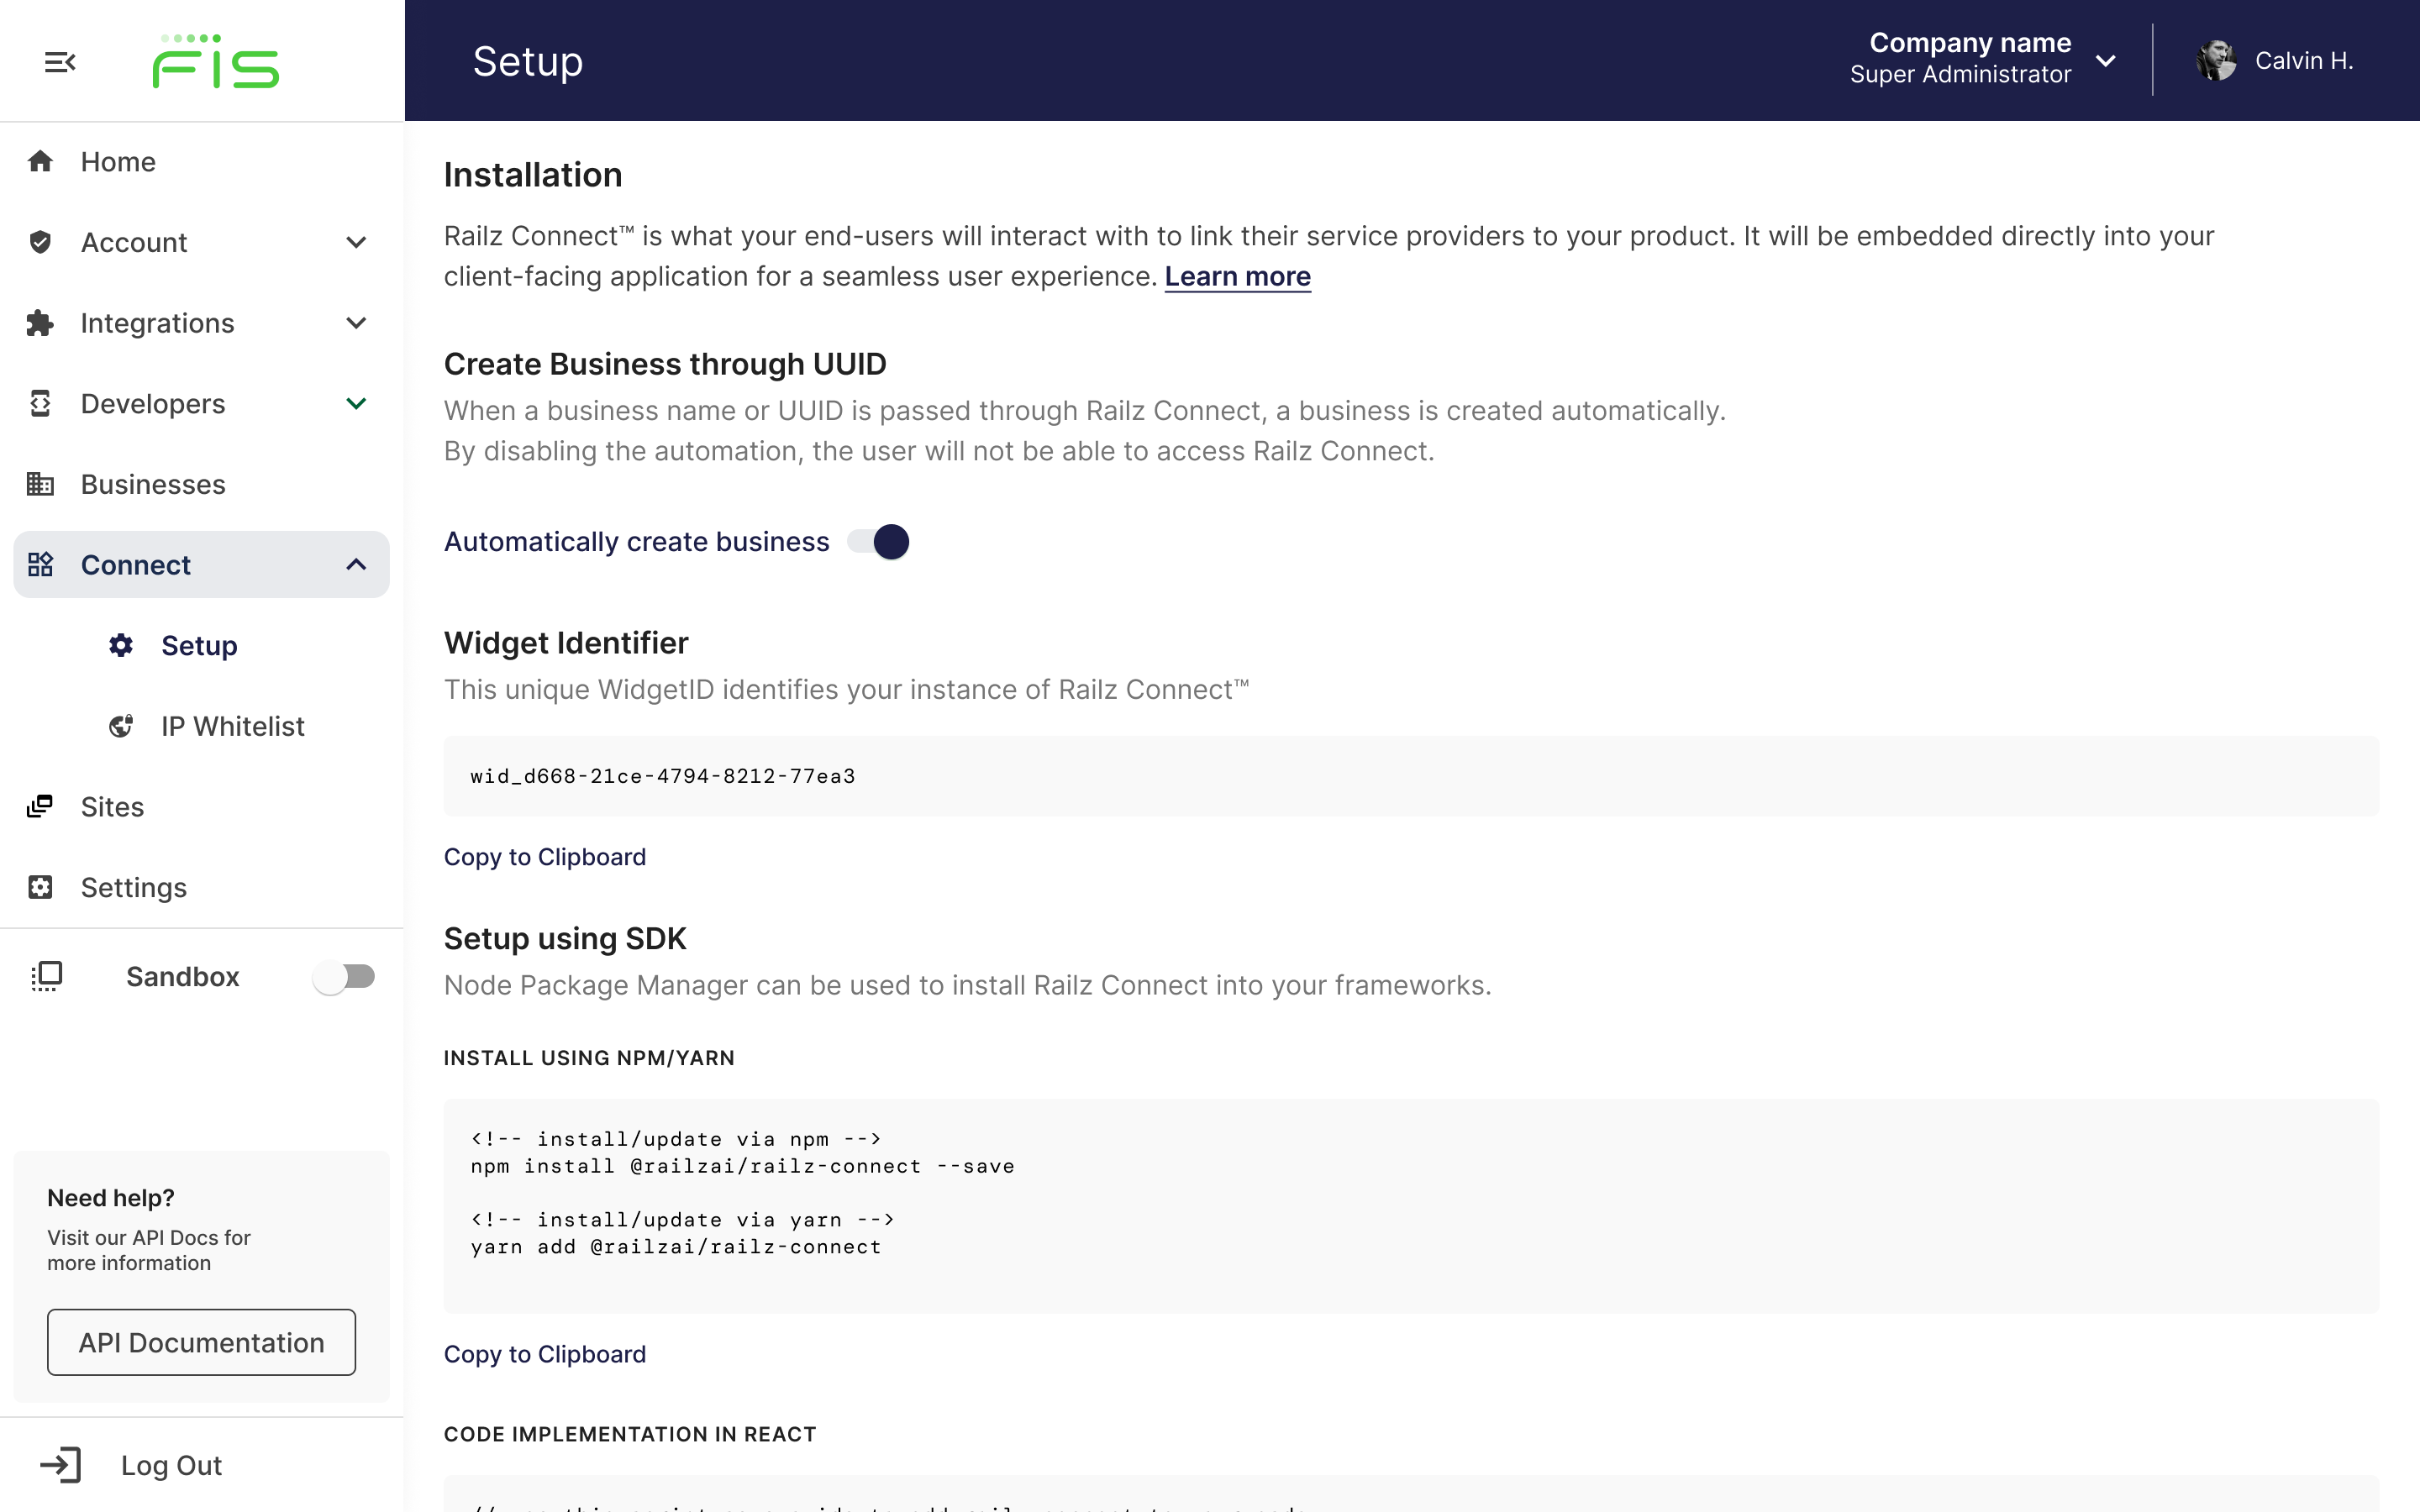
- Once logged into the Dashboard, go to Connect in the left sidebar navigation menu to get your code snippet or setup using our SDK. For this example, we will use the code snippet. Copy the snippet and add it to your application.

Connect setup page in the Dashboard. Click to Expand.
- To the snippet copied above, add the
businessNameparameter with the business name you created above as a value. Once added, your code snippet should look like this:
Customizing Connect
Refer to the customize Connect section for more information.
<!-- Insert this div where you want Connect to be initialized -->
<div id="railz-connect"></div>


<!-- Start of Connect script -->
<script src="https://cdn.jsdelivr.net/npm/@railzai/railz-connect@latest/dist/railz-connect.js"></script>
<script>
  const widget = new RailzConnect();
  widget.mount({
    parentElement: document.getElementById('railz-connect'),
    widgetId: 'YOUR_WIDGET_ID',
    businessName: 'Test Business'
    // Add additional Connect configuration parameters here
  });
</script>
<!-- End of Connect script -->
Creating a New Business through Connect
You can skip adding a business via the API if you want to create a business directly through Connect by providing a
businessNameparameter or letting Accounting Data as a Service™ generate a unique business name. To create a better user flow, we recommend using the POST /businesses endpoint to create anewbusiness, then using it as a value for thebusinessNameparameter.
Create a business connection in Sandbox
Prerequisite
You should have your Accounting Data as a Service™ Sandbox integrations enabled before proceeding with this step.
With Connect installed and a new business created, you can now connect it to a service provider on Sandbox. The Sandbox contains dummy accounting data generated especially for the purpose of your testing. While we have tried to make this data as varied as possible, please bear in mind it is mostly generated by our team and we cannot guarantee its completeness or accuracy.
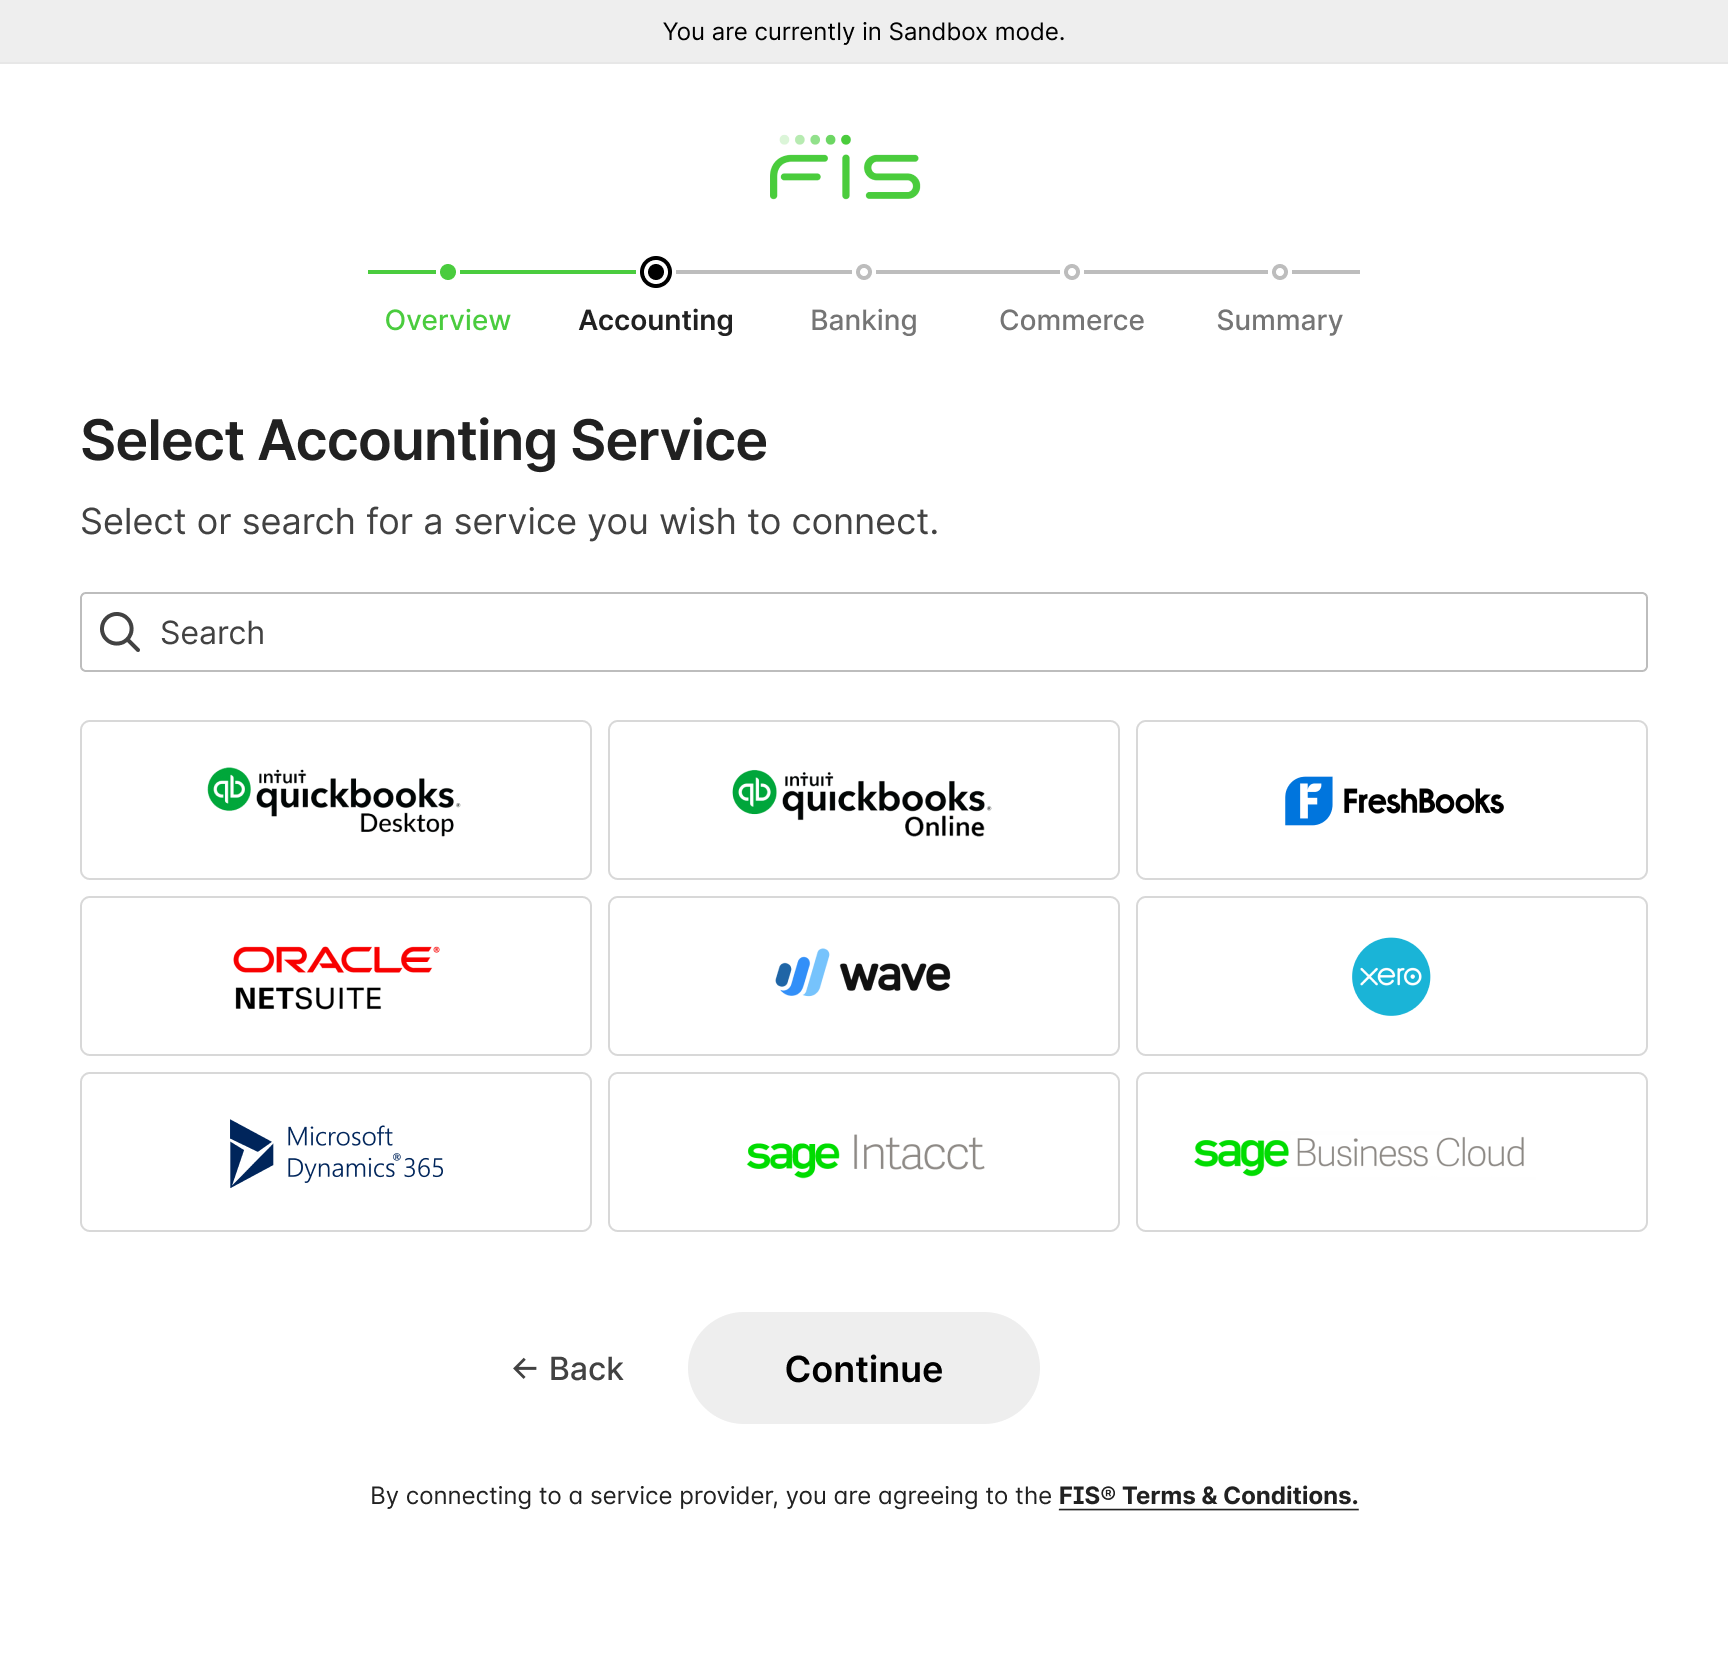
Open the URL of your application that contains the Connect code snippet. This is the URL your business customers will access when your application is live. You will be prompted to connect to the service provider and create a new connection.

Connect in Sandbox mode. Click to Expand.
Once the business authorizes the connection, its status under GET /businesses changes to active.
{
  "businessName": "Test Business",
  "status": "active",
  "createdAt": "2021-09-21T19:46:29Z",
  "updatedAt": "2021-09-21T19:47:12Z",
  "connections":
  [
    {
      "connectionId": "CON-be7493d9-392d-403c-a604-d79de0eb78d9",
      "status": "active",
      "firstRecordDate": "2021-07-04T00:00:00.000Z",
      "serviceName": "quickbooks",
      "createdAt": "2021-09-21T19:46:32Z",
      "updatedAt": "2021-10-11T04:51:03Z"
    }
  ]
}
Synchronizing business financial data
Before you can see the data of the connected business in the Dashboard or API, they need to be synchronized. When your business customer authorizes connection to their business data, Accounting Data as a Service™automatically retrieves all the supported data types. Please see synchronizing data before you proceed to the next step.
Updated over 1 year ago